Table of Contents
Advertisement
Quick Links
Grid-connected inverter
1.1K – 3K TL
User Manual
V2.1 (07-06-2019)
Zucchetti Centro Sistemi S.p.A. - Green Innovation Division
Via Lungarno, 248 - 52028 Terranuova Bracciolini - Arezzo, Italy
tel. +39 055 91971 - fax. +39 055 9197515
innovation@zcscompany.com - zcs@pec.it – www.zcsazzurro.com
Reg. Pile IT12110P00002965 - Capitale Sociale € 100.000,00 I.V.
Reg. Impr. AR n.03225010481 - REA AR - 94189
Azienda Certificata ISO 9001 - Certificato n. 9151 - CNS0 - IT-17778
Advertisement
Table of Contents

Related Manuals for ZUCCHETTI 1.1K-3K TL


Summary of Contents for ZUCCHETTI 1.1K-3K TL
- Page 1 1.1K – 3K TL User Manual V2.1 (07-06-2019) Zucchetti Centro Sistemi S.p.A. - Green Innovation Division Via Lungarno, 248 - 52028 Terranuova Bracciolini - Arezzo, Italy tel. +39 055 91971 - fax. +39 055 9197515 innovation@zcscompany.com - zcs@pec.it – www.zcsazzurro.com Reg.
-
Page 2: Table Of Contents
5.2. Starting the inverter………………………………………………………………………………………………………………….….36 6. Operating interface…………………………………………………………………………………………………………………………….37 6.1. Operating interface and display….………………………………………………………………………….…………..………….37 6.2. Main interface………………………………………………………………..…………………..…………………………………..…….38 6.3. Main menu……….………………………………………………………………………………………………….……………………..40 2 / 61 Manual of 07/06/2019 Rev. 2.1 “User Manual for 1.1K-3K TL” Identification: MD-AL-GI-00 Rev. 4.0 of 31.01.18 - Application: GID... - Page 3 8. Uninstalling…………………………………………………………………………………….……………...………………………………….59 8.1. Steps for uninstalling the inverter…..…………………………………………………………………..…………………………59 8.2. Packaging…………………………………………………………………………………………………………………………………….59 8.3. Storage…..………………………………………………………………………………………………………………….………………...59 8.4. Disposal…….………………………………………………………………………..…………………………………….…………………59 9. Technical specifications………………………………………………………………………………………………………..…………….60 10. Warranty.…………….………………………………………………………………………………………………………………..……………62 3 / 61 Manual of 07/06/2019 Rev. 2.1 “User Manual for 1.1K-3K TL” Identification: MD-AL-GI-00 Rev. 4.0 of 31.01.18 - Application: GID...
- Page 4 Copyright statement The copyright of this manual belongs to Zucchetti Centro Sistemi S.p.A. No part of this manual may be copied (including the software), reproduced or distributed in any form or by any means without the permission of Zucchetti Centro Sistemi S.p.A.
- Page 5 Attention Note: provides important tips on the correct and optimal operation of the product. Note 5 / 61 Manual of 07/06/2019 Rev. 2.1 “User Manual for 1.1K-3K TL” Identification: MD-AL-GI-00 Rev. 4.0 of 31.01.18 - Application: GID...
-
Page 6: Preliminary Safety Instructions
For safety reasons, this inverter can only be installed by a qualified electrician with the necessary training and/or skills and knowledge. Zucchetti Centro Sistemi S.p.A. declines all responsibility for damage to property or personal injury caused by incorrect use or the device. - Page 7 If necessary, request assistance from an installer of photovoltaic systems or from Zucchetti Centro Sistemi SpA. Transport of the equipment, especially by road, must be carried out with vehicles suitable to protect the components (in particular, electronic components) against violent knocks, humidity, vibrations, etc.
- Page 8 Do not disassemble the internal components of the inverter without permission. This will void the warranty. Zucchetti Centro Sistemi S.p.A. shall not be responsible for any damage or loss caused by these actions. Attention 8 / 61 Manual of 07/06/2019 Rev.
-
Page 9: Symbols And Icons
Be careful of high voltage Be careful of high temperatures Complies with the European Standards (CE) Grounding point 9 / 61 Manual of 07/06/2019 Rev. 2.1 “User Manual for 1.1K-3K TL” Identification: MD-AL-GI-00 Rev. 4.0 of 31.01.18 - Application: GID... -
Page 10: Product Features
2. Product features General information in this chapter Product dimensions The field of use and overall dimensions of the 1.1K-3K TL inverters are indicated in this section. Function description It describes how the 1.1K-3K TL inverters and their internal operating modules work. - Page 11 Figure 2 – Grid-connected photovoltaic system The 1.1K-3K TL inverters can only be used with photovoltaic modules that do not require one of the poles to be grounded. The input current and voltage of the PV strings must not exceed the limits specified in the technical specifications.
-
Page 12: Description Of Functions
RS485 interface or via Wi-Fi. E. Software update A microSD card is used to update the firmware. 12 / 61 Manual of 07/06/2019 Rev. 2.1 “User Manual for 1.1K-3K TL” Identification: MD-AL-GI-00 Rev. 4.0 of 31.01.18 - Application: GID... -
Page 13: Efficiency Curve
Wiring diagram Figure 5 – Block diagram of the 1.1K-3K TL inverter 2.3. Efficiency curve Efficiency curve for a Azzurro ZCS 3000 TL model Figure 1 – Efficiency curve for an Azzurro ZCS 3000 TL inverter 13 / 61 Manual of 07/06/2019 Rev. -
Page 14: Installation
DO NOT install 1.1K-3K TL inverters near flammable materials. DO NOT install 1.1K-3K TL inverters in an area where flammable or explosive materials are stored. Danger The housing and heat sink may become very hot while the inverter is running, DO NOT install the inverter in places where they may be touched inadvertently. - Page 15 7 expansion plugs (2 5 self-tapping screws spares) 1 user manual 1 warranty 1 certificate 1 AC output connector 15 / 61 Manual of 07/06/2019 Rev. 2.1 “User Manual for 1.1K-3K TL” Identification: MD-AL-GI-00 Rev. 4.0 of 31.01.18 - Application: GID...
-
Page 16: Installation Tools
To remove the DC connectors MC4 removal tool from the inverter Diagonal pliers To cut and tighten the cable ends 16 / 61 Manual of 07/06/2019 Rev. 2.1 “User Manual for 1.1K-3K TL” Identification: MD-AL-GI-00 Rev. 4.0 of 31.01.18 - Application: GID... - Page 17 To make sure the bracket is level ESD gloves Protective clothing Safety goggles Protective clothing Protection mask Protective clothing 17 / 61 Manual of 07/06/2019 Rev. 2.1 “User Manual for 1.1K-3K TL” Identification: MD-AL-GI-00 Rev. 4.0 of 31.01.18 - Application: GID...
-
Page 18: Installation Position
Follow the requirements below to determine the installation position. Figure 8 – Requirements for installing a single inverter 18 / 61 Manual of 07/06/2019 Rev. 2.1 “User Manual for 1.1K-3K TL” Identification: MD-AL-GI-00 Rev. 4.0 of 31.01.18 - Application: GID... -
Page 19: Moving The Zcs 1.1-3K Tl Inverter
10 and 11. Figure 10 – Removing the polystyrene protections 19 / 61 Manual of 07/06/2019 Rev. 2.1 “User Manual for 1.1K-3K TL” Identification: MD-AL-GI-00 Rev. 4.0 of 31.01.18 - Application: GID... -
Page 20: Installing The Zcs 1.1-3K Tl Inverter
6) (OPTIONAL) Depending on the customer’s requirements, the inverter can be locked to the mounting bracket with a safety lock (not supplied with the kit). 20 / 61 Manual of 07/06/2019 Rev. 2.1 “User Manual for 1.1K-3K TL” Identification: MD-AL-GI-00 Rev. 4.0 of 31.01.18 - Application: GID... -
Page 21: Electrical Connections
Figure 12 - Steps for installing the inverter on the wall 4. Electrical connections General information in this chapter This chapter describes the electrical connections of the 1.1K-3K TL inverter. Carefully read this section before connecting the cables. NOTE: Before making any electrical connections, ensure that the DC circuit breaker is switched off. Please note that the capacitors in the inverter may remain electrically charged after the DC circuit breaker has been switched off. -
Page 22: Electrical Connections
Figure 13 – Steps for connecting the cables 4.2. Ground cable connections (PGND) Connect the 1.1K-3K TL inverter to the ground electrode using ground protection cables (PGND). The inverter does not have a transformer, therefore the positive pole and negative pole of the photovoltaic string does NOT need to be grounded. - Page 23 3 Nm using an Allen key. Figure 16 – Connecting the ground terminal 23 / 61 Manual of 07/06/2019 Rev. 2.1 “User Manual for 1.1K-3K TL” Identification: MD-AL-GI-00 Rev. 4.0 of 31.01.18 - Application: GID...
-
Page 24: Connecting The Dc Input Power Cable
4.3. Connecting the DC input power cables Connect the 1.1K-3K TL inverter to the photovoltaic strings using DC input power cables. Note Depending on the type of inverter, select the appropriate inverter accessories (cables, fuse holder, fuse, switch, etc). The inverter associated with the PV array must offer excellent performance and reliable quality. - Page 25 Figure 18 - Connecting the DC input power cables (1) 25 / 61 Manual of 07/06/2019 Rev. 2.1 “User Manual for 1.1K-3K TL” Identification: MD-AL-GI-00 Rev. 4.0 of 31.01.18 - Application: GID...
- Page 26 If not, the direct current may cause an electric arc that could result in a fire Warning 26 / 61 Manual of 07/06/2019 Rev. 2.1 “User Manual for 1.1K-3K TL” Identification: MD-AL-GI-00 Rev. 4.0 of 31.01.18 - Application: GID...
-
Page 27: Connecting The Ac Output Power Cables
Figure 22 – Do not connect loads between the inverter and circuit breaker 27 / 61 Manual of 07/06/2019 Rev. 2.1 “User Manual for 1.1K-3K TL” Identification: MD-AL-GI-00 Rev. 4.0 of 31.01.18 - Application: GID... - Page 28 Figure 2 – Multi core copper wire Figure 25 – Relationship between power loss, length and cable cross-section The 1.1K-3K TL inverters are single-phase output inverters that fully comply with the local grid connection requirements and safety standards. The inverters are equipped with AC output connectors with IP66 protection suitable for photovoltaic use;...
- Page 29 Connect the neutral wire (blue) to the terminal labelled “N”, and tighten the cable with an Allen key; • 29 / 61 Manual of 07/06/2019 Rev. 2.1 “User Manual for 1.1K-3K TL” Identification: MD-AL-GI-00 Rev. 4.0 of 31.01.18 - Application: GID...
-
Page 30: Connecting The Communication Cables
Table 3 – Recommended specifications for communication cables 1) Remove the central waterproof cover of the communication terminal block using a star screwdriver; 30 / 61 Manual of 07/06/2019 Rev. 2.1 “User Manual for 1.1K-3K TL” Identification: MD-AL-GI-00 Rev. 4.0 of 31.01.18 - Application: GID... - Page 31 31 / 61 Manual of 07/06/2019 Rev. 2.1 “User Manual for 1.1K-3K TL” Identification: MD-AL-GI-00 Rev. 4.0 of 31.01.18 - Application: GID...
- Page 32 Table 4 – Description of the communication terminals and their function Figure 34 – Tightening the terminals on the cables 32 / 61 Manual of 07/06/2019 Rev. 2.1 “User Manual for 1.1K-3K TL” Identification: MD-AL-GI-00 Rev. 4.0 of 31.01.18 - Application: GID...
-
Page 33: Communication Systems
4.6. Communication systems The 1.1K-3K TL inverters are equipped with RS485 (standard) and Wi-Fi (optional) communication systems. These communication systems allow monitoring the main parameters of the inverter (energy generated, alarms, operating status) through various channels, such as the ZCS AZZURRO portal, ZCS AZZURRO app or... - Page 34 This allows the inverter data to be sent to the ZCS server and the inverter to be monitored remotely. 34 / 61 Manual of 07/06/2019 Rev. 2.1 “User Manual for 1.1K-3K TL” Identification: MD-AL-GI-00 Rev. 4.0 of 31.01.18 - Application: GID...
- Page 35 For more information and instructions on how to configure the communication system, refer to the relevant technical notes available at www.azzurrozcs.com or contact the ZCS service centre. 35 / 61 Manual of 07/06/2019 Rev. 2.1 “User Manual for 1.1K-3K TL” Identification: MD-AL-GI-00 Rev. 4.0 of 31.01.18 - Application: GID...
-
Page 36: Commissioning The Inverter
If in doubt, consult the system engineer or a qualified electrician. Zucchetti Centro Sistemi S.p.A. shall not be held responsible for any consequences resulting from the incorrect selection of the country code. If the inverter indicates the presence of any faults, refer to chapter 7.1 of this manual or contact the Zucchetti Centro Sistemi S.p.A. -
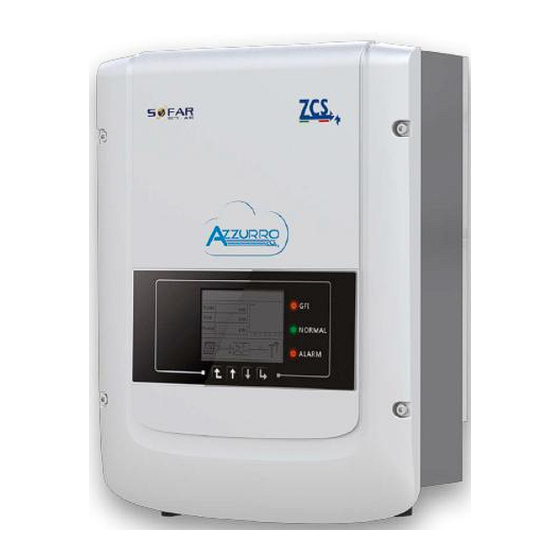
Page 37: Operating Interface
Off: normal operation GFCI warning light (RED) o Steady: indicates GFCI fault o Off: normal operation 37 / 61 Manual of 07/06/2019 Rev. 2.1 “User Manual for 1.1K-3K TL” Identification: MD-AL-GI-00 Rev. 4.0 of 31.01.18 - Application: GID... -
Page 38: Main Interface
A13 – Input voltage and current of the string A14 – Light is on when the state is normal A15 – Grid voltage 38 / 61 Manual of 07/06/2019 Rev. 2.1 “User Manual for 1.1K-3K TL” Identification: MD-AL-GI-00 Rev. 4.0 of 31.01.18 - Application: GID... - Page 39 If the control board and communication board are not connected, the interface of the LCD display appears as shown in the figure below. 39 / 61 Manual of 07/06/2019 Rev. 2.1 “User Manual for 1.1K-3K TL” Identification: MD-AL-GI-00 Rev. 4.0 of 31.01.18 - Application: GID...
-
Page 40: Main Menu
The display will show “OK” if the setting is correct and “Error” in case of an error. The date and time can be seen in the submenu “4. Time” inside the main menu. 40 / 61 Manual of 07/06/2019 Rev. 2.1 “User Manual for 1.1K-3K TL” Identification: MD-AL-GI-00 Rev. 4.0 of 31.01.18 - Application: GID... - Page 41 CEI 0-21 Areti UK-G59 Sweden 33-49 Reserved China General Europe France CEI 0-21 External Table 5 – Country Codes 41 / 61 Manual of 07/06/2019 Rev. 2.1 “User Manual for 1.1K-3K TL” Identification: MD-AL-GI-00 Rev. 4.0 of 31.01.18 - Application: GID...
- Page 42 The user can change the start parameters directly from the LCD display. The user must first copy the TXT files to the SD card. These files can be requested from Zucchetti Centro Sistemi Spa technical support. Select 11 “InitParameters” and press “OK” to enter the menu for setting the start parameters. The display will show “Enter PWD!”, press “OK”...
- Page 43 Safety Voltage The user can change the value of the protection voltage directly from the LCD display. The user must first copy the TXT files to the SD card. These files can be requested from Zucchetti Centro Sistemi Spa technical support.
- Page 44 2) Press the “OK” key to enter the “Settings” menu. 3) Press the “Down” key several times until “19. Fast Self-test” is shown on the screen. 44 / 61 Manual of 07/06/2019 Rev. 2.1 “User Manual for 1.1K-3K TL” Identification: MD-AL-GI-00 Rev. 4.0 of 31.01.18 - Application: GID...
- Page 45 5) The self-test will now start automatically; once completed, press “Down” to display the self-test results, as shown in the figure. 45 / 61 Manual of 07/06/2019 Rev. 2.1 “User Manual for 1.1K-3K TL” Identification: MD-AL-GI-00 Rev. 4.0 of 31.01.18 - Application: GID...
- Page 46 2) Press the “OK” key to enter the “Settings” menu. 3) Press the “Down” key several times until “20. Standard Self-Test” is shown on the screen. 46 / 61 Manual of 07/06/2019 Rev. 2.1 “User Manual for 1.1K-3K TL” Identification: MD-AL-GI-00 Rev. 4.0 of 31.01.18 - Application: GID...
- Page 47 5) The self-test will now start automatically; once completed, press “Down” to display the self-test results, as shown in the figure below. 47 / 61 Manual of 07/06/2019 Rev. 2.1 “User Manual for 1.1K-3K TL” Identification: MD-AL-GI-00 Rev. 4.0 of 31.01.18 - Application: GID...
- Page 48 Use the “Up”, “Down” and “OK” keys to set the time delay expressed in seconds (*.***s) before the changed P active power will intervene. 48 / 61 Manual of 07/06/2019 Rev. 2.1 “User Manual for 1.1K-3K TL” Identification: MD-AL-GI-00 Rev. 4.0 of 31.01.18 - Application: GID...
- Page 49 Press the “OK” key to enter the “System Info” menu. The “System Info” menu contains the following submenus: 49 / 61 Manual of 07/06/2019 Rev. 2.1 “User Manual for 1.1K-3K TL” Identification: MD-AL-GI-00 Rev. 4.0 of 31.01.18 - Application: GID...
- Page 50 Press the “Back” key in the main interface and the “Up” or “Down” keys to enter the submenu “4. Date and Time”, then press “OK” to display the current date and time set on the inverter. 50 / 61 Manual of 07/06/2019 Rev. 2.1 “User Manual for 1.1K-3K TL” Identification: MD-AL-GI-00 Rev. 4.0 of 31.01.18 - Application: GID...
- Page 51 2. Remove the central cover at the bottom of the inverter by unscrewing the four star screws, taking care to have first loosened the four cable glands. 51 / 61 Manual of 07/06/2019 Rev. 2.1 “User Manual for 1.1K-3K TL” Identification: MD-AL-GI-00 Rev. 4.0 of 31.01.18 - Application: GID...
- Page 52 “Enable Country” menu, which corresponds to item 6 of the “Settings” menu. Enter the password 0001. 52 / 61 Manual of 07/06/2019 Rev. 2.1 “User Manual for 1.1K-3K TL” Identification: MD-AL-GI-00 Rev. 4.0 of 31.01.18 - Application: GID...
- Page 53 The new firmware version can be checked from the “Service Code” submenu located inside the “System Info” menu. 53 / 61 Manual of 07/06/2019 Rev. 2.1 “User Manual for 1.1K-3K TL” Identification: MD-AL-GI-00 Rev. 4.0 of 31.01.18 - Application: GID...
-
Page 54: Troubleshooting And Maintenance
54 / 61 Manual of 07/06/2019 Rev. 2.1 “User Manual for 1.1K-3K TL” Identification: MD-AL-GI-00 Rev. 4.0 of 31.01.18 - Application: GID... - Page 55 ID28 user manual; if this setting is incorrect, change it according to Section 6.3 (A) “10. Configuration of 55 / 61 Manual of 07/06/2019 Rev. 2.1 “User Manual for 1.1K-3K TL” Identification: MD-AL-GI-00 Rev. 4.0 of 31.01.18 - Application: GID...
- Page 56 DSP. SCI communication error between the SciCommLose ID54 master DSP and the slave DSP. RelayTestFail Relay fault. ID55 56 / 61 Manual of 07/06/2019 Rev. 2.1 “User Manual for 1.1K-3K TL” Identification: MD-AL-GI-00 Rev. 4.0 of 31.01.18 - Application: GID...
- Page 57 If so, improve the ventilation to reduce the temperature. 57 / 61 Manual of 07/06/2019 Rev. 2.1 “User Manual for 1.1K-3K TL” Identification: MD-AL-GI-00 Rev. 4.0 of 31.01.18 - Application: GID...
-
Page 58: Maintenance
Disconnect the AC and DC power to the inverter before cleaning. 58 / 61 Manual of 07/06/2019 Rev. 2.1 “User Manual for 1.1K-3K TL” Identification: MD-AL-GI-00 Rev. 4.0 of 31.01.18 - Application: GID... -
Page 59: Uninstalling
1550VA 2100VA 2600VA 3000VA Maximum AC current 4.5A 9.5A 11.5A Rated AC voltage L/N/PE, 220, 230, 240 V 59 / 61 Manual of 07/06/2019 Rev. 2.1 “User Manual for 1.1K-3K TL” Identification: MD-AL-GI-00 Rev. 4.0 of 31.01.18 - Application: GID... - Page 60 Acoustic emission <25dB@1m Weight 11kg 12kg Cooling system Natural Dimensions 405*314*135 mm User interface LCD display Warranty 10 years 60 / 61 Manual of 07/06/2019 Rev. 2.1 “User Manual for 1.1K-3K TL” Identification: MD-AL-GI-00 Rev. 4.0 of 31.01.18 - Application: GID...
-
Page 61: Warranty
10. Warranty Zucchetti Centro Sistemi SpA provides a warranty of 10 years from the date of installation on the 1.1K-3K TL inverter, subject to registration on the website https://www.zcsazzurro.com/it/estensione-garanzia. In any case, the warranty cannot exceed 66 months from the date of delivery of the inverter.
Need help?
Do you have a question about the 1.1K-3K TL and is the answer not in the manual?
Questions and answers