Advertisement
Quick Links
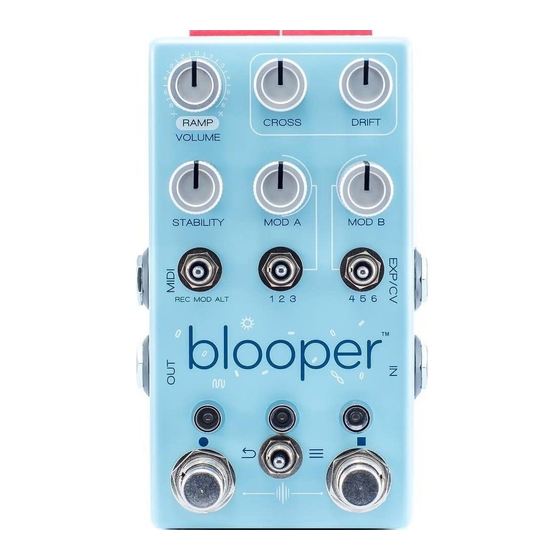
Welcome to Blooper, the bottomless looper. Within this little blue
rectangle is an intricate machine to explore, unravel, and make your
own, with infinite opportunities and outcomes. What you record is
only the beginning.
And with great power comes great confusion, maybe. We've
designed Blooper to be extremely flexible and open-ended, and this
means you will wind up in some unfamiliar places. This is half the fun
of course, but it could also be overwhelming at first.
This manual includes some scenarios that reveal Blooper's abilities
bit by bit, starting with the basic and familiar and working up to
adventure. Play through these scenarios and you and Blooper will
be best buds in no time.
MODES
Normal
Behaves like a "standard" looper. The key difference between Normal and
Additive is how the modifiers / stability are treated. In Normal mode, you will be
able to hear them, but they will basically be like external effects that come after
Blooper (but do not apply to your dry signal). This way you can set up the sound
just the way you like it, and record overdubs without things getting weird.
Additive
Here, overdubbing while a modifier (or stability) is active will imprint it on the
loop. Think of these effects just like your instrument: if you hear them, Blooper's
recording mechanism can too. If you want to use these effects but overdub your
instrument as usual – that's normal mode!
Sampler
Sampler is a simple and immediate mode, with its own workflow. At its core, it lets you record and manually trigger samples,
rather than looping. BUT ALSO, it can loop if you wish. Instead of overdubbing, each time you record, the previous loop is
replaced by a new one. This can be great for stutter, or fast, performative looping. By default, Sampler mode is set to loop
so you can smoothly move between modes without interruptions. Deactivate this by holding the right footswitch for manual
one-shot sample launching. Like the other modes, samples will go through the modifiers and stability.
COMMANDS
ADDITIVE / NORMAL MODES
Tap Left = Record / Play
If you have some looping under your belt, this experience
should be familiar. The Record / Play switch handles a
number of simple, related behaviors. Tap once to get started
recording, tap again to set the end point of the loop. From
there, tapping this switch toggles back and forth between
playing and recording.
Hold Left = One-shot Record
Useful. Thing. One-shot recording allows you to "imprint"
Modifiers and Stability neatly into the loop in Additive mode.
Its job is to record one full pass, then automatically turn itself
off. In this way you can record effects to the whole loop
without having to precisely punch the recording in and out.
INSTRUCTIONS
Tap Right = Stop
Hold Right = Undo / Redo
This is a unique command that activates a sub menu (indicated
by a green LED over the right footswitch). Once in the Undo/
Redo menu, tapping the right footswitch will Undo a layer,
tapping the left footswitch will Redo. None of the other
commands will work in this state. This is essentially a duplicate
of what the Layers knob does, so you can control this behavior
by foot as well. To exit Undo/Redo, simply hold the right
footswitch again.
Tap Both Footswitches = Delete
We chose a pretty darn specific command for this function
so you don't do it by accident. BUT, the delete will occur
immediately, so be sure!
Advertisement

Summary of Contents for Chase Bliss Audio Blooper
- Page 1 Blooper (but do not apply to your dry signal). This way you can set up the sound just the way you like it, and record overdubs without things getting weird.
-
Page 2: Sampler Mode
For consistency, all of be consistent. At maximum you will get granular crumbling. Blooper’s modifiers have a “neutral” zone at 12 o’clock on the knob. - Page 3 Allows you to shorten the length of your loop. Going counter- clockwise will bring the end towards the beginning, going Blooper can save and recall 16 loops, with their layers clockwise will pull the beginning towards the end. preserved. The left and right position of Blooper’s save toggle are two distinct menus: 4.
-
Page 4: Dip Switches
The repeats knob unlocks a whole other side of looping with Sampler mode. This is a place to play Blooper. It allows it to function like a delay, or perform around or capture samples to trigger. frippertronics-style looping. Here, think of your loop length as “tap tempo.”... - Page 5 CV Clock CV can be used for two different things with Blooper: sync, or modulation. By default, CV will provide modulation (configured in the same way as expression). By engaging the CV clock dipswitch, the CV jack will instead look for a clock source to sync to.


Need help?
Do you have a question about the Blooper and is the answer not in the manual?
Questions and answers