Advertisement
Available languages
Available languages
Table of Contents
- 1 Table of Contents
- 2 Seguridad del Acondicionador de Aire
- 3 Preparativos para el Uso
- 4 Identificación de las Piezas
- 5 Mando a Distancia
- 6 Instrucciones de Funcionamiento
- 7 Mantenimiento
- 8 Protección
- 9 Solución de Problemas
- 10 Instrucciones de Instalación
- 11 Asistencia O Servicio
- 12 Garantía
- Download this manual
ACONDICIONADOR
DE AIRE TIPO SPLIT /
INVERTER
Si tiene preguntas respecto a las características,
funcionamiento, rendimiento, partes, accesorios o
servicio técnico, llame al:
01 (81) 8329-2100
o visite nuestro sitio web en...
www.whirlpool.mx/servicio
Índice .......................................2
Este manual de uso y cuidado ampara los
siguientes modelos:
WA5059Q
WA6059Q
1
Advertisement
Table of Contents

Related Manuals for Whirlpool WA5059Q


Summary of Contents for Whirlpool WA5059Q
- Page 1 Si tiene preguntas respecto a las características, funcionamiento, rendimiento, partes, accesorios o servicio técnico, llame al: 01 (81) 8329-2100 o visite nuestro sitio web en… www.whirlpool.mx/servicio Índice ........2 Este manual de uso y cuidado ampara los siguientes modelos: WA5059Q WA6059Q...
-
Page 2: Table Of Contents
Corriente nominal: Potencia nominal: 1 400 W Unidad Evaporadora WA5059Q Modelo: WA6059Q Importador: WHIRLPOOL MÉXICO S. de R.L. de C.V. Antigua Carretera a Roma km 9 Col. El Milagro Apodaca, N.L. México, 66634 Tel. (81) 83-29 21-00 País de origen: China... -
Page 3: Seguridad Del Acondicionador De Aire
SEGURIDAD DEL ACONDICIONADOR DE AIRE Su seguridad y la seguridad de los demás son muy importantes. Hemos incluido muchos mensajes importantes de seguridad en este manual y en su electrodoméstico. Lea y obedezca siempre todos los mensajes de seguridad. Este es el símbolo de advertencia de seguridad. Este símbolo le llama la atención sobre peligros potenciales que pueden ocasionar la muerte o una lesión a usted y a los demás. -
Page 4: Requisitos Eléctricos
• Trate el acondicionador de aire con cuidado. Cable tipo Componente uso rudo Modelos WA6059Q WA5059Q 16 AWG Evaporadora 16 AWG Condensadora 18 AWG Comunicaciones Método recomendado para la puesta a tierra Para su seguridad personal, este acondicionador de aire debe ser puesto a tierra. -
Page 5: Preparativos Para El Uso
PREPARATIVOS PARA EL USO Antes de utilizar el acondicionador de aire, cerciórese de comprobar y preajustar lo siguiente: • Mando a distancia Usted puede controlar el acondicionador de aire desde el mando a distancia inalámbrico incluido. Turbo Display Off Smart Mando a distancia inalámbrico (incluido) Como colocar las pilas (incluidas) •... - Page 6 Operación manual Cuando el mando a distancia no funcione o sea extraviado, usted podrá encender y apagar el acondicionador de aire utilizando el botón de emergencia, el cual se localiza en el panel frontal. Si la unidad se encuentra encendida presione el botón de emergencia para detener operación, si la unidad está...
-
Page 7: Identificación De Las Piezas
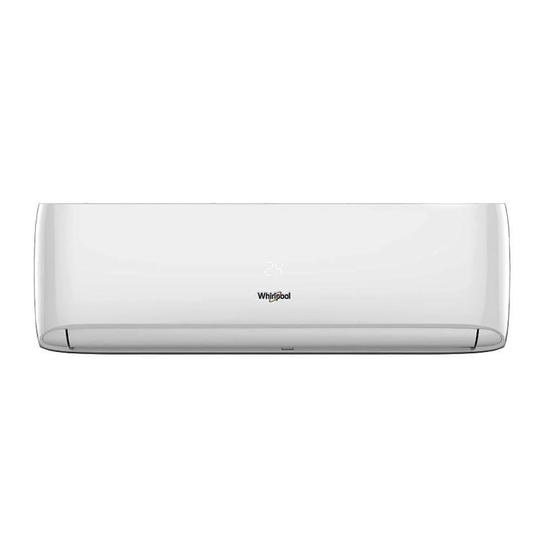
IDENTIFICACIÓN DE LAS PIEZAS NOTA: La figura anterior no es más que una representación de la unidad; es posible que no coincida con el aspecto externo de la unidad que ha adquirido. -
Page 8: Mando A Distancia
MANDO A DISTANCIA El mando a distancia transmite señales al sistema. Modos de operación Seleccionar el modo Cada vez que se presiona el botón de MODE, el modo de operación cambia en esta secuencia: ENFRIAMIENTO SECO VENT. SOLAMENTE CALEFACCION MODO DE ENFRIAMIENTO: En este modo se enfriará... - Page 9 Control de la dirección del flujo de aire El flujo de aire horizontal es ajustado automáticamente a un cierto Angulo de acuerdo con el modo de operación después de haber encendido la unidad. La dirección del flujo de aire también puede ser ajustada a su gusto presionando el botón DIRECCION (SWING) en el control remoto.
-
Page 10: Instrucciones De Funcionamiento
Instrucciones de funcionamiento 6.- Modo inteligente “SMART” Presione el botón SMART, la unidad entrara en el modo INTELIGENTE directamente sin importar si la unidad está encendida o apagada. En este modo, temperatura y velocidad del ventilador están automáticamente configurados basado en la temperatura de la habitación. - Page 11 7.- Función del reloj Usted puede ajustar la hora presionando el botón del Temporizador. Presione este botón y mantenga el botón presionado por 3 segundos para activar la configuración del reloj, los dígitos del reloj parpadearán, luego utilice los botones + y - para configurar el tiempo correcto, presione el botón de nuevo por más de 3 segundos.
- Page 12 8.-Función Sígueme (Around you) Cuando usted presiona este botón, se encenderá este icono , el control remoto transmite la temperatura actual de la habitación a la unidad de interior, y el electrodoméstico operará de acuerdo a esta temperatura para hacerlo sentir confortable.
- Page 13 11.- Función sueño El modo sueño SLEEP de energía puede activarse en el modo de operación de Enfriamiento Calefacción solamente. El aparato se apagará automáticamente después de operar por 8 horas, la velocidad del ventilador se ajustara automáticamente a una baja velocidad. Cada vez que presione el botón SLEEP el modo de operación es cambiado en la secuencia siguiente: Sleep 1 ...
-
Page 14: Mantenimiento
MANTENIMIENTO ADVERTENCIA Peligro de Choque Eléctrico Desconecte el aparato del suministro eléctrico antes de realizar cualquier servicio de mantenimiento o limpieza. No derrame líquidos directamente sobre el aparato. No seguir estas instrucciones puede ocasionar la muerte, incendio o choque eléctrico. Limpieza del filtro de aire Limpieza del panel frontal de la unidad interior Desconecte la unidad de la alimentación... -
Page 15: Protección
Importante: Limpie el filtro de aire cada dos semanas si el acondicionador de aire se utiliza en un ambiente con polvo abundante. PROTECCIÓN Contaminación acústica • Instale el acondicionador de aire en un lugar que soporte bien su peso para lograr un funcionamiento silencioso. •... -
Page 16: Solución De Problemas
SOLUCIÓN DE PROBLEMAS Usted puede resolver fácilmente muchos problemas frecuentes del acondicionador de aire ahorrándose el costo de una llamada de servicio. Pruebe las sugerencias que se incluyen a continuación para ver si puede resolver el problema sin ayuda. PROBLEMA COMPRUEBE •... -
Page 17: Instrucciones De Instalación
INSTRUCCIONES DE INSTALACIÓN... - Page 18 Seleccione la mejor ubicación Unidad interior Unidad interior Ubicación para instalar la unidad interior • Lugares en los que no haya obstáculos cerca de la salida de aire y éste pueda llegar con facilidad a todos los rincones. La distancia La distancia •...
- Page 19 Instalación de la unidad interior (evaporadora) 1. Instalación de la placa de soporte • Elija una ubicación para instalar la placa de soporte, teniendo en cuenta la posición de la unidad interior (evaporadora) y la dirección de la tubería. • Ajuste la placa de montaje en sentido horizontal con una regla de nivel horizontal. •...
- Page 20 IMPORTANTE: • Aislamiento térmico de las uniones de tubería: Envuelva las uniones de tubería con material aislante térmico y cubra después con la cinta de vinilo incluida en su producto. Aislante térmico en tubería. • Coloque la manguera de drenado bajo la tubería •...
- Page 21 Cómo purgar los tubos de aire • Desatornille y remueva las tapas de las válvulas de liquido y gas • Conecte la manguera flexible de la bomba de vacío a la válvula de servicio. • Ponga en marcha la bomba de vacío durante 10 ó 15 minutos hasta que alcance un vacío de 10mm Hg (1.3x10^-3Mpa). •...
- Page 22 Conexión eléctrica • Desatornille y retire la tapa del panel eléctrico de la unidad condensadora. • Conecte cada cable a su terminal correspondiente de acuerdo a su número. • Conexión de tierra: afloje el tornillo de tierra en el panel eléctrico, posteriormente atornille el cable de tierra. •...
- Page 23 • • • •...
-
Page 24: Asistencia O Servicio
If you have any questions regarding the features, performance, parts, accessories or technical service, please dial: 01 (81) 8329-2100 Or visit our web site at: www.whirlpool.mx/servicio Contents ……………………………. 2 This user and care manual supports the following models: WA5059Q WA6059Q... -
Page 25: Garantía
6.5 A Power: 1 400 W Evaporator unit Model: WA5059Q WA6059Q Importer: WHIRLPOOL MÉXICO S. de R.L. de C.V. Antigua Carretera a Roma km 9 Col. El Milagro Apodaca, N.L. México, 66634 Tel. (81) 83-29 21-00 Country of origin: China... - Page 26 SPLIT AIR CONDITIONER SAFETY Your safety and the safety of others are very important. We have provided many important safety messages in this manual and on your appliance. Always read and obey all safety messages. This is the safety alert symbol. This symbol alerts you to potential hazards that can kill or hurt you and others.
- Page 27 These products can damage the surface of your air conditioner. Component Heavy duty Treat the air conditioner with care. cable Models WA6059Q WA5059Q Evaporator 16 AWG Condenser 16 AWG Communications 18 AWG Recommended method for grounding For your personal safety, this air conditioner should be grounded.
- Page 28 BEFORE USING YOUR AIR CONDITIONER Before using the air conditioner, make sure to adjust the following settings: Remote control You can control the air conditioner using the wireless remote control (included). Turbo Display Off Smart Remote control (included) How to install the batteries (included) ...
- Page 29 CONTROL PANEL INDICATORS When the remote control does not work or is lost, you can turn the air conditioner on and off using the emergency button, which is located on the front panel. If the unit is on press the emergency button to stop operation, if the unit is off press and hold the emergency button for 5 seconds to turn it on.
- Page 30 IDENTIFY EACH PIECE Evaporator Unit Front panel Air intake Visual panel Emergency panel Air exit Vertical buffer Horizontal buffer Air filter Remote control Air intake Pipes and electric Condenser Unit wires Drain hose Air exit NOTE: The previous figure is only a representation of the unit; It may not match the external appearance of the unit you purchased.
- Page 31 REMOTE CONTROL The remote control transmits signals to the system Operating modes Select the mode Each time the MODE button is pressed, the operation mode changes in this sequence: COOLING FAN ONLY HEATING COOLING MODE: In this mode the room will be cooled, to make you feel comfortable in the hot seasons.
- Page 32 5. Control of the direction of the air flow The horizontal air flow is automatically adjusted to a certain angle according to the operating mode after the unit has been turned on. The direction of the air flow can also be adjusted to your preference by pressing the SWING button on the remote control.
- Page 33 OPERATING INSTRUCTIONS 6.- Smart mode "SMART" Press the SMART button, the unit will enter SMART mode directly regardless of whether the unit is on or off. In this mode, temperature and fan speed are automatically set based on the temperature of the room. The operating mode and temperature are determined by the internal temperature.
- Page 34 7.- Clock function You can adjust the time by pressing the Timer button. Press this button and keep the button pressed for 3 seconds to activate the clock setting, the clock digits will flash, then use the + and - buttons to set the correct time, press the button again for more than 3 seconds.
- Page 35 8.- Around you When you press this button, this icon will light , the remote transmits the current temperature of the room to the indoor unit, and the appliance will operate according to this temperature to make it comfortable. Please keep the remote control in a location where it can transmit the signal to the indoor unit correctly.
- Page 36 11.- The PERFECT SLEEP mode The Perfect Sleep mode for energy can be activated in Heating Cooling operation mode only. The appliance will turn off automatically after operating for 8 hours, the fan speed will automatically adjust to a low speed. Each time you press the PERFECT SLEEP button the operation mode is changed in the following sequence: Exit...
- Page 37 MAINTENANCE WARNING Electrical shock hazard Unplug the power cord or disconnect power from the switch before performing any maintenance service or cleaning on the unit. Do not spill any liquids over the air conditioner unit. Failure to follow these instructions can result in death, fire or electrical shock.
- Page 38 PROTECTION Acoustic contamination Install the air conditioner in a place that supports its weight to achieve quiet operation. Install the outdoor unit in a place where the expulsion of air and the noise of operation does not disturb the ...
- Page 39 TROUBLESHOOTING You can easily solve many frequent problems of the air conditioner saving the cost of a service call. Try the suggestions below to see if you can solve the problem without help. PROBLEM Is the protection device burned or the fuse has tripped? ...
- Page 40 INSTALLATION INSTRUCTIONS Choose the best location Interior unit Distance from the ceiling should be more than 200mm Distance from the wall should be more than 50mm Distance from the wall should be more than 50mm Distance from the floor should be more than 2500mm The air intake must be The air intake must be more than...
- Page 41 Location to install the indoor unit Places where there are no obstacles near the exit and it can easily reach all corners. The maximum Places where pipes can be installed, and wall holes can be easily made. pipe distance is ...
- Page 42 1. Installation of the mounting plate Choose a location to install the mounting plate, considering the position of the indoor unit and the direction of the pipeline. Adjust the mounting plate horizontally with a horizontal level ruler or a plumb bob. ...
- Page 43 Mounting plate Brackets Slot 2. Open the brackets to 90°C Once the mounting plate is installed, now install the indoor unit. Mounting plate Open Open Screw cover 3. Install the indoor unit using the supports 4. Remove the plastic cover from the screws. Notes: Cover •...
- Page 44 Thermal insulation IMPORTANT: Thermal insulation of the Pipe joints: Wrap the pipe joints with thermal insulation material and cover after with the vinyl tape included with your product. wrapped with vinyl tape Big pipe Thermal insulation on pipes Thermal insulation on Place the drain hose under the pipe.
- Page 45 How to purge the air pipes Unscrew and remove the cover of the service valve. Connect the flexible hose of the vacuum pump to the service valve. Start the vacuum pump for 10 or 15 minutes until it reaches a vacuum of -76cm Hg (1.3x10 ^-3 MPa). ...
- Page 46 Electric connection Unscrew and remove the cover of the electrical panel of the condensing unit. Connect each cable to its corresponding terminal according to its number. Ground connection: loosen the ground screw on the electrical panel, then screw the ground cable. ...
Need help?
Do you have a question about the WA5059Q and is the answer not in the manual?
Questions and answers