
Related Manuals for baltur BTL 3


Summary of Contents for baltur BTL 3
- Page 1 IT - GB - SP - FR - Istruzioni per bruciatori modello BTL 3H - Instruction for burners model - Instrucciónes para quemadores modelos BTL 3 - Mode d’emploi bruleûr 0006080735_200806...
- Page 3 IT - Leggere attentamente le istruzioni prima di GB - The works on the burner and on the mettere in funzione il bruciatore o di eseguire system have to be carried out only by la manutenzione. competent people. - I lavori sul bruciatore e sull’impianto de- - Read carefully the instructions before vono essere eseguiti solo da personale starting the burner and service it.
- Page 4 SP - Lea atentamente las instrucciones antes de FR - Lire attentivement les instructions avant poner en funcionamento los quemadores de mettre en fonction le bruleur et pour y efectuar las tareas de mantenimiento. son entretien correct. - Los trabajos que se efectúen al quemador - Les travaux sur le bruleur et sur l’installa- y a la instalación deben ser efectuados tion doivent etre executes seulement par...
- Page 5 ITALIANO PAGINA Avvertenze per l’utente per l’uso in sicurezza del bruciatore ............ “ Caratteristiche tecniche......................“ Collegamenti idraulici ........................ “ Montaggio alla caldaia ......................“ Caratteristiche apparecchiatura - Preparazione per l’accensione - Accensione e regolazione - Posizionamento elettrodi - Regolazione aria ........ “ Regolazione combustione ......................
-
Page 6: Avvertenze Generali
• In caso di guasto e/o di cattivo funzionamento dell’apparecchio, disattivarlo, astenendosi da qualsiasi tentativo di riparazione o di intervento diretto. Rivolgersi esclusivamente a personale professionalmente qualificato. L’eventuale riparazione dei prodotti dovrà essere effettuata solamente da un centro di assistenza autorizzato dalla BALTUR utilizzando esclusivamente ricambi originali. -
Page 7: Alimentazione Elettrica
AVVERTENZE PER L’UTENTE PER L’USO IN SICUREZZA DEL BRUCIATORE ALIMENTAZIONE ELETTRICA • La sicurezza elettrica dell’apparecchio è raggiunta soltanto quando lo stesso è corretamente collegato a un’efficace impianto di messa a terra, eseguito come previsto dalle vigenti norme di sicurezza (D.P.R. 547/55 art. 314). E’ necessario verificare questo fondamentale requisito di sicurezza. In caso di dubbio, richiedere un controllo accurato dell’impianto elettrico da parte di personale professionalmentequalificato, poiché... -
Page 8: Warning Notes For The User How To Use The Burner Safely
WARNING NOTES FOR THE USER HOW TO USE THE BURNER SAFELY ELECTRICAL SUPPLY • The equipment is electrically safe only when it is correctly connected to an efficient ground connection carried out in accordance with current safety regulations. It is necessary to check this essential safety requirement. If in doubt, call for a careful electrical check by a qualified technicians, since the manufacturer will not be liable for any damage caused by a poor ground connection. - Page 9 WARNING NOTES FOR THE USER HOW TO USE THE BURNER SAFELY ELECTRICAL SUPPLY • The equipment is electrically safe only when it is correctly connected to an efficient ground connection carried out in accordance with current safety regulations. It is necessary to check this essential safety requirement. If in doubt, call for a careful electrical check by a qualified technicians, since the manufacturer will not be liable for any damage caused by a poor ground connection.
-
Page 10: Advertencias Generales
Diríjase exclusivamente a personal cualificado profesionalmente. La eventual reparación de los aparatos tiene que hacerla solamente un centro de asistencia autorizado por BALTUR utilizando exclusivamente repuestos originales. Si no se respeta lo anteriormente se puede comprometer la seguridad del aparato. Para garantizar la eficacia del aparato y para que funcione correctamente es indispensable que el personal cualificado profesionalmente realice el mantenimiento periódicamente ateniéndose a las indicaciones... -
Page 11: Alimentación Eléctrica
ADVERTENCIAS DIRIGIDAS AL USUARIO PARA USAR EL QUEMADOR EN CONDICIONES DE SEGURIDAD PRELIMINARES ALIMENTACIÓN ELÉCTRICA • La seguridad eléctrica del aparato se consigue solo cuando el mismo está conectado correctamente a una buena instalación de puesta a tierra, realizado tal y como establecen las normas de seguridad vigentes. Es necesario comprobar este requisito de seguridad funda- mental. - Page 12 S’adresser exclusivement à du personnel professionnellement qualifié. L’éventuelle réparation des produits doit être effectuée par un centre de service après-vente agréé par BALTUR en utilisant exclusivement des pièces détachées d’origine. Le non-respect de cette recommandation peut compromettre la sécurité de l’appareil. Pour garantir l’efficience de ce dernier et pour que son fonctionnement soit correct, il est indispensable de faire effectuer l’entretien périodique par du personnel professionnellement qualifié...
-
Page 13: Alimentation Electrique
RECOMMANDATIONS A L’ATTENTION DE L’UTILISATEUR POUR UN USAGE DU BRULEUR EN TOUTE SECURITE INTRODUCTION ALIMENTATION ELECTRIQUE • La sécurité électrique de l’appareil est atteinte uniquement lorsque ce dernier est correctement raccordé à une installation de mise à la terre efficace, exécutée comme prévu par les normes de sécurité en vigueur. Cette condition requise de sécurité est fondamentale. En cas de doute, demander un contrôle soigné... - Page 14 CARATTERISTICHE TECNICHE / TECHNICAL SPECIFICATIONS / N° 0002270651 CARACTERISTIQUES TECHNIQUES / CARACTERISTICAS TECNICAS Rev. 02/05/00 MOD. BTL 3H BTL 3 Portata / Burner output / Débit / Druchsatz / Caudal 1,4 - 3,6 1,5 - 3,6 kg/h Potenza termica /Thermic capacity / Puissance thermiqhe /...
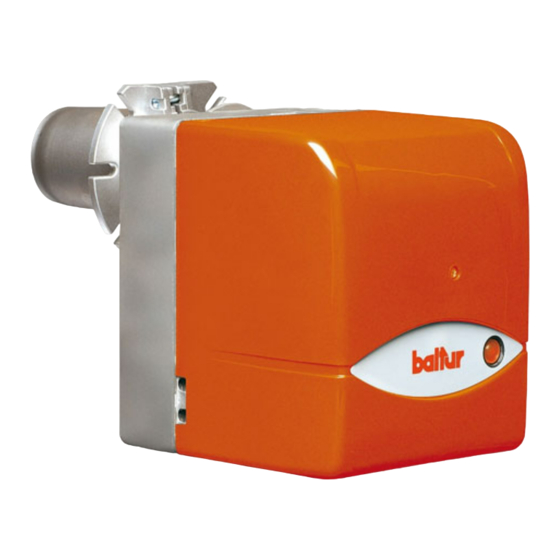
- Page 15 Ø BTL 3 - 3H 217,5 1) Equipo LANDIS LOA.. 1) Control box 1) Apparecchiatura LANDIS LOA.. 1) Appareillage LANDIS LOA.. 2) Transformador LANDIS LOA.. 2) Trasformatore 2) Trasformateur 3) Connector 7 polos 2) Transformer 3) Connettore 7 poli 3) Connecteur 7 polês 4) Tornillo de regulación de la...
-
Page 16: Collegamenti Idraulici
N°0002900860 COLLEGAMENTI IDRAULICI Rev. 27/07/99 I tubi di collegamento cisterna bruciatore devono essere a perfetta tenuta, si consiglia l’uso di tubi in rame o di acciaio di diametro adeguato. All’estremita’ delle tubazioni rigide devono essere installate le saracinesche di intercettazioni del combustibile. -
Page 17: Montaggio Alla Caldaia
N° 0002932940 MONTAGGIO ALLA CALDAIA Rev. 04/10/99 CON FLANGIA FISSA: - infilare la vite (A) nella flangia (B); - fissare la flangia (B) alla caldaia con le 4 viti (D) interponendo la guarnizione (E); - infilare il bruciatore nella flangia e fissarlo alla vite (A) con il dado (C). CON FLANGIA SCORREVOLE - Fissare la flangia (B) alla caldaia con i 4 prigionieri (D) interponendo la guarnizione (E);... -
Page 18: Preparazione Per L'accensione
CARATTERISTICHE APPARECCHIATURA Luce estranea / accensione anticipata Durante il tempo di preventilazione e/o preaccensione non deve esserci alcun segnale di fiamma. Se invece il segnale si presenta, per esempio per accensione anticipata dovuta a cattiva tenuta dell’ elettrovalvola, per illuminazione esterna, per cortocircuito nella fotoresistenza o nel cavetto di collegamento, per guasto all’... -
Page 19: Accensione E Regolazione
ACCENSIONE E REGOLAZIONE Agire sulla vite di regolazione (vedi 0002933100) e portare la serranda di regolazione aria e il disco fiamma nella posizione che si presume necessaria in funzione della quantità di combustibile da bruciare (vedi tabella). Chiudere l’interruttore generale per ottenere l’inserzione e quindi l’accensione del bruciatore. Correggere, se necessario, l’erogazione dell’aria di combustione agendo sulla serranda di aspirazione e sulla posizione del disco fiamma (regolabile dalla vite D). - Page 20 0,85 0,75 BTL 3H (con preriscaldatore) 0,60 0,50 0,40 1.00 0,85 13,5 0,85 BTL 3 (senza 0,75 preriscaldatore) 0,60 0,50 1.95 0,50 NOTA: NOTA: I valori in tabella sono riferiti al I valori riportati in tabella sono 12% di CO ( 4.5 O...
-
Page 21: Manutenzione
N° 0002933120 MANUTENZIONE Rev. 11/05/00 La maggior parte dei componenti sono ispezionabili togliendo il cofano; per l’ispezione alla testata si deve smontare la piastra portacomponenti che può essere appesa al corpo bruciatore in due posizioni, per poter operare agevolmente. Il motore, il trasformatore, l’ elettrovalvola sono collegati tramite un connettore, la fotoresistenza è inserita a pressione. -
Page 22: Irregolarità Di Funzionamento
IRREGOLARITÀ DI FUNZIONAMENTO NATURA DELL’IRREGOLARITA’ CAUSA POSSIBILE RIMEDIO L’apparecchio va in blocco con 1) Fotoresistenza interrotta o sporca di 1) Pulirla o sostituirla. fiamma (lampada rossa accesa). fumo. 2) Controllare tutti i passaggi dei fumi Il guasto é circoscritto al disposi- 2) Caldaia sporca. -
Page 23: Hydraulic Connections
N° 0002900860 HYDRAULIC CONNECTIONS Rev. 27/07/99 The pipes that connect the tank tothe burner should be in perfect tight condition; we recommend the use of copper or steel pipes of an adeguate diameter.Fuel gate valves should be fitted at the end of the rigid pipelines.Fit the filter to the suction pipeline after the gate valve. -
Page 24: Installing On Boyler
N° 0002932940 INSTALLING ON BOYLER Rev. 04/10/99 WITH FIXED FLANGE: - insert screw (A) in flange (B); - Fasten flange (B) on to boiler with screws (D) (n°4 screws) placing the insulation gasket (E); - Insert burner into flange / boiler and fasten to screw (A) with nut (C). WITH SLIDING FLANGE: - Fasten flange (B) to the boiler with n°4 screws (D) placing the insulation card (E);... -
Page 25: Appliance Specifications
APPLIANCE SPECIFICATIONS Extraneous light / advanced ignition During the pre-ventilation and/or pre-starting phase there shall be no flame signal. Should the signal be present, for example for advanced ignition due to bad tightness of the electrovalve, external lighting, short-circuit in the photo- resistance or in the connecting cable, a breakdown in the flame signal amplifier, and so on., when the pre-ventilation and safety time has elapsed, the control-box brings the... -
Page 26: Ignition And Adjustment
IGNITION AND ADJUSTMENT By turning adjuster screw (see 0002933100), set air register and flame disc to the position that would appear correct on the basis of the amount of fuel to be burnt (see table). Set main circuit breaker to OFF in order to connect and switch on the burner. If necessary, correct the flow of combustion air by adjusting the register and the position of the flame disc (adjuster screw D). -
Page 27: Combustion Adjustment
0,85 BTL3H 0,75 (with pre- 0,60 heating) 0,50 0,40 1.00 0,85 13,5 0,85 BTL 3 (without pre- 0,75 heating) 0,60 0,50 1.95 0,50 NOTE: NOTE: The values repoted on this table are The values indicated in the table are pure- referred at the 12% CO (4.5 O... -
Page 28: Maintenance
N° 0002933120 MAINTENANCE Rev. 11/05/00 Most components can be inspected by removing the hood. To inspect the head you must disassemble the component-carrying plate which can be hung on hung on the burner body in two different positions to make work as practical as possible. The motor, transformer and solenoid valve are connected via a connector while the photo-resistor is push-locked into place. -
Page 29: Operating Anomaly
OPERATING ANOMALY TYPE OF IRREGULARITY PROBABLE CAUSE RIMEDY 1) Photoresistance is cut off or dirty with 1) Clean or replace it. The controll-box stops with smoke. flame (red light on) The fai- 2) Boiler fouled 2) Check all smoke circuits inside the boiler lure is limited to the flame- and the chimney. - Page 30 N°0002900860 INSTALACION HYDRAULICA Rev. 27/07/99 Los tubos de Instalación cisterna quemador deberán tener una buena estanqueidad, se consigue con la utilización del tubo de cobre o de acero de diametro adecuado. Todos los extremos de la tubería de aspiración, despues de la compuerta de corte del combustible.
-
Page 31: Montaje A La Caldera
N° 0002932940 MONTAJE A LA CALDERA Rev. 04/10/99 CON BRIDA FIJA: - Colocar el tornillo (A) en la brida (B); - Fijar la brida (B) a la caldera con los tornillos (n°4) (D) interponiendo la junta aislante(E); - Colocar el quemador en la brida y fijarlo al tornillo (A) con la tuerca (C). CON BRIDA CORREDERA: - Fijar la brida (B) a la caldera con n°4 tornillos (D) interponendo la junta aislante (E);... -
Page 32: Preparacion Para El Encendido
CARACTERÍSTICAS DE LA CAJA DE CONTROL Luz extraña/encendido anticipado Durante el tiempo de preventilación y/o preencendido no tiene que producirse ninguna señal de llama. Si, al contrario, se produce la señal, (debido, por ejemplo, al encendido anticipado como consecuencia del mal funcionamiento de la electroválvula, a la iluminación exterior, a un cortocircuito en la fotorresistencia o en el cable de conexión, a una avería del amplificador de la señal de la llama, etc.), transcurrido el tiempo de preventilación y seguridad,... -
Page 33: Encendido Y Regulación
ENCENDIDO Y REGULACIÓN Manipule el tornillo de regulación (véase 0002933100) y ponga la clapeta de regulación del aire y del disco deflector en la posición que se considere necesaria en base a la cantidad de combustible que haya que quemar (véase la tabla). -
Page 34: Regulación De La Combustión
N° etiqueta 1,00 BTL 3H 0,85 (con precalentamient 0,75 0,60 0,50 0,40 1.00 0,85 13,5 BTL 3 0,85 (sin 0,75 precalentamient 0,60 0,50 1.95 0,50 Nota: Nota: los valores de la tabla se re- Los valores de la tabla son indi- fieren a un 12% de CO (4.5... - Page 35 N° 0002933120 MANUTENCION Rev. 11/05/00 La mayor parte de los componentes pueden ser inspeccionados quitando la tapa protectora; para inspeccionar la cabeza hay que desmontar la placa que sujeta los portacomponentes; para poder trabajar con la mayor facilidad posible esta placa puede colgarse al cuerpo del quemador de dos maneras diferentes. El motor, el transformador y la electroválvula están conectados mediante un conector y la fotorresistencia está...
-
Page 36: Irregularidades En El Funcionamiento
IRREGULARIDADES EN EL FUNCIONAMIENTO NATURALEZA CAUSA POSIBLE SOLUCION IRREGULARIDAD El equipo se bloquea con 1) Fotoresistencia interrumpida o sucia 1) Limpiarla o sostituirla. llama por humo. (testigo rojo encendido). 2) Caldera sucia. 2) Controlar todos los pasos del humo en el la averia se limita al disposi- la caldera o en la chimenea. -
Page 37: Connexions Hydrauliques
N°0002900860 CONNEXIONS HYDRAULIQUES Rev. 27/07/99 Les tuyaux de connexion cuve-brûleur doivent être parfaitement étanches. On conseille l’utilisation de tuyaux en cuivre ou en acier de diamètre convenable. Au bout des canalisations rigides, les vannes d’arrêt du combustible doivent être installées. Sur la canalisation d’aspiration, après la vanne, on installe le filtre, auquel est connecté... -
Page 38: Montage A La Chaudière
N° 0002932940 MONTAGE A LA CHAUDIÈRE Rev. 04/10/99 AVEC BRIDE FIXE: - Introduire la vis (A) dans la bride (B); - Fixer la bride (B) sur la chaudière à l’àide des vis (D) (n°4 vis) en interposant le joint isolant (E); - Introduire le brûleur dans la bride / chaudière et le fixer à... -
Page 39: Preparation Pour L'allumage
CARACTERISTIQUE BOÎTIER DE CONTRÔLE Lumière externe/allumage anticipé Pendant la préventilation et/ou le pré-allumage aucun signal de flamme ne doit exister. Si c’était le cas (allumage anticipé pour cause de défaut d’étanchéité de l’électrosoupape, illumination externe, court-circuit sur la résistance photoélectrique ou sur le câble de raccordement pour cause de panne du signal de flamme sur l’amplificateur etc...), une fois le temps de préventilation et de sécurité... -
Page 40: Allumage Et Reglage
Le brûleur BTL 3 H est équipé d’un réchauffeur de fioul au gicleur. Ce dispositif permet d’obtenir une meilleure pulvérisation et, par conséquent, une meilleure combustion. - Page 41 0,85 BTL3H 0,75 (avec 0,60 préchauffage) 0,50 0,40 1.00 0,85 13,5 0,85 BTL 3 (sans 0,75 préchauffage) 0,60 0,50 1.95 0,50 REMARQUE: REMARQUE: Les valeurs du tableau sont indi- Les valeurs indiquées dans le ta- catives; pour obtenir les meilleu- bleau se réfèrent à...
- Page 42 N° 0002933120 MANUTENTION Rev. 11/05/00 La plupart des composants peut être inspectée en enlevant le coffre ; pour l’inspection de la tête, il est nécessaire de démonter la plaque porte-composants, laquelle peut être accrochée au corps brûleur dans deux positions pour agir de la façon la plus rationnelle possible.
-
Page 43: Irrégularités De Fonctionnement
IRRÉGULARITÉS DE FONCTIONNEMENT INCONVENIENT CAUSE REMEDE L’appareil se bloque flam- 1) Photorèsistance interrompue ou sale. 1) Netoyer ou remplacer. 2) Chaudière sale. me présente (lampe rouge 2) Contròler tous les passages de fummèe allumée). sur la chaudière et les cameaux. La panne est circonscrite au 3) Circuit de la photorésistance en panne 3) Rempacer. - Page 44 PARTICOLARE POMPA / PUMP PARTICULER / DETAILE BOMBA / DETAIL DE LA POMPE BT 8930/1 N°0002900910 SUNTEC AS 47C 1538 SUNTEC AE 47C 1538 Rev 21/04/94 Rev. 04/05/00 1 - ELETTROVALVOLA (NORMALMENTE CHIUSA) / ELECTROVALVE (USUALLY CLOSED) / ELECTROVALVULA (NORMALMENTE CERRADA) / ELECTROVANNE (NORMALEMENT FERMEE) 2 - ATTACCO MANOMETRO E SFOGO ARIA (1/8”) / PRESSURE TEST POINT AND PURGE POINT (1/8”) / CONEXIÓN PARA MANOMETRO Y PURGA DE AIRE (1/8”) / CONNEXION DU MANOMÈTRE ET ÉVENT DE L’AIR (1/8”).
- Page 45 N° 0002200380 SCHEMA ELETTRICO BTL 3H / ELECTRIC DIAGRAM FOR BTL 3H / DIAGRAMA DE CONEXION BTL 3H / SCHEMA ELECTRIQUE BTL 3H Rev. 22/09/2000 COLLEGAMENTI ELETTRICI / ELECTRIC CONNECTIONS / INSTALACION ELECTRICA / CONNEXIONS ELECTRIQUES Le linee elettriche devono essere convenientemente distanziate dalle parti calde. E’ consigliabile che tutti i collegamenti siano eseguiti con filo eletrico flessibile.
- Page 46 N° BT 2125/2 SCHEMA ELETTRICO BTL 3 / ELECTRIC DIAGRAM FOR BTL 3 / DIAGRAMA DE Rev. 17/07/96 CONEXION BTL 3 / SCHEMA ELECTRIQUE BTL 3 COLLEGAMENTI ELETTRICI / ELECTRIC CONNECTIONS / INSTALACION ELECTRICA / CONNEXIONS ELECTRIQUES Le linee elettriche devono essere convenientemente distanziate dalle parti calde. E’ consigliabile che tutti i collegamenti siano eseguiti con filo eletrico flessibile.
- Page 47 TABELLA PORTATA UGELLI PER GASOLIO NOZZLE FLOW-RATE TABLE FOR LIGHT OIL TABLA CAUDAL BOQUILLAS PARA GASÓLEO DURCHSATZTABELLE FÜR HEIZÖLDÜSEN Ugello Ugello Nozzle Nozzle Pressione pompa / Pump pressure / Presión bomba / Pression de la pompe / Druck Pumpe Boquilla Boquilla Gicleur Gicleur...
- Page 48 Il presente catalogo riveste carattere puramente indicativo. La casa, pertanto, si riserva ogni possibilità di modifica dei dati tecnici e quant’altro in esso riportato. Technical data in this brochure are given as information only. Baltur reserves the right to change specification, without notice.
Need help?
Do you have a question about the BTL 3 and is the answer not in the manual?
Questions and answers