Table of Contents
Advertisement
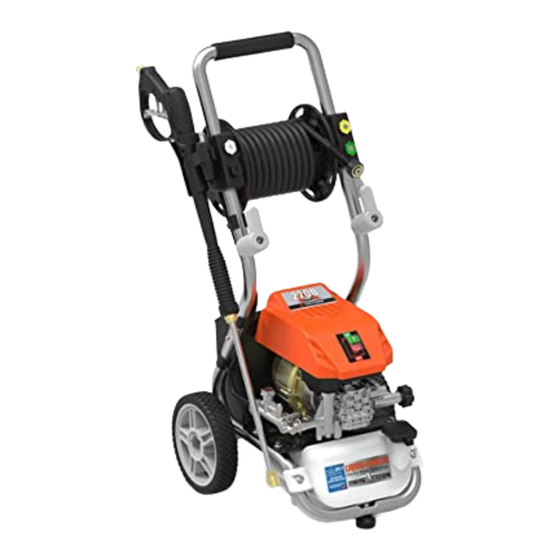
ELECTRIC PRESSURE WASHER
OPERATOR'S MANUAL
Our Customer Service staff is ready to provide assistance.
In the case of a damaged or missing part, most replacement parts ship from our
facility.
For immediate help with assembly, or for additional product information, visit
www.YardForceUSA.com or email support@MerotecUSA.com
SAVE THIS MANUAL FOR REFERENCE
You will need this manual for safety
instructions, operating procedures, and Warranty.
The original sales receipt is required for warranty service.
YF2200LC
Y0EWN22WR01
Advertisement
Table of Contents

Related Manuals for Yard force YF2200LC


Summary of Contents for Yard force YF2200LC
- Page 1 YF2200LC Y0EWN22WR01 ELECTRIC PRESSURE WASHER OPERATOR’S MANUAL Our Customer Service staff is ready to provide assistance. In the case of a damaged or missing part, most replacement parts ship from our facility. For immediate help with assembly, or for additional product information, visit www.YardForceUSA.com or email support@MerotecUSA.com...
-
Page 2: Table Of Contents
YF2200LC Original Instructions TABLE OF CONTENTS Important safety instructions ........................... 3 Safety features ..............................5 Parts and diagram list ............................6 Technical data ..............................8 Assembly and operation instructions ....................... 9 Machine assembly ............................. 9 Operation instruction ..........................13 Cleaning detergents dispenser ......................... 14 Shutting down and storage .......................... -
Page 3: Important Safety Instructions
IMPORTANT SAFETY INSTRUCTIONS Please read all of the safety precautions before operating this machine every time. Please pay particular attention to all sections with following symbols. WARNING Could cause injury or death if not followed. CAUTION Could damage machine if not followed. WARNING When using this product, basic precautions should always be followed, including: 1. - Page 4 IMPORTANT SAFETY INSTRUCTIONS CAUTION Gun Kick Back • Hold with both hands. • The trigger gun safety lock prevents the trigger from being engaged accidentally. • The safety feature DOES NOT lock trigger in the ON position. GENERAL SAFETY RULES 1.
-
Page 5: Safety Features
IMPORTANT SAFETY INSTRUCTIONS DANGER – Improper connection of the equipment –grounding conductor can result in a risk of electrocution. Check with qualified electrician or service personal if you are in doubt as to whether the outlet is properly grounded. Do not modify the plug provided with the product – if it will fit the outlet, have a proper outlet installed by a qualified electrician. -
Page 6: Parts And Diagram List
PARTS AND DIAGRAM LIST PARTS AND DIAGRAM LIST Fig. 1... - Page 7 Carefully remove the pressure washer and parts from its packaging. Identify all the parts packaged in the carton against the parts list. Please contact Yard Force customer service center (Monday - Friday 8:30AM - 5:00PM ET) at 1-(866) 902-9690 if anything is missing.
-
Page 8: Technical Data
TECHNICAL DATA PARTS AND DIAGRAM LIST Model Y0EWN22WR01 Input voltage rating 120V AC Rated Power 13 A Working pressure 2200 PSI Max pressure 2500 PSI Rated Flow rate 1.20 GPM (272.5LPH) Max. Flow rate 1.35 GPM (306 LPH) Inlet pressure ≥20 PSI Supply water temperature (max.) Cold tap water 104 °F (40 °C) -
Page 9: Assembly And Operation Instructions
To prolong the life of the unit, rest the unit for 5 minutes after every 30 minutes of use. MACHINE ASSEMBLY Your Yard Force pressure washer will need to be assembled before operation (tools not required): 1. Install the wheels. (Fig. 2) The short axle (A) is first passed through the wheel (W) and then attach to the shaft under the frame of the machine. - Page 10 ASSEMBLY AND OPERATION INSTRUCTIONS 2. Attach storage bucket. (Fig. 3) Attach the storage bucket onto pressure washer main unit by sliding open slot over tab. Fig. 3 3. Assemble middle handle. (Fig. 4) Push and hold the push-pin buttons on the sides of the middle handle as sliding the middle handle onto the frame.
- Page 11 ASSEMBLY AND OPERATION INSTRUCTIONS 7. Insert the turbo nozzle. (Fig. 8) Put the turbo nozzle into the nozzle holder together with the gun holder. 8. Connect high-pressure hose to pressure washer main unit. (Fig. 9) Tighten the high-pressure hose to the water outlet of the pressure washer main unit. Fig.
- Page 12 ASSEMBLY AND OPERATION INSTRUCTIONS CAUTION The pressure washer must only be used with clean water. Use of unfiltered water or corrosive chemicals will damage the pressure washer. This pressure washer is not intended to pump hot water. Never connect it to a hot water supply as it will significantly reduce the life of the pump.
-
Page 13: Operation Instruction
ASSEMBLY AND OPERATION INSTRUCTIONS OPERATION INSTRUCTIONS WARNING Risk of injury, Do Not Direct discharge stream at self or other persons. WARNING Before cleaning any surface, an inconspicuous area should be cleaned to test spray pattern and distance for maximum cleaning results. Fig. -
Page 14: Cleaning Detergents Dispenser
ASSEMBLY AND OPERATION INSTRUCTIONS 3. Turn off the pressure washer by pressing the switch button with mark “ O ”, activate the safety latch for a break. For storage, drain machine after use by removing water connection, turning ON the machine for 3 seconds and depressing gun trigger to release remaining water in the pump. - Page 15 ASSEMBLY AND OPERATION INSTRUCTIONS CAUTION Failure to follow detergent cleaning procedure will cause the dispensing system to become clogged. Damage may occur to painted surfaces if a chemical is allowed to dry on surface. Wash and rinse a small section at a time. Avoid working on hot surfaces or in direct sunlight. Never use: •...
-
Page 16: Shutting Down And Storage
SHUTTING DOWN AND STORAGE 1. (If you are not using detergent, go directly to Step 2.) When you have finished using the detergent dis- pensing system, fill detergent tank with clean water to rinse the system clean. Squeeze the gun trigger for one minute at low pressure so that all detergents remaining in system are thoroughly flushed out. -
Page 17: Cleaning And Maintenance
CLEANING AND MAINTENANCE Water Filter Screen The pressure washer is equipped with a water inlet filter screen to protect the pump. If the screen is not kept clean, the flow of water to the pressure washer will be restricted and the pump may be damaged. 1. -
Page 18: Troubleshooting
TROUBLE SHOOTING Disconnect the machine from the power source before making any repairs. Symptom Cause Solution Motor does not run On/Off switch is in the “OFF” (O) Turn switch to the “ON” ( I ) position. when “ON” ( I ), fully position. - Page 19 TROUBLE SHOOTING Pump is noisy. Pump is sucking air. Check that hoses and fittings are airtight. Turn off machine and purge pump by squeezing trigger gun until a steady flow of water emerges through the nozzle. Water filter is clogged. Remove water filter and rinse in warm water.
-
Page 20: Warranty
3. If service or a warranty evaluation is requested, Yard Force USA will provide an RGA number that should be used in all communications with Yard Force USA and is required to be indicated on the prod- uct itself and on the outside of the box. - Page 21 Merotec Inc. 3655 Kennesaw North Industrial Parkway, Kennesaw, GA 30144 Copyright © 2019 Merotec Inc. Made in China at a SUMEC manufacturing facility MADE IN CHINA...
Need help?
Do you have a question about the YF2200LC and is the answer not in the manual?
Questions and answers