Table of Contents
Advertisement
Quick Links
Advertisement
Table of Contents

Subscribe to Our Youtube Channel
Related Manuals for National DC4-211


Summary of Contents for National DC4-211
- Page 1 National Optical & Scientific Instrument Inc. 6508 Tri-County Parkway Schertz, Texas 78154 Phone (210) 590-9010 Fax (210) 590-1104 INSTRUCTIONS FOR MODEL DC4-211 / 212 COMPOUND BIOLOGICAL MICROSCOPE WITH DIGITAL CAMERA Copyright © 6/03/2016 National Optical & Scientific Instrument Inc.
-
Page 2: Description Of Components
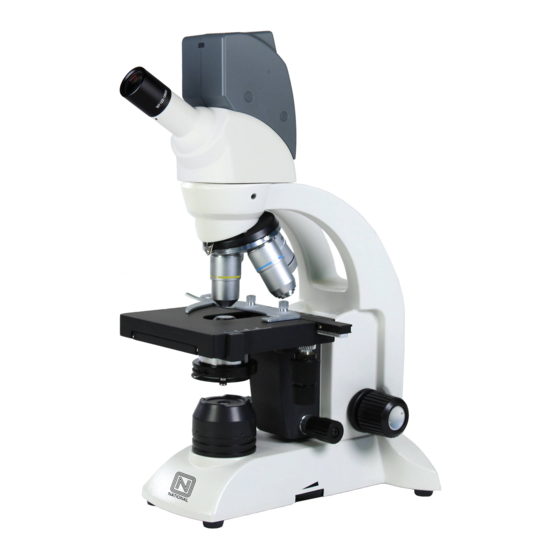
Retain the styrofoam container in case microscope must be transported or returned to factory for any reason. A. Microscope, with WF10x eyepiece, four objective lenses (DC4-212) three objective lenses (DC4-211), 1.25 N.A. Abbe condenser, and specimen holder already installed. -
Page 3: On/Off Switch
13. RHEOSTAT INTENSITY CONTROL: Controls illumination intensity. Always turn control to lowest intensity before turning microscope power on or off. This extends bulb life. 14. POWER CORD: Attached US 110V 60Hz, three prong UL approved power cord. 15. ON/OFF SWITCH: This turns microscope lamp on 16. -
Page 4: Mechanical Maintenance
National for “warranty repair”, make certain to examine the front lens element with a magnifying glass or eye loupe for the presence of such contaminants. If a microscope is returned to National for warranty repair, and it is determined that such contaminants are the problem, this is not covered under warranty and National will submit a cost estimate for cleaning. -
Page 5: Electrical Maintenance
The tension adjustment collar is located between arm and coarse focus knob on right side of microscope. Using a 0.9mm “L” type hex key wrench, loosen the socket set screw located in the hole on tension adjustment collar. Turn collar clockwise to tighten tension, counter-clockwise to loosen tension. Use of a wide rubberband will provide a better grip on the tension adjustment collar. - Page 6 MOTIC IMAGES SOFTWARE Full Help Menu The full software manual for Motic Images is accessible within the software’s main page. To begin, open the Motic Images Software. At the top of main screen find the menu tab labeled Help: ...
- Page 7 Motic Live Imaging Module Full Help Menu The full Live Imaging Module manual is accessible within the live Imaging main page. To begin, open the Motic Images Software. At the top of main screen find the menu tab labeled File and click on Capture: ...
- Page 8 Cleaning Your Microscope This microscope was designed to function with minimal maintenance, but certain components should be cleaned frequently to ensure ease of viewing. The power switch should be turned off or the microscope should be unplugged when not in use. Do not disassemble your microscope Disassembly may significantly affect the performance of the instrument, and may result in electric shock or injury and will void the terms of the warranty.
- Page 9 For objectives that work with immersion oil it is essential to clean them after each observation session. To clean use a cleaning cloth for lenses slightly dampened with a low graduation of alcohol. Proceed by cleaning the frontal objective lens (normally 100X-Oil or 50X-Oil). It is important for those objectives that work at a very close distance to the sample.
-
Page 10: Troubleshooting
TROUBLESHOOTING PROBLEM REASON FOR PROBLEM SOLUTION Light fails to operate. Outlet inoperative. Have qualified service technician repair outlet. AC power cord not connected. Plug into outlet. Lamp burned out. Replace lamp. Image does not remain in focus Stage of microscope drops from Adjust tension control.
Need help?
Do you have a question about the DC4-211 and is the answer not in the manual?
Questions and answers