Table of Contents
Advertisement
Quick Links
(For microscope operation only. Camera operation covered in separate
HOW TO USE YOUR MICROSCOPE SERIAL NUMBERS
1. Microscope serial number: This number (etched on inside of small ledge
immediately behind stage plate) is the number under which your warranty
is registered.
2. Microscope DM number: This number (found on a white sticker on the
bottom of the microscope) is used for logging on the Motic web site, which
gives you the ability to download free software upgrades. This number is
also used to register the software when loading on the computer for the
first time.
Copyright © 1/18/05
National Optical & Scientific Instrument Inc.
National Optical & Scientific Instrument Inc.
6508 Tri-County Parkway
Schertz, Texas 78154
Phone (210) 590-9010 Fax (210) 590-1104
INSTRUCTIONS FOR
MODEL DM-52
COMPOUND BIOLOGICAL MICROSCOPE
WITH DIGITAL CAMERA
supplement on disc.)
Advertisement
Table of Contents

Related Manuals for National DM-52


Summary of Contents for National DM-52
- Page 1 National Optical & Scientific Instrument Inc. 6508 Tri-County Parkway Schertz, Texas 78154 Phone (210) 590-9010 Fax (210) 590-1104 INSTRUCTIONS FOR MODEL DM-52 COMPOUND BIOLOGICAL MICROSCOPE WITH DIGITAL CAMERA (For microscope operation only. Camera operation covered in separate supplement on disc.) HOW TO USE YOUR MICROSCOPE SERIAL NUMBERS 1.
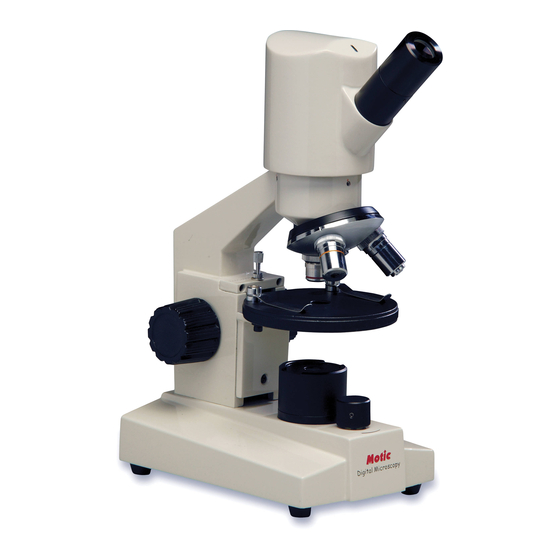
- Page 2 LED indicator light Eyepiece (ocular lens) Eyepiece tube Objective turret (nosepiece) Objective lens Safety rack stop Stage clips Rotating stage Focusing knob In stage lens LED illuminator On/Off switch with rheostat intensity control Rubber feet USB port DC recharging socket...
-
Page 3: Description Of Components
About the Digital Microscope The manual for your new digital microscope is in two parts. This first part describes the basic nomenclature and functions of the microscope, which can be used as a fully functional microscope, independent of the camera. The second part is the Motic Image Quick Start Guide located on you CD, which provides detailed documentation for installation and operation of the Motic software. -
Page 4: Operation
9. SAFETY RACK STOP: When properly adjusted, controls maximum upward travel of stage. Prevents higher power objectives from breaking specimen slides, prevents damage to objective lenses. This stop has been pre-adjusted at the factory. 10. FOCUSING KNOBS: Focusing knobs located on each side of arm, raise or lower stage to bring specimen image into focus. - Page 5 4. Rotate focus knobs to move stage down (away) from objective lenses as far as possible. 5. Turn the objective turret until the 4x (smallest) objective lens “clicks” into position in the optical path. Each time that you change from one objective lens to another you should turn the turret until you hear the “click”, which indicates that the lens is properly indexed in the optical path.
-
Page 6: Mechanical Maintenance
If a microscope is returned for warranty repair, and it is determined that such contaminants are the problem, this is not covered under warranty and National will submit a cost estimate for cleaning. 2. MECHANICAL MAINTENANCE A. -
Page 7: Troubleshooting
B. Replace batteries: Your microscope includes 3 rechargeable AA nickel metal hydride batteries. These may be recharged up to 500 times, but if you observe that a recharge is providing significantly less than 40 hours of operation it is probably time to replace batteries. a) Gently lay microscope on its side. -
Page 8: Optional Accessories And Parts
OPTIONAL ACCESSORIES AND PARTS: #610-106 WF10x eyepiece w/pointer #800-001 Replacement LED lamp #802-003 Replacement auto recharger (input 100-240 volts AC, output 4.5 volts DC) #975-001 Carrying case, anodized aluminum, fabric lining, accessory pocket. Interior dimension 14- 7/8 x 7-3/4 x 10-1/2 inches. WARRANTY –...
Need help?
Do you have a question about the DM-52 and is the answer not in the manual?
Questions and answers