Table of Contents
Advertisement
Advertisement
Table of Contents

Related Manuals for Liquid Controls M Series


Summary of Contents for Liquid Controls M Series
-
Page 2: Table Of Contents
Table of Contents Resources in this Guide ....................3 Publication Updates ..................... 3 Safety Procedures ....................... 4 Owner Information Packet ................... 6 Serial Plate Locations ....................8 Installation & Operation ....................9 How LC Meters Work ....................10 Installation Requirements ..................12 Operation Requirements .................. -
Page 3: Resources In This Guide
This manual provides warnings and procedures that are intended to inform the owner and/or operator of the hazards present when using the Liquid Controls Meter on LP gas and other products. The reading of these warnings and the avoidance of such hazards is strictly in the hands of the owner-operators of the equipment. -
Page 4: Safety Procedures
M & MA Series Meters Phone: +1 847 295-1050 Toll-free: 800 458 5262 Address: Liquid Controls LLC, 105 Albrecht Drive, Lake Bluff, IL 60044 USA Website: www.LCmeter.com Safety Procedures BE PREPARED · Before using this product, read and understand the instructions. - Page 5 M & MA Series Meters Failure to follow this warning could result in property damage, personal injury, or death from fire and/or explosion, or other hazards that may be associated with this type of equipment. OBSERVE NATIONAL & LOCAL CODES Power, input, and output (I/O) wiring must be in accordance with the area classification for which it is used (Class I, Div 2).
-
Page 6: Owner Information Packet
Please have the following information available when you make inquiries, order replacement parts, or schedule service. If a specific meter accessory is involved, please provide the model and serial number of the accessory in question. Liquid Controls recommends that you record the following: · The Serial Number of your meter: _______________________________________ ·... - Page 7 Check your red Owner Information Packet against the diagrams below to make sure that all the documentation needed for your meter and accessories is included in your packet. If any documentation is missing, contact your full-service distributor or Liquid Controls. Or, visit www.lcmeter.com where you can find the most up-to-date LC literature.
-
Page 8: Serial Plate Locations
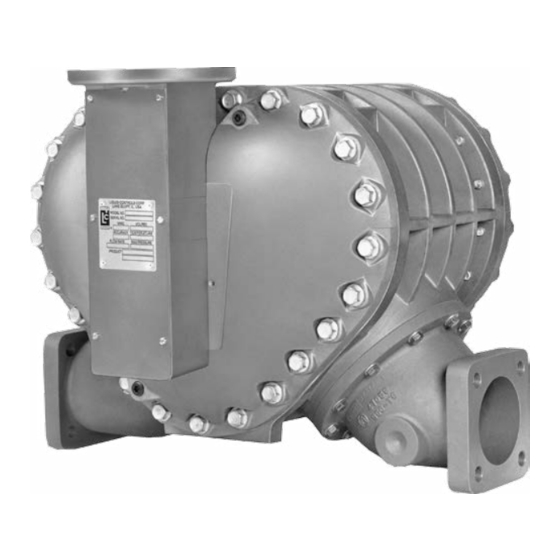
M & MA Series Meters Serial Plate Locations Components not pictured For components not pictured, refer to the components manual if you can't find the Serial Number Plate on the component. https://www.lcmeter.com/resources/technical/manuals Get the latest PDF manual: https://www.lcmeter.com/manuals Mobile/online version of this manual:... -
Page 9: Installation & Operation
M & MA Series Meters Installation & Operation Check Each Shipment Before installation, check your shipment against the packing list and ensure that no parts are missing. The packing list is inside the information packet. This chapter includes the following topics: ·... -
Page 10: How Lc Meters Work
Setting the Standard Adjuster How LC Meters Work Liquid Controls meters are positive displacement meters. They are designed for liquid measurement in both custody-transfer and process-control applications. They can be installed in pump or gravity flow systems. Because of their simple design, they are easy to maintain, and easy to adapt to a variety of systems. - Page 11 Once again, no wear results means no metal fatigue and no friction. Liquid Controls meters are made of a variety of materials to suit a variety of products. Because of their no-wear design, capillary seals, and unique rotary metering, LC meters provide unequalled accuracy, long operating life, and exceptional dependability.
-
Page 12: Installation Requirements
READ PROVIDED LITERATURE – Read this manual as well as all the literature provided in your red Owner Information Packet. If you have any questions, consult with your full- service distributor or call the Service Department at Liquid Controls. ·... - Page 13 M & MA Series Meters · FLUSH PIPING – Prior to meter installation, the entire piping system should be thoroughly flushed of all debris with a liquid that is compatible with the construction of the meter. · KEEP EXTERNAL SURFACES OF THE METER CLEAN ·...
-
Page 14: Operation Requirements
M & MA Series Meters meters equipped with a pulser or an electronic register, refer to the manual of the electronic component. · USE CURRENT ENGINEERING DRAWINGS – Always request up-to-date, engineering approved, dimensional drawings before starting any construction. Do not rely on catalog pictures or drawings. - Page 15 M & MA Series Meters - Chapter 4 - Proving Systems - Chapter 5 - Metering - Chapter 6 - Metering Assemblies - Chapter 11 Section 2.3 - Water Calibration of Volumetric Provers - Chapter 12 Section 2 - Calculation of Petroleum Quantities ·...
-
Page 16: Meter Start Up And Operation
M & MA Series Meters Meter Start Up and Operation Before continuing to the procedures below, it's important to heed the following cautions and warnings. Dead Head Pressure - Pumps Make sure that your pump can operate against a dead-head pressure situation. If not, consult the factory for assistance. - Page 17 M & MA Series Meters ratings. If the meter is installed in a custody transfer application (for financial transactions), the flow rate must fall within flow rate range indicated on the serial number plate. A meter should never be run beyond the maximum flow rate determined for that class meter and/or liquid measured.
-
Page 18: Reversing The Meter Registration
M & MA Series Meters 6. Once the product is flowing out of the end of your system, the outlet valve can be opened all the way, provided that the system is designed not to exceed the flow rate marked on the meter. - Page 19 M & MA Series Meters Refer to the figures below and follow this procedure to reverse the meter registration: 1. Remove the dust cover. See the Removing the Dust Cover procedure in Servicing the Drive Components 2. Remove the retaining ring (4) with a screwdriver or pliers. 3.
-
Page 20: Setting The Standard Adjuster
M & MA Series Meters Setting the Standard Adjuster Mechanical Instructions Only These instructions apply to meters equipped with mechanical output accessories only. If your meter is equipped with an electrical output (i.e., electronic pulser), refer to the manual for the electrical component your Owner Information Packet. -
Page 21: Maintenance
M & MA Series Meters 8. Retighten the adjuster clamp screw. Run product through the meter to allow the adjuster to take a set. Then make several prover runs to check for accuracy. Maintenance This chapter includes the following topics: ·... -
Page 22: Maintenance Requirements
For applicable safety rules, refer to local authorities and relevant NFPA Codes. DISCLAIMER Liquid Controls disclaims all liability for damage to meter or accessories because of corrosion, salting out of product, or separation of chemicals whether occurring during periods of use or storage. -
Page 23: Servicing The Drive Components
M & MA Series Meters meter immediately with a compatible liquid (or oil misting). Refilling is essential to preventing corrosion and ice damage that can result from any moisture that was overlooked after flushing and drying. · DO NOT MAR OR SCRATCH – Do not mar or scratch any of the precision machined surfaces by prying or sanding parts. - Page 24 M & MA Series Meters RELIEVING INTERNAL PRESSURE All internal pressure must be relieved to zero pressure before disassembly or inspection of the strainer, vapor eliminator, any valves in the system, the packing gland, and the front or rear covers. Serious injury or death from fire or explosion could result in performing maintenance on an improperly depressurized and evacuated system.
- Page 25 M & MA Series Meters 2. Remove the dust cover screws with a 5/16" wrench or slotted screwdriver. 3. Remove the dust cover. Servicing the Adjuster and Adjuster Drive Assembly Remember to Reassemble to the Original Position Make sure to return the adjuster drive gear to its original position when reinstalling or the meter counter will run backwards.
- Page 26 M & MA Series Meters 3. Swing the retaining spring off the adjuster drive bushing. 4. Loosen the adjuster mounting clamp screw with a Phillips head screwdriver. 5. Remove the adjuster from the top of the meter by: - Removing screws that secure adjuster mounting plate to counter adapter. - Lifting adjuster mounting bracket with the adjuster out of the counter adapter.
- Page 27 M & MA Series Meters Servicing the Packing Gland After prolonged use, the packing gland may show leakage from the metering chamber. Leakage is a sign of wear, resulting from the type of product being metered, the operating temperature, and other system conditions. If the packing gland shows leakage, it should be replaced or repaired.
- Page 28 M & MA Series Meters Remove the Packing Gland Follow this procedure to remove the packing gland: 1. Remove the two screws on the packing gland retaining plate with a 5/16” socket and ratchet drive extension or 5/16” nut driver. 2.
-
Page 29: Disassembling The Meter
M & MA Series Meters Disassembling the Meter This topic explains how to disassemble the Meter, including how to: · Remove non-corroded rotor gears · Remove corroded rotor gears · Remove the bearing plates and rotors Follow this procedure to begin disassembling the Meter: 1. - Page 30 M & MA Series Meters 4. Use a socket wrench or box end wrench to remove the screws securing the front cover. Remove the screws that hold the rear cover. The number of screws will vary depending on meter size. 5.
- Page 31 M & MA Series Meters 7. Use the rotor gear wrench (or a socket driver) to remove the right displacement rotor gear screw and washer. Hold a spare displacement rotor gear between the right displacement rotor gear and the blocking rotor gear to keep them from turning (if unavailable, use a shop rag between gear teeth).
- Page 32 M & MA Series Meters the blocking rotor gear. Removing Non-Corroded Rotor Gears Follow this procedure to remove non-corroded gears: 1. Insert two standard screwdrivers behind the blocking rotor gear: Gently pry the gear off its rotor tapered end. If the gears show signs of corrosion, or do not pry off easily, see To remove corroded rotor gears: below.
- Page 33 M & MA Series Meters 4. Use the bearing plate wrench (or a socket driver) to remove the screws that hold the front bearing plate to the meter housing. 5. Remove the screws that hold the rear bearing plate to the housing. Removing Corroded Rotor Gears Follow this procedure to remove corroded gears: 1.
- Page 34 M & MA Series Meters 3. With a plastic or non-metallic mallet, tap on the heads of the screws on the rotor ends lightly and equally, slowly driving the rotors off of the rotor gears. As you tap on the screws, the rear bearing plate and the rotor assembly will separate from the housing.
- Page 35 M & MA Series Meters Remove the Bearing plates and Rotors Avoid scratching, defacing, or marring any surfaces Be careful not to mar or alter the shape of any of the parts. Changing the shape of the parts may interfere with their operation.
-
Page 36: Reassembling The Meter
M & MA Series Meters NOTE: MA-4®, M-5®, and MA-5® old style models, M-60® and M-80® current models have a driven reduction gear attached by a shoulder bolt in the center of the front. 4. Inspect and clean all critical surfaces: gear teeth, rotors, and internal housing faces. 5. - Page 37 M & MA Series Meters 2. Insert the non-tapered ends of the three rotors into the housing and onto its respective bore of the installed bearing plate. NOTE: For MA-4®, M-5®, and MA-5® old style models, M-60® and M-80® current models, make sure that the teeth of the driving reduction gear mesh with the teeth of the driven reduction gear.
- Page 38 M & MA Series Meters Timing the rotor gears Before putting the meter into service, the rotors must be timed. Rotors are timed by lining up timing marks stamped onto the face of the gears. The timing mark on the blocking rotor gear is stamped on a gear tooth.
- Page 39 M & MA Series Meters 3. Position the spare displacement rotor gear between the left displacement rotor gear and the blocking rotor gear to prevent the gears from moving. Attach the right displacement gear washer and screw using the rotor gear wrench. 4.
- Page 40 Completing the Meter Reassembly Tightening Front and Rear Covers For step 2 in the following procedure, Liquid Controls recommends tightening the front and rear cover screws in a criss-cross or “star” pattern with a minimum of two passes. First pass should be at half- torque.
- Page 41 M & MA Series Meters 9. Screw the packing gland retaining plate onto the counter bracket using the two retaining plate screws. See Servicing the Packing Gland in Servicing the Drive Components more information. 10.Return the adjuster drive gear (14), the adjuster drive shaft (15), and the drive shaft bushing (16) to the inside of the counter bracket.
- Page 42 M & MA Series Meters Torque Chart Torque Pattern M-7® Front and Rear Cover https://www.lcmeter.com/resources/technical/manuals Get the latest PDF manual: https://www.lcmeter.com/manuals Mobile/online version of this manual:...
- Page 43 M & MA Series Meters Wrench and Socket Size Chart ROTOR GEAR SCREWS It's important to apply these techniques when repairing meters in the field: 1. Prior to installation, apply a small amount of Locquic Primer N764 to each screw. 2.
-
Page 44: Troubleshooting
M & MA Series Meters Troubleshooting PROBLEM PROBABLE CAUSE & SOLUTION Leakage past packing gland Internal seal of packing gland assembly is worn. Replace packing gland and O-ring seal. drive shaft housing from internal metering chamber OPERATING NOTES: · Two common causes of packing gland leakage are thermal expansion and hydraulic shock. - Page 45 M & MA Series Meters are of a magnitude that preclude the elimination of hydraulic shock with the use of a two-stage slow closing valve, an impact-absorbing air cushioning device can be added to further dampen hydraulic shock. Leakage from the cover Gasket has been damaged due to shock pressure or cover bolts have not been tightened sufficiently.
- Page 46 M & MA Series Meters Product flows through meter This may result from the following: but register does not record · Adjuster not properly calibrated. correctly · Incorrect gear plate or gear ratio has been installed. · Air is in the system. No flow through meter This may result from the following: ·...
-
Page 47: How To Order Replacement Parts
M & MA Series Meters How to Order Replacement Parts Follow this procedure to order replacement parts: 1. Refer to the exploded view drawings in Bill of Materials. Find the four-digit item number of the part that needs replacement. Item numbers can be seen on each of the exploded drawings.
Need help?
Do you have a question about the M Series and is the answer not in the manual?
Questions and answers