Table of Contents
Advertisement
Available languages
Available languages
Quick Links
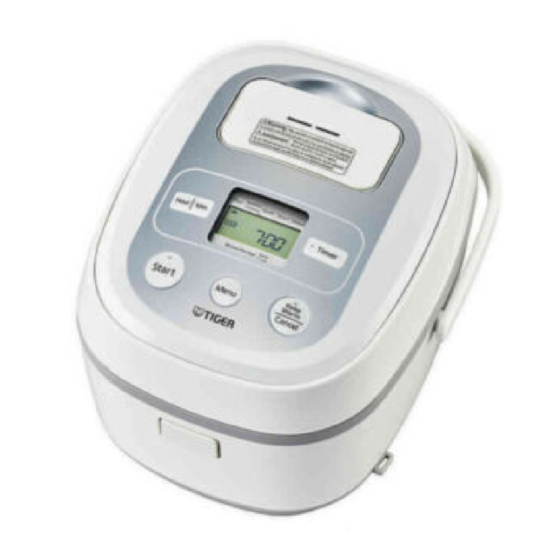
JBX-B10W
JBX-B18W
For household use
Rice Cooker / Warmer
OPERATING INSTRUCTIONS
Thank you for purchasing this TIGER rice cooker/warmer.
Please read these instructions carefully before use and observe them during use.
Sử dụng trong gia đình
Nồi cơm Điện tử
HƯỚNG DẪN SỬ DỤNG
Vui lòng đọc và tuân thủ những hướng dẫn này một cách thận trọng trước khi sử dụng.
JBX-B
フィリピン向け
Dành cho Việt Nam
Advertisement
Chapters
Table of Contents

Related Manuals for Tiger JBX-B Series


Summary of Contents for Tiger JBX-B Series
- Page 1 For household use JBX-B18W Rice Cooker / Warmer OPERATING INSTRUCTIONS Thank you for purchasing this TIGER rice cooker/warmer. Please read these instructions carefully before use and observe them during use. Sử dụng trong gia đình Nồi cơm Điện tử HƯỚNG DẪN SỬ DỤNG Vui lòng đọc và...
- Page 2 IMPORTANT SAFEGUARDS When using the appliance, basic safety precautions should always be followed including the following: 1. Read all instructions. 2. Do not touch hot surfaces. Use handles or knobs. 3. To protect against electrical shock, do not immerse cord or plug in water or other liquid. 4.
-
Page 3: Table Of Contents
Setting the current time .................... 41 ......................42 When a power outage occurs or the appliance plug is disconnected ....42 Purchasing consumables and optional accessories ..........42 Warranty on Tiger Microcomputer Controlled rice cooker ......... 86 Free-of-charge repair (Replacement*) policy ............... 87... -
Page 4: Important Safeguards
Important Safeguards Read and follow all safety instructions before using the rice cooker. • The WARNINGS and CAUTIONS described below are intended to protect the user and other individuals from physical and property damage. To ensure safety, please follow them carefully. •... - Page 5 WARNING Keep the appliance plug out of the Do not expose the power plug to reach of small children. steam. Do not allow them to place the appliance Doing so may cause electric shock or plug in their mouths. fi re. When using the rice cooker on a Doing so may cause electric shock, sliding table, be careful not to expose short circuits, or fi re.
- Page 6 Important Safeguards WARNING Stop using the rice cooker Do not use the rice cooker on a immediately in case of any sliding tabletop that does not have malfunction or failure. sufficient load bearing capacity. Using the rice cooker with a problem Otherwise, the rice cooker may fall, may cause fire, electric shock, or injury.
- Page 7 CAUTION Do not touch high-temperature Do not wash the entire rice cooker. surfaces during or immediately after Do not wash the main body or pour cooking. water into the main body or the base. Doing so may cause burns. Doing so may cause short circuits and Do not touch electric shock.
- Page 8 Important Safeguards „ Follow the safety instructions ● Strictly observe the following instructions to in order to use your rice cooker keep the fluorocarbon resin coating of the inner safely for many years. pot from becoming scratched, deformed, or peeling. ●...
-
Page 9: Names And Functions Of Component Parts
Names and Functions of Component Parts Steam vent Steam cap Inner lid button Inner lid gasket It is not removable. Do not attempt to remove it. (See P.31 to 32.) Heating plate Lid gasket It is not removable. Lid sensor Do not attempt to remove it. - Page 10 Names and Functions of Component Parts Operation panel Display Displays the symbol (menu cursor) and the current time, etc. Timer lamp [Hour] and [Min] keys Lit or blinks when the Used to set the current time and the time under Timer function is set.
-
Page 11: Menu Options And Features
Menu options and features Keep Timer Warm Menu function Feature function availability availability Plain Cooks white rice (long-grain rice). Synchro-Cooking – * Cooks rice and side dishes together using the cooking plate. Quick – Quickly cooks white rice (long-grain rice). ... -
Page 12: Tips On Making Delicious Rice
Read P.14 to15 for preparations before cooking rice and P.16 to 20 for Tips on making delicious rice how to cook rice. Select quality rice and a good storage • Add water prior to adding the ingredients. Adding water after the ingredients results in the location. - Page 13 Cooking semi-polished rice, whole rice, Cooking short-grain rice barley rice, germinated brown rice, or • When cooking short-grain rice, select the “Short” multigrain menu. When cooking seasoned rice with various ingredients using short-grain rice, select the • Select the “Short” menu. “Mixed”...
-
Page 14: Before Cooking Rice
Before Cooking Rice Measure the rice. Adjust the water level. Be sure to use the supplied measuring cup. Place the inner pot on a level surface and Filling the supplied measuring cup until it is adjust the water level to the appropriate line level provides approximately one cup of rice of the corresponding scale on the inside of (approx. - Page 15 Connect the power cord. Caution ● Be sure to remove any cooked rice or grains of rice on and around the heater plate, center (1) Insert the plug. sensor, lid sensor, upper casing, and hook catch. (See P.31.) Any rice that is not removed can prevent the lid from closing, allow steam to leak out during Appliance plug cooking, or enable the lid to open and the...
-
Page 16: How To Cook Rice
How to Cook Rice Press the [Menu] key to move Press the [Start] key. to the desired menu. The Start lamp lights up. Cooking starts. Each time the [Menu] key is pressed, the The rice cooker makes one short and one selected menu changes in the order shown long beep when the “Plain”... -
Page 17: Cooking Time Guidelines
Cooking time guidelines Menu Plain Synchro-Cooking Quick Short Unit size 1.0 L (5.5-cup) type 32 to 43 min 37 to 48 min 24 to 36 min 43 to 58 min 1.8 L (10-cup) type 32 to 46 min 46 to 58 min 24 to 42 min 44 to 59 min Menu... -
Page 18: Once Rice Is Finished Cooking
Once Rice Is Finished Cooking Stir and loosen the cooked rice. begins, the remaining time is Stir and loosen the rice as soon as cooking is displayed. complete. • Use an oven mitt, etc. to hold the inner pot. The time until steaming is completed is shown on the display in units of 1 minute. -
Page 19: Using The Timer Function
Using the Timer Function Press the [Menu] key to select the desired menu. symbol blinks while the menu is being selected. 4 • 6 Blinks Timer function You can preset the time that you want cooking to be actually completed. •... - Page 20 Using the Timer Function Press the [Timer] key. Use the [Hour] and [Min] keys to set the desired completion time. The Timer lamp blinks. Press the [Hour] key to set the time in units of 1 hour and the [Min] key to set it in units of 10 Blinks Blinks minutes.
-
Page 21: Keeping Rice Warm
Keeping Rice Warm „ Elapsed Keep Warm time display The taste and gloss of white rice (rinse-free rice) can be maintained. Hold down the [Hour] key to display the elapsed The rice cooker automatically switches to the Keep Keep Warm time while the Keep Warm function is Warm setting when cooking is completed. -
Page 22: Cooking Rice And Side Dishes Together
Cooking Rice and Side Dishes Together You can use the cooking plate to cook side dishes To enjoy various concurrent cookings described in the supplied COOKBOOK at the same time as you cook rice. Precautions for ingredients to be placed in See the supplied COOKBOOK for directions. - Page 23 Prepare ingredients and place Connect the power cord. them in the cooking plate. • Spread the ingredients entirely across the cooking plate instead of stacking them on top of (1) Insert the plug. each other. Doing so may cause the contents to boil over or result in improperly cooked rice.
- Page 24 Cooking Rice and Side Dishes Together Press the [Start] key. Remove the cooking plate and stir and loosen the rice. The Start lamp lights up and concurrent cooking starts. Note ● Do not leave the cooking plate in the rice cooker while the Keep Warm function is on.
-
Page 25: Slow Cooking
Slow Cooking Connect the power cord. You can prepare soup and simmered dishes with ease. See the supplied COOKBOOK for directions. Note Food is first brought to near boiling and the heat is then lowered for simmering. The temperature is ●... - Page 26 Slow Cooking Press the [Start] key. Note The Start lamp lights up and cooking starts. ● If a longer cooking time is required, do not press “Ready in” is shown on the display. the [Keep Warm/Cancel] key before extending the cooking time. Doing so causes the Keep Warm lamp to turn off and additional cooking cannot be performed.
-
Page 27: Steaming Food
Steaming Food You can also perform steam cooking by adding Use the [Menu] key to select the water to the inner pot without making rice. “Slow Cook” menu. Add ingredients to the cooking symbol blinks while the menu is being selected. - Page 28 Steaming Food Remove the cooking plate. Note ● Do not open the lid during cooking. Doing so may prevent the food from cooking properly. Once the steaming is completed, the rice cooker beeps 8 times (long beeps) (the Start lamp turns off). The Keep Warm lamp lights up and “0h”...
- Page 29 „ Guidelines for steaming times Ingredients Amount Approx. time Tips for steaming Make a few small slits in the surface Chicken 1 fillet (200 to 300 g) 25 to 30 min of the chicken. Fillet to a thickness of 2cm or less. White fish 2 to 3 fillets (150 to 200 g) 20 to 25 min...
-
Page 30: Cleaning And Maintenance
Cleaning and Maintenance Any other servicing should be performed by an authorized service representative. To maintain cleanliness, be sure to clean the rice cooker on the same day it is used. The rice cooker should also be cleaned on the day that it is used in order to remove any odors that remain from cooking food. - Page 31 The steam cap can be rinsed. (1) Clean with a soft sponge and with tap or lukewarm water. (2) Immediately wipe off water using a dry cloth and completely dry it. Note ● Avoid the following, as the steam cap may become deformed. •...
- Page 32 Cleaning and Maintenance Power cord Wipe it using a dry cloth. Note ● Do not immerse the power cord in or splash it with water. Doing so may cause short circuits, electric shock, or malfunction. Removing and attaching the inner lid Removing the inner lid Inner lid button Lift the inner lid button and...
- Page 33 Removing and attaching the steam cap „ Removing the steam cap (1) Insert your fingers into the indentation in (3) Lift and remove the cap unit from the cap lid. the lid and lift and remove the steam cap. Steam cap Note Note ●...
- Page 34 Cleaning and Maintenance Cleaning the heater plate Water drops may fall from the lid during cooking and cause the surface of the heater plate to become dirty. This does not affect the performance of the rice cooker, however, you can clean the heater plate according to the following procedure if necessary.
-
Page 35: If Rice Does Not Cook Properly
If Rice Does Not Cook Properly Check the following if you experience a problem with the cooked rice or with the operation of the rice cooker, etc. Check point Problem Too hard Too soft ... - Page 36 If Rice Does Not Cook Properly Problem Cause There is a thin film covering A thin, tissue-like film is formed by melted and dried starch. This is not harmful to your the rice. health. Rice sticks to the inner pot. Soft rice and sticky rice can easily stick to the pot.
-
Page 37: If Synchro-Cooking Does Not Work As Expected
If Synchro-Cooking Does Not Work As Expected Check the following when you experience a problem with food cooked concurrently using the cooking plate. Check point Problem Too hard Too soft Not cooked ... -
Page 38: If Food Is Not Cooked Or Steamed As Expected
If Food Is Not Cooked or Steamed as Expected Check the following if you experience a problem with the cooked food. Check point Problem Does not boil Boils over ... -
Page 39: Troubleshooting
Troubleshooting Check the following before requesting repairs. Reference Symptom Check point Action page The rice is not cooked at all. Is the appliance plug properly Be sure to connect the appliance The food is not cooked at all. connected to the appliance plug inlet plug to the appliance plug inlet and of the rice cooker and the power the power plug to an outlet. -
Page 40: If This Indication Appears
Troubleshooting Reference Symptom Check point Action page Condensation collects in the upper Condensation may collect in the upper casing immediately after rice is casing. cooked or while the Keep Warm function is on but it is not a malfunction. Wipe the upper casing using a dry cloth when condensation collects. Nothing happens when a key is Is the appliance plug properly Be sure to connect the appliance... -
Page 41: Setting The Current Time
Setting the current time The current time is displayed in a 24-hour format. The rice cooker has a built-in lithium battery, and it can store the current time and preset timer settings and elapsed Keep Warm time even with the power plug disconnected. -
Page 42: When A Power Outage Occurs Or The Appliance Plug Is Disconnected
Unit size 1,0 L (5.5-cup) type 1,8 L (10-cup) type Power source 220V 50 Hz Rated power (W) Plain 0,18 to 1.0 (1 to 5,5 cups) 0,36 to 1,8 (2 to 10 cups) Synchro-Cooking 0,18 to 0,36 (1 to 2 cups) 0,36 to 0,72 (2 to 4 cups) Quick 0,18 to 1,0 (1 to 5,5 cups) -
Page 43: Warranty On Tiger Microcomputer Controlled Rice Cooker
Free-of-charge repair (Replacement*) policy ............... 43 Mua linh kiện thay thế và các phụ kiện tùy chọn ..............82 Bảo hành đối với nồi cơm điện tử Tiger ..................86 Chính sách sửa chữa (thay thế*) miễn phí ................. 87 フィリピン向け... -
Page 44: Nội Dung
Các biện pháp an toàn quan trọng Hãy đọc và tuân thủ tất cả các hướng dẫn an toàn trước khi sử dụng nồi cơm điện. • Các mục CẢNH BÁO và THẬN TRỌNG được mô tả bên dưới đều nhằm để bảo vệ người dùng và những người khác khỏi các tổn thương về... - Page 45 CẢNH BÁO Hãy giữ phích cắm thiết bị điện tránh xa Không để phích cắm dính hơi nước. tầm tay của trẻ nhỏ. Làm vậy có thể gây điện giật hoặc cháy nổ. Không để trẻ đưa phích cắm thiết bị lên miệng. Khi sử...
- Page 46 Các biện pháp an toàn quan trọng CẢNH BÁO Không sử dụng nồi cơm điện trên mặt bàn Dừng sử dụng nồi cơm ngay lập tức khi trượt không thể chịu được trọng lượng của có trục trặc hay sự cố. nồi.
- Page 47 THẬN TRỌNG Không rửa toàn bộ nồi cơm điện. Không chạm vào các bề mặt nóng trong Không rửa thân nồi đổ nước vào thân nồi hoặc ngay sau khi nấu xong. hoặc dội nước lên đáy nồi; Làm vậy có thể Làm như...
- Page 48 Các biện pháp an toàn quan trọng Tuân thủ các hướng dẫn an toàn này sẽ ● Tuân thủ đúng theo các hướng dẫn sau để giữ cho giúp bạn sử dụng nồi cơm điện một cách an toàn trong nhiều năm. không bị...
-
Page 49: Tên Và Chức Năng Của Các Bộ Phận Cấu Tạo
Tên và chức năng của các bộ phận cấu tạo Lỗ thoát hơi Nắp hơi Ron cao su nắp Nút nắp trong trong Không thể tháo rời Nắp lớp ron này. Không cố gắng tháo ra. (Xem Trang 71-72.) Ron cao su Mâm nhiệt Không thể... - Page 50 Tên và chức năng của các bộ phận cấu tạo Tên và chức năng của các bộ phận cấu tạo Bảng điều khiển Bảng điều khiển Màn hình Màn hình Màn hình Hiển thị biểu tượng (con trỏ menu) Hiển thị biểu tượng (con trỏ...
-
Page 51: Các Tùy Chọn Và Tính Năng Của Menu
Các tùy chọn và tính năng của menu Chức năng Chức năng hẹn giờ Giữ ấm Menu Tính năng sẵn có sẵn có Plain Chọn khi nấu gạo trắng (gạo hạt dài). Synchro-Cooking – Chọn khi sử dụng khay nấu để nấu cơm và các món ăn với nhau. ... -
Page 52: Mẹo Để Nấu Cơm Ngon
Đọc Trang 54-55 để biết cách chuẩn bị Mẹo để nấu cơm ngon trước khi nấu cơm, và Trang 56-60 để biết cách nấu cơm. Chọn loại gạo chất lượng cao và cất giữ • Đổ thêm nước trước khi bỏ thêm các nguyên liệu khác vào gạo. - Page 53 Nấu gạo nguyên cám, gạo nguyên hạt, Nấu gạo hạt ngắn gạo lúa mạch, gạo lứt nảy mầm hoặc gạo • Khi nấu gạo hạt ngắn, hãy chọn menu “Short”. Khi ngũ cốc nấu xôi với nhiều nguyên liệu khác nhau và gạo hạt •...
-
Page 54: Trước Khi Nấu Cơm
Trước khi nấu cơm Đong gạo. Điều chỉnh mực nước. Luôn dùng cốc đong gạo được cung cấp kèm theo Đặt ruột nồi bên trong lên một mặt phẳng cân bằng nồi cơm điện. Mỗi vạch đong gạo trên cốc đong và... - Page 55 Kết nối dây điện. Thận trọng ● Hãy chắc chắn đã vét hết toàn bộ cơm cũ hoặc hạt gạo dính trên và xung quanh mâm nhiệt, cảm biến (1) Cắm phích cắm điện (1) Ổ cắm thiết bị trung tâm, cảm biến nắp nồi, khung trên và nút gài. (Xem Trang 71.) Hạt cơm chưa được lấy ra có...
-
Page 56: Cách Nấu Cơm
Cách nấu cơm Nhấn nút [Menu] để chọn menu Nhấn nút [Start]. mong muốn. Đèn Khởi động sẽ bật sáng. Quá trình nấu sẽ bắt đầu. Mỗi lần nhấn nút [Menu], thì menu được chọn Nồi cơm điện sẽ phát ra tiếng bíp một ngắn, một dài sẽ... -
Page 57: Hướng Dẫn Về Thời Gian Nấu
Hướng dẫn về thời gian nấu Menu Plain Synchro-Cooking Quick Short Kích thước đơn vị Loại 1,0 L (5,5 cốc) 32-43 phút 37-48 phút 24-36 phút 43-58 phút Loại 1,8 L (10 cốc) 32-46 phút 46-58 phút 24-42 phút 44-59 phút Menu Mixed Brown... -
Page 58: Khi Cơm Được Nấu Xong
Khi cơm được nấu xong Khi quá trình hấp cuối cùng Xới cơm đã chín. bắt đầu, thì thời gian còn lại Luôn xới cơm ngay khi nấu xong. sẽ được hiển thị. • Luôn mang găng tay nấu bếp, v.v. để giữ ruột nồi. Thời gian cho đến khi hấp xong sẽ... -
Page 59: Cài Đặt Hẹn Giờ
Cài đặt Hẹn giờ Nhấn nút [Menu] để chọn menu mong muốn. Biểu tượng sẽ nhấp nháy khi menu đang được chọn 4 • 6 Nhấp Nhấp nháy Chức năng Hẹn giờ Bạn có thể đặt trước thời gian mà bạn muốn quá •... - Page 60 Cài đặt Hẹn giờ Cài đặt Hẹn giờ [Timer]. Cài đặt Hẹn giờ Sử dụng các nút [Hour] và [Min] [Timer]. để đặt thời gian hoàn thành Đèn Hẹn giờ sẽ nhấp nháy. mong muốn. Đèn Hẹn giờ sẽ nhấp nháy. Nhấp Nhấp nháy Nhấn nút [Hour] để...
-
Page 61: Hâm Nóng Cơm
Hâm nóng cơm Màn hình hiển thị Thời gian Giữ Hương vị và độ bóng của gạo trắng (gạo không cần vo) có thể được giữ nguyên. ấm đã trôi qua Nồi cơm điện sẽ tự động chuyển sang chế độ Nhấn giữ... -
Page 62: Nấu Cơm Và Các Món Ăn Đồng Thời
Nấu cơm và các món ăn đồng thời Bạn có thể sử dụng khay nấu để nấu các món ăn đồng thời được mô tả trong SÁCH NẤU ĂN cung cấp kèm theo Để thưởng thức nhiều món ăn đồng thời khi bạn đang nấu cơm. - Page 63 Chuẩn bị nguyên liệu và đặt Kết nối dây điện. chúng vào khay nấu. • Trải đều toàn bộ nguyên liệu trên khay nấu (1) Ổ cắm thiết bị (1) Cắm phích cắm điện. thay vì xếp chúng lên nhau. Làm như vậy có thể...
- Page 64 Nấu cơm và các món ăn đồng thời Nhấn nút [Start]. Lấy khay nấu ra và xới đều cơm. Đèn Khởi động sáng lên và bắt đầu nấu đồng thời. Bật Bật Lưu ý ● Không để khay nấu trong nồi cơm điện khi chức năng Giữ...
-
Page 65: Nấu Chậm
Nấu chậm Kết nối dây điện. Bạn có thể chuẩn bị nấu súp và các món sắp sôi một cách dễ dàng. Xem SÁCH NẤU ĂN được cung cấp kèm theo để biết hướng dẫn. Lưu ý Thức ăn sắp sôi và nhiệt sau đó được hạ xuống để đun sôi. - Page 66 Nấu chậm Nhấn nút [Start]. Lưu ý Đèn sáng lên và bắt đầu quá trình nấu. " Sẵn sàng" được hiển thị trên màn hình. ● Nếu cần thời gian nấu lâu hơn, không nhấn nút [Keep Warm/Cancel] trước khi tăng thời gian nấu. Làm như vậy sẽ...
-
Page 67: 10 Hấp Thức Ăn
Hấp thức ăn Sử dụng nút [Menu] để chọn menu Bạn cũng có thể thực hiện nấu bằng hơi nước bằng Bạn cũng có thể thực hiện hấp thức ăn bằng cách cách thêm nước vào nồi trong mà không làm cơm. “Slow Cook”. - Page 68 Hấp thức ăn Lấy khay nấu ra Lưu ý ● Không mở nắp trong khi nấu. Làm như vậy có thể khiến thực phẩm không chín. Sau khi hoàn tất quá trình hấp, nồi cơm điện sẽ phát ra tiếng bíp 8 lần (tiếng bíp dài) (đèn khởi động sẽ...
- Page 69 Hướng dẫn về thời gian hấp Nguyên liệu Số lượng Thời gian ước tính Mẹo hấp Khía một vài khe nhỏ trên bề mặt Gà 1 miếng phi lê (200-300 g) 25-30 phút miếng gà. Miếng phi-lê với độ dày 2cm hoặc ít Cá...
-
Page 70: 11 Vệ Sinh Và Bảo Dưỡng
Vệ sinh và bảo dưỡng Việc sửa chữa phải được thực hiện bởi đại diện trung tâm dịch vụ được ủy quyền. Để giữ sạch sẽ, hãy đảm bảo vệ sinh nồi cơm điện trong cùng ngà sử dụng Cần vệ sinh nồi cơm điện ngay trong ngày sử dụng để loại bỏ toàn bộ mùi còn sót lại từ quá trình nấu thức ăn hoặc hoặc làm bánh ( Xem trang 74) Lưu ý... - Page 71 Có thể rửa nắp hơi. (1) Vệ sinh bằng miếng mút mềm dưới vòi hoặc nước âm ấm. Ngay lập tức lau sạch nước bằng vải khô và Lau khô ngay lập tức bằng vải khô và lau khô lau khô hoàn toàn. hoàn toàn Lưu ý...
- Page 72 Vệ sinh và bảo dưỡng Dây điện Lau sạch bằng vải khô. Lưu ý ● Không ngâm dây điện vào nước hoặc làm bắn nước lên dây điện. Làm như vậy có thể gây ngắn mạch, điện giật hoặc hỏng hóc. Tháo và...
- Page 73 Tháo và gắn nắp hơi Tháo nắp hơi nước (1) Đưa ngón tay của bạn vào chỗ lõm trong (3) Nhấc và tháo nắp thiết bị ra khỏi nắp. nắp nồi, nhấc lên và tháo nắp hơi ra. Nắp hơi Lưu ý...
- Page 74 Vệ sinh và bảo dưỡng Vệ sinh mâm nhiệt Nước có thể rơi ra khỏi nắp trong quá trình nấu và làm cho bề mặt của mâm nhiệt bị bẩn. Tuy nhiên, điều này không ảnh hưởng đến hiệu suất của nồi cơm điện, bạn có thể vệ sinh mâm nhiệt theo quy trình sau nếu cần Thêm một lượng nhỏ...
-
Page 75: 12 Nếu Gạo Không Được Nấu Chín
Nếu gạo không được nấu chín Kiểm tra các mục sau đây nếu bạn gặp vấn đề với cơm hoặc với hoạt động của nồi cơm điện, v.v... Mục kiểm tra Vấn đề Quá cứng ... - Page 76 Nếu gạo nấu không được nấu chín Vấn đề Nguyên nhân Có một màng mỏng bám trên Một màng mỏng như giấy được hình thành do tinh bột tan chảy và khô lại. Điều này không gây hại bề mặt cơm. cho sức khỏe của bạn.
-
Page 77: 13 Nếu Việc Nấu Đồng Thời Không Như Mong Đợi
Nếu việc nấu đồng thời không như mong đợi Kiểm tra những mục sau đây khi bạn gặp vấn đề với thức ăn được nấu chín đồng thời bằng khay nấu. Mục kiểm tra Vấn đề Quá cứng ... -
Page 78: 14 Nếu Thức Ăn Không Được Nấu, Hoặc Hấp Chín Như Mong Đợi
Nếu thức ăn không được nấu hoặc hấp chín Kiểm tra những điều sau đây nếu bạn gặp vấn đề với thức ăn nấu chín. Mục kiểm tra Vấn đề Không sôi Bị sôi bùng lên ... -
Page 79: Khắc Phục Sự Cố
Khắc phục sự cố Kiểm tra các mục sau đây trước khi yêu cầu sửa chữa. Trang Dấu hiệu Mục kiểm tra Hành động tham nhận biết khảo Toàn bộ gạo không được nấu chín. Đầu cắm thiết bị có được cắm đúng Đảm bảo đã... -
Page 80: Nếu Những Dấu Hiệu Này Xuất Hiện
Khắc phục sự cố Trang Dấu hiệu nhận biết Mục kiểm tra Hành động tham khảo Nước có thể đọng trên khung trên ngay sau khi cơm chín hoặc trong khi Nước sẽ đọng ở khung trên. chức năng Giữ ấm đang được bật. Tuy nhiên, đây không phải là sự cố. Hãy lau khung trên bằng vải khô... -
Page 81: Cài Đặt Thời Gian Hiện Tại
Cài đặt thời gian hiện tại Thời gian được hiển thị theo định dạng 24 giờ. Nồi cơm điện được trang bị một pin lithium thích hợp, và nó có thể lưu trữ các cài đặt thời gian hiện tại, cài đặt hẹn giờ đặt trước và thời gian Giữ ấm (WARM) đã trôi qua ngay cả... -
Page 82: Thông Số Kỹ Thuật
Thông số kỹ thuật Kích thước đơn vị Loại 1,0 L (5,5 cốc) Loại 1,8 L (10 cốc) Nguồn điện 220V Công suất định mức (W) Plain 0,18-1,0 (1-5,5 cốc) 0,36-1,8 (2-10 cốc) Synchro-Cooking 0,18-0,36 (1-2 cốc) 0,36-0,72 (2-4 cốc) Quick 0,18-1,0 (1-5,5 cốc) 0,36-1,8 (2-10 cốc) -
Page 86: Warranty On Tiger Microcomputer Controlled Rice Cooker
Tiger customer service center written in the contact information. phẩm từ hoặc trung tâm dịch vụ khách hàng Tiger được ghi purchased the product from or the Tiger customer service center written in the contact information. -
Page 87: Free-Of-Charge Repair (Replacement*) Policy
Để sửa chữa (thay thế *) sau khi thời hạn bảo hành kết thúc, vui lòng liên hệ với đại lý bạn đã mua sản phẩm từ the inner pot. hoặc trung tâm dịch vụ khách hàng Tiger được ghi trong thông tin liên hệ. Mục đích sử dụng thông tin khách hàng Ruột nồi bên trong chỉ... - Page 88 TIGER CORPORATION Trụ sở chính: 3-1 Hayami-cho, Kadoma City, Osaka 571-8571, Nhật Bản Head Office: 3-1 Hayami-cho, Kadoma City, Osaka 571-8571, Japan フィリピン向け Dành cho Việt Nam...
Need help?
Do you have a question about the JBX-B Series and is the answer not in the manual?
Questions and answers