Tiger JBX-A Operating Instructions Manual
Rice cooker / warmer
Hide thumbs
Also See for JBX-A:
- Operating instructions manual (48 pages) ,
- Operating instructions manual (109 pages)
Table of Contents
Advertisement
Quick Links
Advertisement
Chapters
Table of Contents

Related Manuals for Tiger JBX-A


Summary of Contents for Tiger JBX-A
- Page 1 JBX-A JBX-A10S For household use JBX-A18S Rice Cooker / Warmer OPERATING INSTRUCTIONS Thank you for purchasing this TIGER rice cooker/warmer. Please read these instructions carefully before use and observe them during use. 家庭用 电饭煲 使用说明书 非常感谢您购买本公司的产品。 在您使用之前,请仔細阅读完本说明书,并妥善保存,以便随时参阅。...
- Page 2 IMPORTANT SAFEGUARDS When using the appliance, basic safety precautions should always be followed including the following: 1. Read all instructions. 2. Do not touch hot surfaces. Use handles or knobs. 3. To protect against electrical shock, do not immerse cord or plug in water or other liquid. 4.
-
Page 3: Table Of Contents
Contents 1 Important Safeguards ....................4 2 Names and Functions of Component Parts ............. 9 Menu options and features ..................11 Tips on making delicious rice .................. 12 3 Before Cooking Rice ....................14 4 How to Cook Rice ..................... 16 Cooking time guidelines .................. -
Page 4: Important Safeguards
Important Safeguards Read and follow all safety instructions before using the rice cooker. WARNING • The WARNINGS and CAUTIONS described below are intended to protect the user and other individuals from physical and property damage. To ensure safety, please follow them carefully. •... - Page 5 Important Safeguards CAUTION WARNING Stop using the rice cooker Do not use the rice cooker near walls Do not cook with the inner pot empty. Handle the rice cooker with care. immediately in case of any or furniture. Doing so may cause overheating or Dropping the rice cooker or exposing it malfunction or failure.
-
Page 6: Names And Functions Of Component Parts
Names and Functions of Component Parts Important Safeguards „ Follow the safety instructions ● Strictly observe the following instructions to Steam vent in order to use your rice cooker keep the fluorocarbon resin coating of the inner Steam cap safely for many years. pot from becoming scratched, deformed, or peeling. -
Page 7: Menu Options And Features
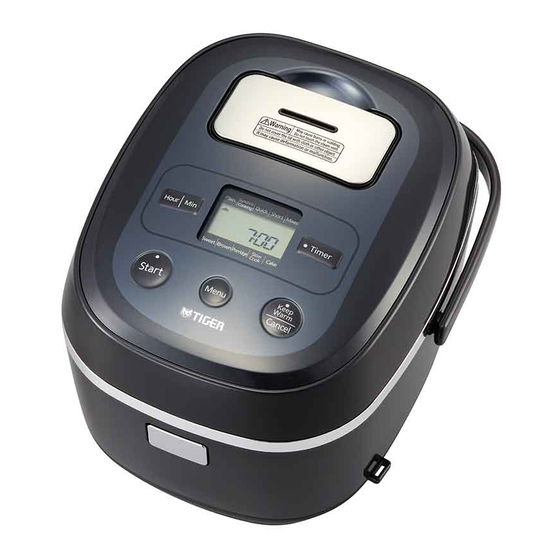
Names and Functions of Component Parts Menu options and features Operation panel Keep Timer Warm Display Menu function Feature function Displays the symbol (menu availability availability cursor) and the current time, etc. Plain Cooks white rice (long-grain rice). Synchro-Cooking –... -
Page 8: Tips On Making Delicious Rice
Read P.14 to15 for preparations before cooking rice and P.16 to 20 for Tips on making delicious rice how to cook rice. Select quality rice and a good storage • Add water prior to adding the ingredients. Cooking semi-polished rice, whole rice, Cooking short-grain rice Adding water after the ingredients results in the location. -
Page 9: Before Cooking Rice
Before Cooking Rice Measure the rice. Adjust the water level. Connect the power cord. Caution Be sure to use the supplied measuring cup. Place the inner pot on a level surface and ● Be sure to remove any cooked rice or grains Filling the supplied measuring cup until it is adjust the water level to the appropriate line of rice on and around the heater plate, center... -
Page 10: How To Cook Rice
How to Cook Rice Cooking time guidelines Press the [Menu] key to move Press the [Start] key. to the desired menu. The Start lamp lights up. Cooking starts. Each time the [Menu] key is pressed, the Menu The rice cooker makes one short and one Plain Synchro-Cooking Quick... -
Page 11: Once Rice Is Finished Cooking
Once Rice Is Finished Cooking Using the Timer Function Once the final steaming process Stir and loosen the cooked rice. Press the [Menu] key to select begins, the remaining time is Stir and loosen the rice as soon as cooking is the desired menu. -
Page 12: Keeping Rice Warm
Keeping Rice Warm Using the Timer Function Press the [Timer] key. Use the [Hour] and [Min] keys to The taste and gloss of white rice (rinse-free rice) „ Elapsed Keep Warm time display can be maintained. The Timer lamp blinks. set the desired completion time. -
Page 13: Cooking Rice And Side Dishes Together
Cooking Rice and Side Dishes Together You can use the cooking plate to cook side dishes Prepare ingredients and place Connect the power cord. To enjoy various concurrent cookings described in the supplied COOKBOOK at the same them in the cooking plate. time as you cook rice. -
Page 14: Slow Cooking
Slow Cooking Cooking Rice and Side Dishes Together Press the [Start] key. Remove the cooking plate and You can prepare soup and simmered dishes with ease. Connect the power cord. See the supplied COOKBOOK for directions. The Start lamp lights up and concurrent stir and loosen the rice. -
Page 15: Steaming Food
Steaming Food Slow Cooking You can also perform steam cooking by adding Press the [Start] key. Use the [Menu] key to select the Note water to the inner pot without making rice. “Slow Cook” menu. The Start lamp lights up and cooking starts. ●... - Page 16 Steaming Food Remove the cooking plate. „ Guidelines for steaming times Note Ingredients Amount Approx. time Tips for steaming ● Do not open the lid during cooking. Doing so may prevent the food from cooking properly. Make a few small slits in the surface Chicken 1 fillet (200 to 300 g) 25 to 30 min...
-
Page 17: Making Cakes
Making Cakes You can make cakes described in the supplied Press the [Menu] key to select Once the heating is completed, (2) Remove the inner pot and the cake and COOKBOOK. cool down the cake. the “Cake” menu. the rice cooker beeps 8 times (long beeps). -
Page 18: Cleaning And Maintenance
Cleaning and Maintenance Any other servicing should be performed by an authorized service representative. The steam cap can be rinsed. (1) Clean with a soft sponge and with tap or lukewarm To maintain cleanliness, be sure to clean the rice cooker on the same day it is used. water. - Page 19 Cleaning and Maintenance Removing and attaching the steam cap Power cord Wipe it using a dry cloth. Note „ Removing the steam cap ● Do not immerse the power cord in or splash it with (1) Insert your fingers into the indentation in (3) Lift and remove the cap unit from the cap lid.
-
Page 20: If Rice Does Not Cook Properly
If Rice Does Not Cook Properly Cleaning and Maintenance Cleaning the heater plate Check the following if you experience a problem with the cooked rice or with the operation of the rice cooker, etc. Check point Water drops may fall from the lid during cooking and cause the surface of the heater plate to become dirty. This does not affect the performance of the rice cooker, however, you can clean the heater plate according to the following procedure if necessary. -
Page 21: If Synchro-Cooking Does Not Work As Expected
If Synchro-Cooking Does Not Work As Expected If Rice Does Not Cook Properly Check the following when you experience a problem with food cooked concurrently using the cooking plate. Problem Cause There is a thin film covering A thin, tissue-like film is formed by melted and dried starch. This is not harmful to your Check point the rice. -
Page 22: If Food Is Not Cooked Or Steamed Or Cakes Are Not Made As Expected
If Food Is Not Cooked or Steamed or Cakes Are Not Made as Expected Troubleshooting Check the following if you experience a problem with the cooked food or cakes. Check the following before requesting repairs. Check point Reference Symptom Check point Action page The rice is not cooked at all. -
Page 23: If This Indication Appears
Troubleshooting Setting the current time Reference Symptom Check point Action page “0:00” blinks on the display when the Are the current time, preset timer The lithium battery has run out, The current time is displayed in a 24-hour format. The rice cooker has a built-in lithium battery, and it can power plug is connected. -
Page 24: Specifications
Specifications Unit size 1.0 L (5.5-cup) type 1.8 L (10-cup) type Power source 230 V 50 Hz Rated power (W) Plain 0.18 to 1.0 (1 to 5.5 cups) 0.36 to 1.8 (2 to 10 cups) Synchro-Cooking 0.18 to 0.36 (1 to 2 cups) 0.36 to 0.72 (2 to 4 cups) Quick 0.18 to 1.0 (1 to 5.5 cups) - Page 25 目录 1 安全注意事项 ........................ 46 2 各部件的名称与作用..................... 50 菜单选择功能与特长..................... 52 煮出美味可口米饭的秘诀 ..................... 53 3 煮饭前的准备 ........................ 55 4 煮饭方法 ........................57 煮饭时间的标准 ......................58 5 米饭煮好后 ........................59 6 预约煮饭的方法 ......................60 7 保温 ..........................62 8 同时烹煮米饭与料理..................... 63 9 烹调方法 ........................66 10 蒸制烹调方法 .
- Page 26 安 全注意事项 使用前请仔细阅读,并务必遵守。 警 告 • 此处标识的注意事项是为防止对使用者及他人造成危害及财产损失。此注意事项为安全相关的重要内容,请 务必遵守。 • 请勿撕下贴在本体上的注意事项贴纸。 请勿让电源插头接触蒸汽。 请勿使用负重强度不足的滑动桌。 以免造成火灾、触电或起火。若在抽出 以免电饭煲掉落导致受伤、烫伤或产品 无视标识内容,采用错误的使用方法可能产生的危害及损害的程 式桌台上使用,请将电源插头置于蒸汽 故障。 图标符号的说明 影响范围外。 使用前请确认桌子有足够的负重强度。 度通过以下标识进行区分并说明。 符号表示警告、注意。具体 请勿在墙壁或家具的附近使用。 的注意内容用图或文章标注在 因蒸汽和热量会导致墙壁及家具受损、变 图标记号的中间或附近。 该符号表示错误操作可能导致使用者死 形、变色,因此使用时请与墙壁和家具 警 告 亡或重伤 。 保持 30cm 以上的距离。在厨房内的储 符号表示禁止的行为。具体 物架等位置使用时,请注意勿让蒸汽滞 的禁止内容用图或文章标注在 该符号表示错误操作可能导致使用者受 注 意 留其中。...
-
Page 27: 安全注意事项
安全注意事项 „ 为了能经久耐用,请注意以下事项。 ● 请务必遵守以下内容,以免内锅氟素加工面膨 注 意 ● 请清除粘附于本产品上的饭粒或米粒等。 胀、剥落或变形。 以免造成蒸汽泄漏、煮沸溢出、故障或米饭不可口。 • 请勿将内锅直接放在煤气上烧或放在电磁炉或 微波炉中使用。 请勿在操作面板可能接触到蒸汽的狭窄 请勿使用多头插座。 ● 煮饭中,请勿将布等覆盖在本 • 请勿保温白米、免洗米以外的米饭。 空间内使用本产品。 以免造成火灾。 体上。 • 请勿在内锅中使用醋。 蒸汽和热量会导致操作面板变形或本体 以免造成本体或上盖变形或变 • 请勿使用附属品木制以外的饭勺。 受损、变色、变形或故障。放在抽出式 色。 • 请勿使用金属制的汤勺、汤匙、打蛋器等坚硬 桌子上使用电饭煲时,请拉出桌面,防 物品。 止蒸汽接触操作面板。 • 请勿在内锅中放入竹制蒸笼。 ● 请勿保温已冷却的米饭。 •... -
Page 28: 各部件的名称与作用
各 部件的名称与作用 操作面板 蒸汽孔 蒸汽阀 液晶显示屏 显示标记 (菜单指针) 及当前时 间等。 [Hour] 键、[Min] 键 预约指示灯 用于设定当前时间及预 使用预约煮饭时点亮或闪 约计时。 烁。 [Timer] 键 预约时使用。 内盖装卸按钮 煮饭指示灯 保温指示灯 内盖垫圈 煮饭中点亮或闪烁。 保温时点亮。 不可拆卸。 上盖 请勿强力拉扯。 [Keep Warm/Cancel] 键 [Start] 键 (P.74~75 参照) 保温时使用。 煮饭及烹饪等开始时使用。 取消操作时使用。 放热板 上盖垫圈 [Menu] 键 不可拆卸。 选择煮饭菜单时使用。 请勿强力拉扯。... -
Page 29: 菜单选择功能与特长
煮饭前的准备请查阅 P.55~56、煮 饭方式请查阅 P.57~61。 菜单选择功能与特长 煮出美味可口米饭的秘诀 选择优质大米及储存于阴凉场所 请配合米的种类及个人喜好增减水量 菜单预约选 菜单 保温 特长 择 • 请选择碾米日期新鲜、颗粒饱满且有光泽的大米。 ●加水量标准表 Plain ○ ○ 煮白米 (长粒米) 时选择。 • 请储存在通风好、阴暗凉爽的地方。 可根据标准刻度线适量的增加或减少一点水量,但 Synchro-Cooking - ○ * 使用调理盘同时烹煮米饭与料理时选择。 增减的水量请不要超过标准刻度线的 1/3 以上。以 使用附带的量杯正确计量 免造成煮沸溢出等。 Quick - ○ 想迅速完成煮白米 (长粒米) 时选择。 平满... -
Page 30: 煮饭前的准备
煮 饭前的准备 量米 擦拭干净水滴和米粒 白米中加入杂粮一起煮饭时 请务必使用附属的量杯计量。 内锅外侧及边缘 • 请将杂粮的份量控制在白米份量的 1/5 以内。 附带的量杯一个平杯约为 0.18L。 • 白米和杂粮混合时的最大煮饭量为 1.0L 型 : 4 杯、 Tips 1.8L 型 : 8 杯。 • 请将杂粮平铺在白米上煮饭。若搅拌在一起则煮 ● 免洗米也请使用附属的量杯计量。 出来的饭不可口。 正确量法 错误量法 • 若担心杂粮的硬度,只需先让杂粮浸泡吸水 1 小 时左右,再将其平铺于白米上。 • 由于千穗谷等特别小颗粒的杂粮容易喷出,因此 可能附着在内盖上。... -
Page 31: 煮饭方法
煮饭方法 煮饭前的准备 将内锅装入本体,盖上上盖 连接电源线 按 [Menu] 键,让 标记对准想 按 [Start] 键 (1) 请左右旋转内锅,确保内锅无倾斜、正确 要烹煮的菜单 煮饭指示灯点亮。 地放入。 开始煮饭。 每按压一次,菜单将按顺序切换。 (2) 盖上上盖。 “Plain” 时发出 “哔哔 -” 的提示音, “Plain” 以 (1) 装入 在选择菜单过程中, 标记一直显示闪烁。 外时发出 “哔 -” 的提示音。 确认已安装内 闪烁 盖 点亮 (2) 关闭 产品插头... -
Page 32: 煮饭时间的标准
米饭煮好后 煮饭方法 煮饭时间的标准 开始焖饭后会显示剩余时间 翻动米饭 液晶显示屏以 1 分钟为单位显示焖饭剩余时间。 米饭煮好之后请务必立刻均匀翻动米饭。 • 焖饭时间因菜单选择而异。 • 请使用连指手套或抓锅垫布等按住内锅,再进 菜单 行翻动。 Plain Synchro-Cooking Quick Short 规格 1.0L 型 (5.5 杯) 32~43 分钟 37~48 分钟 24~36 分钟 43~58 分钟 内锅 1.8L 型 (10 杯) 32~46 分钟 46~58 分钟 24~42 分钟... -
Page 33: 预约煮饭的方法
预约煮饭的方法 按 [Menu] 键,选择煮饭菜单 按 [Timer] 键 按下 [Hour] 键或 [Min] 键设定米 饭煮好时间 在选择菜单过程中, 标记一直显示闪烁。 预约指示灯闪烁。 [Hour] 键可进行以每小时为单位进行设定, 闪烁 [Min] 键可以 10 分钟为单位设定。 闪烁 4•6 闪烁 按住按键不放,便可快速变换时间。 闪烁 • 若之前已设置过预约时间,则显示该时间。如 果要在相同的时间预约煮饭,则无需再次设定 时间。 Note Note ● 下述情况无法预约煮饭。 关于预约煮饭 ● 为避免食物变质,请将预约时间设定在 12 小时以 •... -
Page 34: 同时烹煮米饭与料理
保温 同 时烹煮米饭与料理 „ 关于保温持续时间的显示 保持白米 (免洗米) 爽滑的美味口感。 使用调理盘,可同时烹煮附带的 COOKBOOK( 食谱 ) 为充分享受同时烹煮的乐趣,请注 煮饭结束后将自动切换到保温状态。 中记载的料理与米饭。 若在保温中按住 [Hour] 键,保温持续时间将以 1 小 料理的烹调方法请参照附带的 COOKBOOK。 意以下事项 时为单位进行显示。 „ 中止保温时 超过 12 小时后,将持续闪烁直至 “24” 小时。 放入调理盘中的配料的注意事项 Note ● 请勿在调理盘中摆放过多食材。 按下 [Keep Warm/Cancel] 键 ● 为使蒸汽能接触到食材,请遵守最高容量规 ●... - Page 35 同时烹煮米饭与料理 将事先预备好的食材放入调理盘 连接电源线 按 [Start] 键 取出调理盘,翻动米饭 • 请尽量将食材均匀平铺在调理盘内。以免导致 煮饭指示灯点亮,开始同时烹煮。 煮沸溢出或烹调的料理不美味。 (1) 装入 点亮 Note ● 使用健康盘时,请参照 P.63。 产品插头 煮饭前的准备 (参照 P.55) 点亮 Note ● 同时烹煮时的煮饭量请参照下表。煮饭时请不要超 过规定的最大量或少于最小量。以免导致煮沸溢出 或烹调的料理不美味。 1.0L 型 1.8L 型 (2) 装入 Note 最大量 最小量 最大量 最小量 2 杯 1 杯...
-
Page 36: 烹调方法
烹调方法 按下 [Menu] 键选择 “Slow 您可轻松烹调汤以及炖煮料理。 烹调完成后,会发出 8 次 “哔 -” 的 烹调结束后…… 料理的烹调方法请参照附带的 COOKBOOK。 Cook” 菜单 提示音 在选择菜单过程中, 标记一直显示闪烁。 务必按下 [Keep Warm/Cancel] 键 开始时使用接近沸点的高温煮沸后,将温度降低再炖 保温指示灯点亮,液晶显示屏显示 “0h” 。 煮一段时间。之后再次降低温度继续炖煮。逐渐降低 温度炖煮,不仅可让食物更加入味,而且也无需担心 点亮 熄灭 长时间加热将汤汁熬干。 Note 闪烁 ● 烹调附带的 COOKBOOK ( 食谱 ) 上记录的食谱以 外的料理时,... -
Page 37: 蒸制烹调方法
蒸制烹调方法 蒸制完成后,提示音会发出 8 次 取出调理盘 不煮米饭时,也可给内锅装入水单独进行蒸制烹调。 按下 [Menu] 键选择 “Slow “哔 -” 的声音 (煮饭指示灯熄灭) Cook” 菜单 将食材放置于调理盘上 保温指示灯点亮,液晶显示屏显示 “0h” 。 在选择菜单过程中, 标记一直显示闪烁。 给内锅内装入水,安装调理盘,盖 上上盖 请按照以下标准调节加水量。 闪烁 • 1.0L (5.5 杯) 型 : 3 1/2 杯 (630mL) • 1.8L (10 杯) 型 : 4 1/2 杯 (810mL) 点亮... -
Page 38: 蛋糕的制作方法
蛋糕的制作方法 蒸制烹调方法 „ 蒸制时间标准表 按下 [Menu] 键选择 “Cake” 菜单 可制作附带的 COOKBOOK( 食谱 ) 中记载的蛋糕。 在选择菜单过程中, 标记一直显示闪烁。 食材 量 蒸制时间标准 蒸制方法的要点 Note 鸡肉 1 颗 (200-300g) 25-30 分钟 划几道口子。 ● 请勿制作 COOKBOOK( 食谱 ) 中所记载蛋糕以外 切成厚度 2cm 以下的鱼片。 白肉鱼 切块 2-3 块 (150-200g) 20-25 分钟... -
Page 39: 清洁保养方法
清洁保养方法 蛋糕的制作方法 烤制完成后,提示音会发出 8 次 除清洁保养外的其他修理等请委托经本公司认可的维修技术人员。 Note “哔 -” 的声音 ● 取出内锅时,请务必使用连指手套或抓锅垫布等, 为了保持清洁以便能够随时使用,请务必在使用当日将电饭煲清洗干净。 保温指示灯和液晶显示部的 “0” 闪烁。 切勿用手直接触碰。以免造成烫伤。 每次做完料理或蛋糕后很容易有异味残留,请务必在当日将异味清除干净。 (参照 P.77) ● 蛋糕做好后,请立刻取出。如放置不理可能导致上 盖水珠滴至蛋糕上。 Note 闪烁 ● 请务必拔掉电源插头,并等电饭煲本体、内锅、内盖、蒸汽阀冷却后再进行清洁保养。 ● 请随时保持内锅及内盖等清洁,以免腐蚀或产生异味。 蛋糕制作完成后…… ● 请勿使用稀释剂、去污剂、漂白剂、化学抹布、金属刷、菜瓜布等清洁用具。 ● 请务必拔掉各零件后再进行清洁保养。 熄灭 闪烁 务必按下 [Keep Warm/Cancel] 键 ● 请不要使用洗碗机或餐具烘干器等。以免造成变形或变色。 ●... - Page 40 清洁保养方法 内盖的拆卸和安装 可冲洗。 (1) 用清水或温水配合海绵进行冲洗 (2) 马上用干抹布擦拭水分,使其充分干燥 „ 拆卸方法 内盖装卸按钮 提起内盖的装卸按钮,正面取 Note 出内盖 ● 请勿按照以下方式进行清洗,以免造成变形。 (1) 拉起 · 用热水冲洗 蒸汽阀 · 浸泡一阵子后再清洗 (分为 2 个部分。 · 直接在煮饭后的高温状态下冲洗 参照 P.76) ● 将杂粮 (苋菜等) 及大麦等混合炊煮后,请务必对蒸汽阀进行 (2) 取出 清洁保养。以免堵塞蒸汽阀,造成上盖无法打开等故障,导致 煮出来的饭不可口。 ● 清洗完蒸汽阀,请马上用干布擦拭使其充分干燥。若未及时去 除水分,可能造成水迹残留。 „ 安装方法 (1) 用清水或温水沾湿海绵清洗...
- Page 41 清洁保养方法 去除加热板污垢的方法 蒸汽阀的拆卸和安装 使用过程中,有可能出现水珠从上盖等处滴落,在加热板上留下斑点状污垢的现象。 „ 拆卸方法 该现象并不影响性能,但如您介意这些污垢,可按照如下方式进行清洗保养。 (1) 将手指伸入上盖的凹点,向上拉起取出 (3) 从蒸汽盖上取下蒸汽盖本体 (1) 用菜瓜布沾取少量市售的清洁剂, 擦拭加热板上留有斑点污垢的地方 (2) 用打湿的厨房纸巾或布擦拭掉污垢 蒸汽阀 菜瓜布 Note Note ● 刚煮完饭时,蒸汽阀中仍残留有滚烫的水珠,敬请 注意。 ● 请勿取下蒸汽盖本体的垫圈、环形垫圈。若不慎取 出,请按原样妥善嵌回最里侧。请注意蒸汽盖本体 加热板 (2) 逆时针转动蒸汽盖本体,使蒸汽盖本体上标 垫圈的方向。 记的位置与解锁标记对齐。 ※ 若安装困难,可在垫圈上沾少许水解决。 去除异味的方法 解锁标记刻在蒸汽盖上。 ● 请正确安装垫圈类部品。如未安装可能发生蒸汽泄 解锁标记 漏,从而导致烹调出的料理不可口。 蒸汽盖 请在感觉有异味或烹调之后,用以下方法进行清洗。 垫圈 Note 蒸汽盖本体 ● 清洁保养后,本体、内锅、调理盘和健康盘会变烫,敬请注意。以免造成烫伤。 蒸汽盖...
-
Page 42: 觉得米饭煮得不理想时
觉得米饭煮得不理想时 煮好的饭或电饭煲的运行状态等发生异常时,请确认以下几点。 发生情况 理 由 量 米 超 饭 使 使 菜 已 接 使 米 器 内 内 未 或 产 形成了薄膜 纸糊状的薄膜是淀粉被溶解后干燥所形成,并非有害物质。 检查事项 错 量 过 用 用 单 设 按 用 粒 、 锅 锅 充 中 品... -
Page 43: 觉得同时烹煮不理想时
觉得同时烹煮不理想时 觉得烹煮、蒸制、蛋糕制作不理想时 使用调理盘进行同时烹煮的食物发生异常时,请确认以下几点。 若烹调的料理或烤制的蛋糕不够美味时,请检查确认以下几点。 食 放 放 烹 烹 理 烹 中 未 物 传 内 内 垫 上 或 产 记 加 而 未 于 煮 外 用 事 未 或 产 检查事项 材 入 入 调 调 煮 。... -
Page 44: 认为发生故障时
认为发生故障时 液晶显示屏出现下列内容时 在委托修理前,请检查以下几点。 参照 故障现象 确认事项 处理方法 页面 参照 显 示 处 理 页面 无法煮饭。 产品插头是否已插入本体的连接插口, 请将插头切实插入连接口。 无法烹调。 电源插头是否已插入插座。 显示 “E” 开头代码 可能存在故障。请在拔下电源插头后,委托购买本产品的销售店进行修 未按照预约时间煮好 是否已按下 [Start] 键。 若未按下 [Start] 键,则预约操作未完 理。 成。 - 与现在显示的时间是否相符? 请正确设定时间。 请确认 P.78 的 “煮饭时间过长” 项目,并进行处理。 若所指定的时间低于预约设定推荐时间,可能导致在设定时间内饭未煮熟。... -
Page 45: 时间的调整方法
产品规格 时间的调整方法 以 24 小时为单位显示时间。本体中内置有锂电池,因此即使拔下电源插头,也将继续记忆当前时间、预约时 规格 1.0L 型 (5.5 杯) 1.8L 型 (10 杯) 间以及保温的经过时间。 电源 230 V ~ 50 Hz ※ 进行以下动作运行时无法调整时间。 额定电力 (W) • 煮饭中、保温中、预约设定中、预约煮饭中、重新加热中 Plain 0.18~1.0 (1~5.5 杯) 0.36~1.8 (2~10 杯) • 选择了 “Porridge” 、 “Slow Cook” 、 “Cake” 模式时 Synchro-Cooking 0.18~0.36 (1~2 杯)... - Page 46 TIGER CORPORATION Head Office: 3-1 Hayami-cho, Kadoma City, Osaka 571-8571, Japan...
Need help?
Do you have a question about the JBX-A and is the answer not in the manual?
Questions and answers