Table of Contents
Advertisement
Quick Links
Advertisement
Table of Contents
Troubleshooting

Related Manuals for Dimplex DHEBHT


Summary of Contents for Dimplex DHEBHT
- Page 1 Heated Throw INSTRUCTIONS 3 Hour Auto Off Model Number DHEBHT Note: The specifications and/or components of this product are subject to change without prior notice Distributed By: Reduction Revolution Pty Ltd www.reductionrevolution.com.au/heating-cooling...
-
Page 2: Table Of Contents
IMPORTANT SAFEGUARDS ............... 3 Connecting the Controller ..............5 Overheat Protection ................5 Using The Controller ................6 Auto Off......................7 Pre Heat ......................7 Using Your Heated Throw ..............8 Recommended Cleaning Instructions ..........9 Treatment For Localised Soiling ..............9 Hand Washing ..................... -
Page 3: Important Safeguards
Thank you for purchasing our Heated Throw. Each unit is manufactured to ensure safety and reliability. Before using for the first time, please read the instruction manual carefully and keep it for future reference. 1 IMPORTANT SAFEGUARDS • Before connecting and switching on the Heated Throw, ensure that the voltage indicated on the rating label corresponds to the mains voltage in your home. - Page 4 • Keep the controller away from an open window. • Keep the controller away from external heat sources. i.e. a heater, fire place etc. • Do not use pins in the Heated Throw as these may damage the electric wiring. •...
-
Page 5: Connecting The Controller
2 Connecting the Controller Ensure Power is Off and the Plug is Removed from the Power Source • To fit the controller plug, simply hold the socket with one hand and push the controller plug all the way until the locking tab locates over the lug on top of the controller plug. -
Page 6: Using The Controller
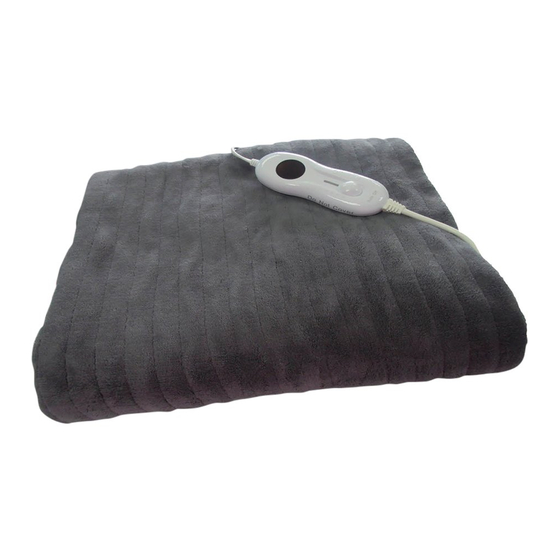
4 Using The Controller • Use your Heated Throw with Detachable Controller Model MC-112A3 Only. • Do not use any other controller. Heat Level Indicators 0 = Off 1 = Low Heat 2 = Medium Heat 3 = High Heat (For preheating only) 0 = Off Temperature Select Slide... -
Page 7: Auto Off
4.1 Auto Off This controller is fitted with a 3 hour Count Down Auto Off Timer which starts to countdown from when your heat setting has been selected, and will switch power off to the elements after approximately 3 hours. (+/- 15 Minutes) Note: Once a heat setting has been selected and the controller is powered ON, the countdown timer will not be affected by adjusting heat level. -
Page 8: Using Your Heated Throw
5 Using Your Heated Throw • Read the Important Safeguards section first, then ensuring the Heated Throw is fully unfolded, not creased and the controller plug is fitted securely, you can then plug in and switch on. NOTE: Do not plug into a powerboard, double adaptor or the like. The power plug must be inserted directly into the wall power socket. -
Page 9: Recommended Cleaning Instructions
6 Recommended Cleaning Instructions Ensure the Controller is Unplugged from the Power Source and Disconnected from the Heated Throw Before Cleaning Do Not Wring, Do Not Spin Dry, Drip Dry Only 6.1 Treatment For Localised Soiling Never Use Hot Water as the Heated Throw may shrink and will void your warranty. -
Page 10: Hand Washing
6.2 Hand Washing Detach and Remove the Controller before Cleaning the Throw. Never Use Hot Water as the Heated Throw may shrink and will void your warranty. DO NOT Pre-Soak or use stain removers of any kind which contain Bleach. This includes any of the Oxy pre-soakers or Stain Removers •... -
Page 11: Servicing Your Heated Throw And Controller
7 Servicing Your Heated Throw and Controller NOTE: There are no user serviceable parts in this Heated Throw or controller. • The Heated Throw should be examined frequently for signs of wear, either of the Heated Throw Fabric, controller or flexible cord. If wear is visible or if any abnormality or defect in operation in the Heated Throw is observed, discontinue use immediately and consult a qualified and registered person for service. -
Page 12: Troubleshooting Table
9.1 Troubleshooting Table Problem Cause Remedy Slide the knob to setting 1, 2 or 3. The corresponding The Temperature Slide Knob is in the “O” position front display Lights should illuminate. No Power to Controller / No Heat Level The Power Plug may not be plugged in to the power Ensure the power plug is inserted into the power Indicator Lights source and switched on. -
Page 13: Warranty
10 Warranty This warranty is provided by Glen Dimplex Australia Pty Limited ABN 69 118 275 460 of Unit 1, 21 Lionel Road, Mount Waverley, Victoria 3149 (Phone number 1300 556 816), or in New Zealand by Glen Dimplex Australasia Limited, New Zealand registration... - Page 14 Dimplex product which require routine replacement; d) you are unable to provide us with reasonable proof of purchase for the Dimplex product; e) the breakdown occurs after the expiry of the express warranty period set out in section 1;...
- Page 15 If you make a valid claim under this warranty and none of the exclusions set out in section 2 apply, we will, at our election, either repair the Dimplex product or replace the Dimplex product with a product of identical specification (or where the product is superseded or no longer in stock, with a product of as close a specification as possible).
Need help?
Do you have a question about the DHEBHT and is the answer not in the manual?
Questions and answers