
Related Manuals for Dimplex Optiflame DF2608-LED


Summary of Contents for Dimplex Optiflame DF2608-LED
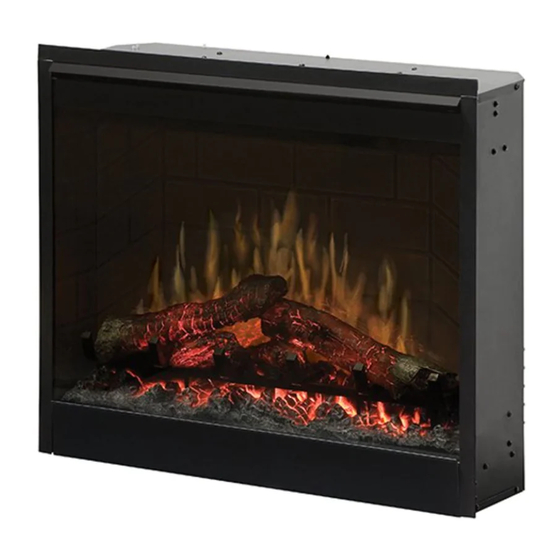
- Page 1 INSTRUCTION MANUAL Optiflame 26" Firebox Model: DF2608-LED For domestic household use only. 08/53613/3 Issue 5 OCN 11905...
- Page 2 IMPORTANT THESE INSTRUCTIONS SHOULD BE READ CAREFULLY AND RETAINED FOR FUTURE REFERENCE. CAUTION: FAILURE TO FOLLOW THESE INSTRUCTIONS MAY CAUSE INJURY AND/ OR DAMAGE AND MAY INVALIDATE YOUR WARRANTY Please read the operating instructions carefully before using your product for the first time and keep them in a safe place.
- Page 3 • Although this appliance complies with safety standards, we do not recommend its use on deep pile carpets or on long hair type of rugs • The appliance must be positioned so that the plug is accessible. • If the supply cord is damaged it must be replaced by the manufacturer or service agent or a similarly qualified person in order to avoid a hazard.
- Page 4 WARNING: KEEP BATTERIES OUT OF REACH OF CHILDREN • Swallowing may lead to serious injury in as little as 2 hours or death, due to chemical burns and potential perforation of the oesophagus. • If you suspect your child has swallowed or inserted a button battery immediately call the 24-hour Poisons Information Centre on 13 11 26 (in Australia) or 0800 764 766 (in New Zealand) for fast, expert advice.
- Page 5 Exposed to the Near water If the power cable weather outdoors wires are frayed or cut Where small children No extension leads or Where the power may be left unattended power boards cable may be damaged On a slope or Where there is risk Where it may be uneven surface...
-
Page 6: Specifications
Specifications Model no. DF2608-LED Colour/Finish Black Wattage 2000 Heat Settings Thermostat Control Remote Control Warranty 2 Years Dimensions (w x d x h) 695w x 222d x 575h For greater precision, please always refer to the rating label placed on the product. Product Dimensions... - Page 7 Setup General Information The fire incorporates a flame effect, which can be used with or without heat, so that the comforting effect may be enjoyed at any time of the year. To reduce heat loss and to prevent any chimney up draft affecting the operation of your stove fire, we recommend that the chimney flue is sealed off.
- Page 8 Setup Thermal Safety Cut-out A thermal safety cut-out is incorporated in the fan heater to prevent damage due to overheating. This can happen if the heat outlet was restricted in any way. If the cut-out operates, unplug the heater from the socket outlet and allow approximately 10 minutes before reconnecting.
-
Page 9: Installation
Installation INSTALLING FRONT GLASS NOTE: The outer glass is shipped separate to the firebox. 1. Remove the 6 screws holding the side trims and remove the metal trims. 2. Unpack the glass, ensure it is free from dust and finger marks and place into posi- tion. - Page 10 Installation FITTING IMPORTANT: If not using a Dimplex mantel, the fireplace must be installed in an en- closure with the following MINIMUM dimensions. 1. Select a suitable location that is not susceptible to moisture and is at least 1 me- ter away from drapes, furniture and high traffic.
- Page 11 Installation NEW WALL CONSTRUCTION 1. Select a suitable location that is not susceptible to moisture and is away from drapes, furniture and high traffic. 2. Place the fireplace in the desired location to see how it will look in the room. 3.
- Page 12 Control Panel & Remote WARNING: FAILURE TO FOLLOW THESE OPERATING INSTRUCTIONS MAY RESULT IN INJURY AND/OR DAMAGE. Remote control The maximum range of use is ~ 5 metres. WARNING: It takes time for the receiver to respond to the transmitter. Do not press the buttons more than once within two seconds for correct operation.
-
Page 13: Operation
Operation Operating Instructions Dis- Func- Description play tion Press Once to turn the product ‘ON’. Press a second time to p ss a second time to put the product into ‘STANDBY’. Power / (When returning from ‘STANDBY’ mode the product will return to previous settings Standby unless the product has been unplugged, in which case it will reset to factory settings) Press multiple times to change the ‘SLEEP TIMER’... - Page 14 Operation Press multiple times to increase the heater temperature in 1 C increments. The highest temperature that can be set 37 Temp Up Note: Once you stop at your desired temperature this will flash 3 times, then the display will show the room temperature as detected by the product. If the set temperature is lower than the detected room temperature the heater will not activate.
-
Page 15: Warranty
Warranty Please refer to the warranty card in the box for warranty information. For any troubleshooting advice, please contact the relative Customer Care Centre below. Glen Dimplex Australia Pty Ltd Glen Dimplex New Zealand Ltd 8 Lakeview Drive, 38 Harris Road, East Tamaki,... - Page 16 Supplied by Glen Dimplex Australia 8 Lakeview Drive, Scoresby, Victoria, 3179 © Glen Dimplex Australia. All rights reserved. Material contained in this publication may not be reproduced in whole or in part, without prior permission in writing of Glen Dimplex Australia.
Need help?
Do you have a question about the Optiflame DF2608-LED and is the answer not in the manual?
Questions and answers