Table of Contents
Advertisement
Quick Links
Advertisement
Table of Contents

Related Manuals for Apera Instruments PH8500


Summary of Contents for Apera Instruments PH8500
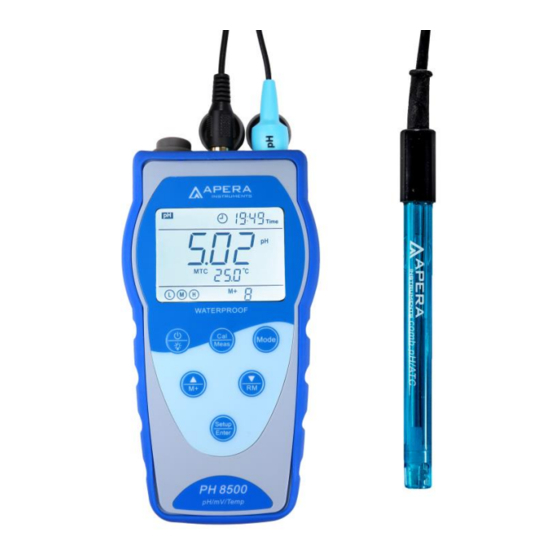
- Page 1 PH8500 Portable pH Meter User Manual Version2.0...
-
Page 2: Table Of Contents
Contents Introduction ............................3 Basic Features ..........................3 pH Measurement Features ......................3 Specifications............................3 Main Specifications ........................3 Other Specifications: ........................4 Instrument Description ........................... 4 LCD Display ........................... 4 Keypad Functions .......................... 5 Meter Socket ..........................7 Display Mode ..........................7 Store, Recall and Clear Data ...................... -
Page 3: Introduction
Introduction Thank you for purchasing PH8500 portable pH meter. This product is a great combination of advanced electronics technology, sensor technology, and software design, made for general water solution applications such as water treatment, environmental monitoring, pools and spas, hydroponics, aquaculture, education, beverage making, cooling tower, etc., especially ideal for field use. -
Page 4: Other Specifications
Resolution 0.1℃ Accuracy ± 0.5℃± 1 digit 2.2 Other specifications: Data storage 500 groups Serial number, date, time, measuring value, Storage content measuring unit and temperature value Output Power AA batteries × 3 (1.5V× 3) IP rating IP57 waterproof and dust proof Meter: (86×196×33 ) mm / 335 g Dimension &... -
Page 5: Keypad Functions
(7) — Temperature units (8) — Units of calibration value (9) — Standard calibration value, the serial number for storage and recall, and prompts of special display mode (10) — Storage and recall icons, M+ — Measurement to be stored icon, RM — Reading to be recalled icon (11) —... - Page 6 Chart – 1 Keypad operations and descriptions Keypad Operations Descriptions ⚫ In the power-off mode, press this key to turn on the meter; ⚫ In the measurement mode, press this key to turn on or turn off the Short press backlight display.
-
Page 7: Meter Socket
Electrode socket displays as Chart – 2. USB socket displays as Chart– 3. Chart – 2 Sockets for meters Models Photos Description ⚫ BNC socket (right) — connect pH PH8500 electrode or ORP electrode, ⚫ RCA socket (middle) — connect pH meter temperature probe Chart – 3 USB socket... -
Page 8: Store, Recall And Clear Data
3.5 Store, Recall and Clear Data 3.5.1. Manual storage When the measurement is stable, short press key, M+ icon and storage serial number appear on LCD, storing measuring information, see Diagram – 6. Diagram - 6 3.5.2. Automatic timing storage Set the storage timing (eg. -
Page 9: Ph Calibration Consideration
socket. RCA socket connects temperature socket. When dipping pH electrode in the solution, please stir the solution briefly to eliminate any air bubbles and allow it to stay in the solution until the reading is stable. The 201T-F Combination Glass pH/temp. Electrode is only suitable for general water solutions’ pH Note: measurement. -
Page 10: Ph Calibration (Take Three-Point Calibration As An Example)
(c) After measuring a solution that contains fluoride or a concentrated organic solution (d) If the solution’s temperature differs greatly from the calibration solution temperature 4.2.4. Due calibration Diagram - 9 Preset calibration interval (begin from the date of last calibration) to remind due calibration in a preset period in parameter setting P1.4 (Section 7.3). -
Page 11: Customer-Defined Calibration
4.3.3. The 3 point calibration Press key to enter the calibration mode, CAL 3 flashes at the top right of LCD indicating make the 3 point calibration. rinse pH electrode in distilled or deionized water, allow it to dry, submerge it in pH10.01 buffer solution, Stir the solution briefly and allow it to stay in the buffer solution until the reading is stabilized. -
Page 12: Sample Test
c) The value set in “Customer-defined” is at a fixed temperature. The meter is suggested to perform calibration and measurement at the same temperature to avoid large error. The meter cannot automatically recognize customer-defined calibration solution. 4.5 Sample Test 4.5.1. Rinse pH electrode in distilled or deionized water, allow it to dry, and submerge it in sample solution. Stir the solution briefly and allow it to stay in the sample solution until the stable value and icon appears on LCD, get the reading which is pH value of sample solution, please refer to Diagram-11 for... -
Page 13: Ph Electrode Maintenance
Enter in pre-set due calibration date Press key to perform calibration or cancel due reminder calibration setup per parameter P1.4 4.5.3. pH temperature principle Please note that the closer the temperature of the sample solution is to the calibration solution, the more accurate will be the readings. -
Page 14: Mv Measurement
submerge it in soaking solution for 24 hours. The method to prepare 0.1mol/L hydrochloric acid: dilute 9mL hydrochloric acid in distilled or deionized water to 1000mL. For serious passivation, submerge the bulb in 4% HF (hydrofluoric acid) for 3-5 seconds, and wash it in distilled or deionized water, then submerge it in the soaking solution for 24 hours to renew it.) 4.6.5. -
Page 15: Parameter Setting
(c) For heavily polluted platinum surface on which there is an oxidation film, polish the platinum surface with toothpaste, then wash it in distilled or deionized water, then submerge it in the soaking solution for 6 hours. Parameter Setting 6.1 Main Menu In the measurement mode, press key to enter in P1.0, then press to switch to main... - Page 16 6.3 Sub-Menu of pH Parameter Setting (press key to switch) P1.1 – Select pH standard solution (USA-NIST-CUS) 1. In measurement mode, press key to enter in P1.0, press enter in P1.1. 2. When key is pressed, USA flashes, press key to select USA→nIS→CUS, press to confirm.
- Page 17 P1.6 – Restore to factory default setting (NO – Yes) key to select no → YES, 1. Press key, no flashes, then press Press key to confirm, the meter returns to the measurement mode. No – not restore to factory default setting, Yes – restore to factory default setting.
-
Page 18: Usb Communication
P3.5. – Adjust time 1. When key is pressed, Hour flashes, then press and Minute flashes. When the number flashes, press key and key to adjust time, then press to confirm. 2. After confirming date, press key to enter in P3.6 mode or press to return to the measurement mode. -
Page 19: Software Interface
7.2 Software Interface Software interface: see Diagram-15. Diagram -15 ① — Meter serial number ② — Stored value ③ — Keys Clear — press this key to clear the data Download — press this key to download the data from the meter to the computer Export —... -
Page 20: Automatic Connection Port
Diagram – 16 7.4 Automatic Connection Port Connect USB cable to the meter and the computer, open PC-Link program, program interface shows on the computer, automatic connection is done after a few seconds. Icon shows at the left bottom of LCD. Note: To reconnect after turn-off, please restart the software interface, as the computer can not recognize the software automatically. -
Page 21: What's In The Kit
What’s in the Kit? Include Quantity PH8500 portable pH meter 1 set 201T-F plastic three-in-on pH electrode 1 pc pH standard buffer solution 1 bottle each (4.00/7.00/10.01pH/50mL) PC-Link communication software flash drive 1 pc USB communication cable 1 pc Combined electrode clip... -
Page 22: Warranty
We warrant this instrument to be free from defects in material and workmanship and agree to repair or replace free of charge, at the option of APERA INSTRUMENTS, LLC, any malfunctioned or damaged product attributable to the responsibility of APERA INSTRUMENTS, LLC for a period of THREE YEARS for the instrument and SIX MONTHS for the probe from the delivery. -
Page 23: Appendix I: Parameter Setting And Factory Default Setting
11 Appendix I: Parameter Setting and Factory Default Setting Restore to factory Modes Prompts Parameter setting items Abbreviation Description default setting P1.1 Select pH buffer solution USA-NIST-CUS P1.2 Select resolution 0.01-0.1 0.01 P1.0 Set reading stability Normal-High-Low Normal P1.3 criteria P1.4 Set due calibration No-H00-D00... - Page 24 P3.1 P3.2 Back light Back light P3.3 P3.0 P3.4 Basic P3.5 parameters P3.6 Clear readings Clear readings P3.7 Auto. close Auto. close P3.8...
Need help?
Do you have a question about the PH8500 and is the answer not in the manual?
Questions and answers