Tramontina TCP-320 Safety And Instruction Manual
Hide thumbs
Also See for TCP-320:
- Safety and instruction manual (14 pages) ,
- Safety and instruction manual (20 pages)

Related Manuals for Tramontina TCP-320


Summary of Contents for Tramontina TCP-320
- Page 1 SAFETY AND INSTRUCTION MANUAL Charcoal Grills 26500/008 - TCP 450 26500/009 - TCP 450L 26500/011 - TCP 560L 26500/002 - TCP 320 26500/005 - TCP 320F 26500/003 - TCP 320L...
-
Page 3: Table Of Contents
2.4. TCP-450 (Ref.: 26500/008): ............................5 2.5. TCP-450L (Ref.: 26500/009): ............................5 2.6. TCP-560L (Ref.: 26500/011): ............................5 3. CHARCOAL GRILL COMPONENTS BY MODEL ........................6 3.1. TCP-320 MODEL (Reference nº 26500/002) .........................6 3.1.1. Components: ...............................6 3.1.2. Assembly instructions: ............................6 3.2. MODEL TCP-320L (Reference nº 26500/003) .......................7 3.2.1. -
Page 4: Introduction
To maintain your grill’s smooth performance and make it last longer, follow the gui- This is the manual for grill models TCP-320, TCP-320L, TCP-320F, TCP-450, TCP- delines in this manual. -450L e TCP-560L. Therefore, please do not take into consideration information that mentions components that are not part of your specific grill model. -
Page 5: Tcp-450 (Ref.: 26500/008)
2.4. TCP-450 (Ref.: 26500/008): * The dimensions below are for reference only. Identification Measurements (cm) Ø47.0 73.5 16.3 52.0 2.5. TCP-450L (Ref.: 26500/009): * The dimensions below are for reference only. Identification Measurements (cm) Ø47.6 73.5 16.3 52.0 97.3 2.6. TCP-560L (Ref.: 26500/011): * The dimensions below are for reference only. -
Page 6: Charcoal Grill Components By Model
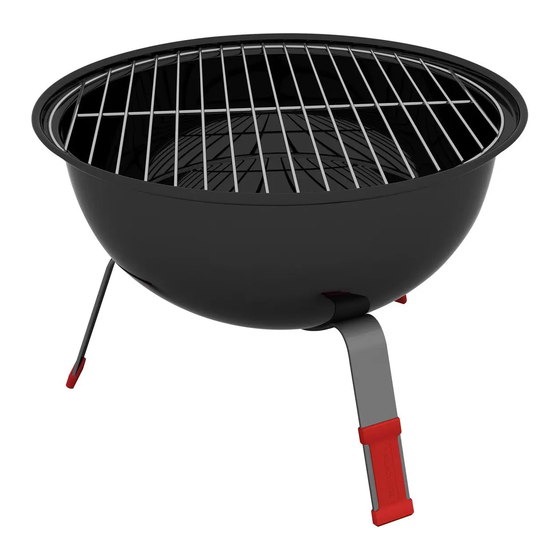
3. CHARCOAL GRILL COMPONENTS BY MODEL 3.1. TCP-320 MODEL (Reference nº 26500/002) 3.1.1. Components: ITEM DESCRIPTION QUANTITY LARGE SILICONE SUPPORT SMALL SILICONE SUPPORT UTENSIL FOR HANDLING COOKING GRATES STAINLESS STEEL COOKING GRATE STAINLESS STEEL CHARCOAL TRAY ENAMELED STEEL BOWL PAINTED STEEL TRIPOD... -
Page 7: Model Tcp-320L (Reference Nº 26500/003)
3.2. MODEL TCP-320L (Reference nº 26500/003) 3.2.1. Components: ITEM DESCRIPTION QUANTITY LARGE SILICONE SUPPORT SMALL SILICONE SUPPORT UTENSIL FOR HANDLING COOKING GRATES ENAMELED STEEL COOKING GRATE ENAMELED STEEL CHARCOAL TRAY ENAMELED STEEL BOWL PAINTED STEEL TRIPOD M6 HEADLESS SCREW M6 WING NUT METALLIC WASHER CERAMIC WASHER M5 SCREW... -
Page 8: Tcp-320F Model (Reference Nºo 26500/005)
3.3. TCP-320F MODEL (Reference nº 26500/005) 3.3.1. Components: ITEM DESCRIPTION QUANTITY LARGE SILICONE SUPPORT SMALL SILICONE SUPPORT UTENSIL FOR HANDLING COOKING GRATES STAINLESS STEEL COOKING GRATE STAINLESS STEEL CHARCOAL TRAY ENAMELED STEEL BOWL PAINTED STEEL TRIPOD M4 SCREW M4 NUT STAINLESS STEEL HOLDER FOR COOKING GRATE AND TRAY M6 LARGE SCREW METALLIC WASHER... -
Page 9: Model Tcp-450 (Reference Nº 26500/008)
STEP 3 STEP 4 Place the tray (item 5) on the lower part of the holders and the cooking grate (item Attach the holder (item 19) to the lid (item 20) using the M5 screw (item 15), a 4) on the upper part of the holders as shown in picture 09. When using the skewer metallic washer (item 12), and a ceramic washer (item 13) as shown in picture 11. -
Page 10: Assembly Instructions
3.4.2. Assembly instructions STEP 1 STEP 3 Align two M6 screws (item 10) with the holes in the outer holder (item 2) according Position the chrome steel triangle (item 8) and secure it with M5 screws (item 9) as to picture 12. Insert the holder with the screws into the bowl (item 6), making sure shown in figure 16. -
Page 11: Tcp-450L (26500/009)
3.5. TCP-450L (Reference nº 26500/009) 3.5.1. Components: ITEM DESCRIPTION QUANTITY STAINLESS STEEL LEG STAINLESS STEEL OUTER HOLDER STAINLESS STEEL INNER HOLDER STAINLESS STEEL COOKING GRATE ENAMELED STEEL CHARCOAL TRAY ENAMELED STEEL BOWL UTENSIL FOR HANDLING COOKING GRATES CHROME STEEL TRIANGLE M5 SCREW M6 SCREW M6 NUT... - Page 12 STEP 2 NOTE: The cooking grate (item 4) is double-sided, meaning it can be used on both Hold the existing pin on the leg (item 1) and insert it into the securing hole of the of its sides: outer holder (item 2) according to picture 24. Make sure that the hole of the outer •...
-
Page 13: Tcp-560L Model (Reference Nº 26500/011)
STEP 7 The internal holder allows for the lid to be supported on the grill bowl as shown in Attach the thermometer (item 14) using its metallic washer (item 20) and a wing nut Figure 36. (item 17) as shown in pictures 34 and 35. Picture 34 Picture 36 Picture 35... -
Page 14: Assembly Instructions
3.6.2. Assembly instructions STEP 1 STEP 4 Firstly, align the M6 screw (item 11) with a metallic washer (item 13) and then with a In this step, start the assembly with the front leg (item 1), hold the existing pin on the ceramic washer (item 12). - Page 15 STEP 8 Insert two M6 screws (item 11) into the handle holes (item 20) and attach the handle with the screws to the lid (item 18) according to picture 15. Hold the screws and align a ceramic washer (item 16) in inner part of the lid with the same screws. Then secure the M6 nuts (item 11) and tighten them as shown in pictures 16 and 17.
-
Page 16: General Safety Information
• Incorrect assembly can be dangerous. Follow this manual’s assembly instructions • For the TCP-320F grill, we recommend using Tramontina skewers 26499/011 as well as the video available on Tramontina’s website. Only use the grill when all (blade length: 40 cm). -
Page 17: Steps To A Great Barbecue
• If your model is equipped with a thermometer, it is possible to measure the internal temperature of the grill, making preparation easier. • In order to keep food juicy, we recommend using Tramontina spatulas or tongs to Picture 21 Picture 22 prevent creating holes in the food. -
Page 18: Discarding
Other information about technical support This warranty is limited to repairing or replacing defective parts under normal • TRAMONTINA S/A CUTELARIA, due to the ongoing development of its products, conditions of use after analysis and confirmation that these are indeed defective. - Page 20 Belém: Fone: (91) 4009.7700 Belo Horizonte: Fone: (31) 3223.4026 Curitiba: Fone: (41) 2111.9110 Goiânia: Fone: (62) 3272.2100 Porto Alegre: Fone: (51) 2101.5000 Recife: Fone: (81) 3128.5500 Rio de Janeiro: Fone: (21) 2224.5004 Salvador: Fone: (71) 3215.8266 São Paulo: Fone: (11) 4197.1266 www.tramontina.com...
Need help?
Do you have a question about the TCP-320 and is the answer not in the manual?
Questions and answers