
Subscribe to Our Youtube Channel
Related Manuals for Yardworks 060-2279-2


Summary of Contents for Yardworks 060-2279-2
- Page 1 ELECTRIC GRASS TRIMMER/EDGER 060-2279-2 Owner’s Manual Toll-free helpline: 1-866-523-5218 Read all safety rules and instructions carefully before operating this tool.
-
Page 2: Table Of Contents
Contents Contents…… ……..………………………………………………………………………….………. Specifications..……………………………………………………………………………...………… Warranty……………………………………………………………………………………………….. General Safety Rules……………………………………………………………………...…...……. Electrical Information……………..……..………….……………………..……………………….… Know Your String Trimmer..……………………………………………………………….……..Assembly……………..……………………………………………………………………………….. Operation……………….…………………………………………………………………….………. Maintenance…..…………………………………………………………………………….….……. Troubleshooting.……………………………………………………………………………..………. Symbols……………………………….……………………………...………………..….………….. Exploded View……………………………………………………...………………….…..….…….. Parts List……..……………………………………………………………………………………….. Specifications ELECTRIC GRASS TRIMMER/EDGER Type Corded Voltage 120 V~60 Hz 5.0 A Speed 8,000 RPM (no load) Line Size 0.065”... -
Page 3: Warranty
Warranty TWO-YEAR LIMITED WARRANTY For TWO YEARS from the date of purchase within Canada, YARDWORKS CANADA will, at its option, repair or replace for the original purchaser, free of charge, any part or parts found to be defective in material or workmanship. -
Page 4: General Safety Rules
General Safety Rules WARNING: When using this device, safety precautions must be followed. For your own safety and that of bystanders, please read these instructions before operating the device. Do not use the device without reading the instruction sheet. Please keep the instructions safe for later use. •... - Page 5 • To avoid the risk of injury, keep fingers and hands clear of the cutting line at the leading edge of the guard. MAINTENANCE • After use, disconnect the device from the power supply and check for damage. • When not in use, store the device out of the reach of children •...
-
Page 6: Electrical Information
Electrical Information CAUTION! Always make sure that your outlet is properly grounded. If you are uncertain, have it checked by a certified electrician. WARNING! This grass trimmer is for outdoor use only. Do not expose to rain or use in damp locations. GUIDELINES FOR USING EXTENSION CORDS USE THE PROPER EXTENSION CORD. -
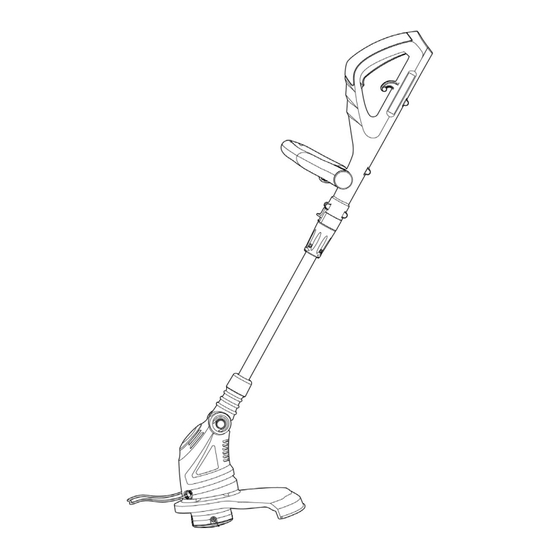
Page 7: Know Your String Trimmer
Know Your String Trimmer KNOW YOUR STRING TRIMMER The safe use of this product requires an understanding of the information on the product and in this operator’s manual as well as a knowledge of the project you are attempting. Before use of this product, familiarize yourself with all operating features and safety rules. -
Page 8: Assembly
Assembly WARNING! Before assembly, make sure that the tool is switched off and unplugged. Fitting the guard (See Figure 2 & Figure 3.) 1. Secure the guard with 3 screws. 2. Place the safety guard onto the motor housing as shown, pivot the guard anti-clockwise to the position of figure 3. -
Page 9: Operation
Preparing the trimmer for use (See Figure 6 & Figure 7.) 1. Turn the adjustment collar clockwise to unlock. You can slide the telescopic tube up or down to achieve comfortable working height. 2. Turn the adjustment collar counter-clockwise until the shaft locks into place. WARNING! Never attempt to lock the trigger lever in the on position. - Page 10 Adjusting cutting head angle (See Figure 9.) Press the button and move the shaft to the lowest position. The shaft will rotate to the 3 positions, when button is pressed. When the shaft is in position, the button will lock into place. Using the edge guide (See Figure 10.) If necessary the distance bracket can be swung down until it locks.
- Page 11 Edging (See Figure 12 & Figure 13.) For edging, push the button and rotate the handle. The handle will rotate to 90°, 180° position, while releasing the button. When the hand is in position, the button will lock into place. The hand will only rotate in one direction.
-
Page 12: Maintenance
Maintenance Your device has been designed to operate over a long period of time with a minimum of maintenance. Continuous satisfactory operation depends upon proper tool care and regular cleaning. WARNING! Before performing any maintenance, switch off and unplug the tool. •... - Page 13 Winding new line onto a spool (See Figure 18 & Figure 19 & Figure 20.) 1. You may wind new cutting line onto an empty spool. 2. Replacement packs of cutting line are available from dealer. 3. Remove the empty spool from the tool as described above. 4.
-
Page 14: Troubleshooting
Troubleshooting If your device is not operating properly, follow the instructions below. If this does not solve the problem, please contact your local repair agent. WARNING! Before proceeding, switch off and unplug. Tool runs slowly • Check that the spool housing can rotate freely. Carefully clean it if necessary. •... -
Page 15: Symbols
Symbols Some of the following symbols may be used on this product. Please study them and learn their meaning. Proper interpretation of these symbols will allow you to operate the product better and safer. SYMBOL NAME DESIGNATION/EXPLANATION Volts Voltage Amperes Current Hertz Frequency (cycles per second) -
Page 16: Exploded View
Exploded View... -
Page 17: Parts List
GT01FM.00.11 spacer guard TM65XX.00.00 motor assembly GT02FM.A0.05 right motor shell assembly GT02FM.00.06 bushing button TOTHYY.03.12 pressed spring GT02FM.A0.04 right rotary handle GT01FM.10.00 assistant handle assembly GT01FM.A0.02 switch button Made in China Imported by YardWorks Canada Toronto, Canada M4S 2B8...
Need help?
Do you have a question about the 060-2279-2 and is the answer not in the manual?
Questions and answers