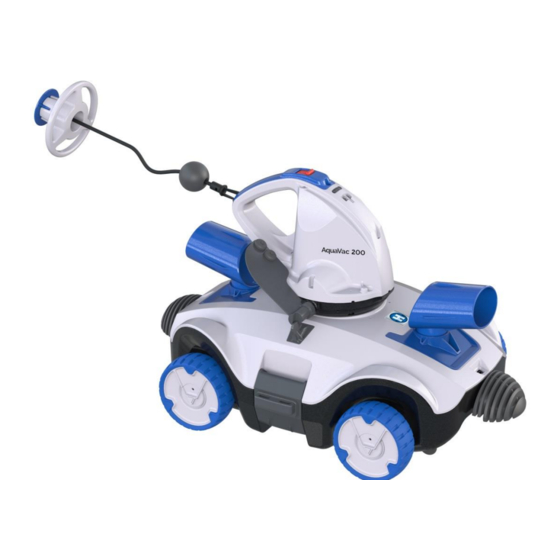
Hayward AquaVac 250 User Manual
Cordless electric pool cleaner
Hide thumbs
Also See for AquaVac 250:
- User manual (56 pages) ,
- Installation & operation manual (57 pages)

Related Manuals for Hayward AquaVac 250


Summary of Contents for Hayward AquaVac 250
- Page 1 AquaVac ® CORDLESS ELECTRIC POOL CLEANER USER MANUAL MANUEL D’UTILISATION ROBOT NETTOYEUR ELECTRIQUE SANS FIL ROBOT SIN CABLE PARA PISCINAS MANUAL DE USUARIO [Type here]...
-
Page 2: Table Of Contents
Table Of Contents IMPORTANT SAFETY INSTRUCTIONS & WARNINGS HOW THE ROBOT WORKS GETTING STARTED Charging The Battery Set-Up Before Use Clip-on Rake/ Brush Assembly Adjustment of Trajectory P.10 Tube setting P.10 Bumper P.11 Pool Preparation P.11 OPERATION P.12... -
Page 3: Important Safety Instructions & Warnings
IMPORTANT SAFETY INSTRUCTIONS & WARNINGS When installing and using this electrical equipment, safety precautions should always be followed, including: SAVE THESE INSTRUCTIONS WARNING! - READ AND FOLLOW ALL INSTRUCTIONS in this manual and on the equipment. Failure to do so could result in severe or fatal injuries. - Ensure that children do not attempt to access cleaner while it is operating. - Page 4 - Do not use this robot if any damage is detected. - Replace damaged parts as soon as possible. Only use parts certified by the distributor or manufacturer. - Turn off the robot, disconnect the external adaptor from the power source, and unplug the external adaptor from the charging base, before detaching the robot from the charging base.
- Page 5 The external adaptor and charging base should not be used outdoors, nor should it be exposed to rain, humidity, any liquid or heat. The transformer (or external adaptor) should be located outside zone 1 Keep the external adaptor and charging base out of reach of children. ...
-
Page 6: How The Robot Works
HOW THE ROBOT WORKS The robot has a water-propelling nozzle at the bottom of the swivel head. Water is first sucked in through the suction mouth at the bottom of the robot, which then goes through the filter and is discharged via the propelling nozzle. -
Page 7: Getting Started
GETTING STARTED Charging The Battery IMPORTANT NOTE: Fully charge the robot (about 5-6 hrs) before using it for the first time. WARNING! Use only the original external adaptor and charging base provided. Make sure the robot and the charging port are clean and dry before set-up. ... -
Page 8: Set-Up Before Use
Deformation, cracks, leaks Smoke 4. When charging is complete, disconnect the external adaptor from the power source and unplug the charging cable from the charging base. IMPORTANT: Make sure to unplug the charging base from the swivel head after charging is complete. -
Page 9: Adjustment Of Trajectory
Tube setting Adjustment of Trajectory: Set the tubes A & B according to below instruction. 1)For pools where the shortest length is 3 meters or above Turn the tube A to position “0” or “1” Set tube B in position Tips: To achieve a steeper curve in trajectory , adjust the tube A to position “2”. -
Page 10: Bumper
NOTE: In case the robot is moving in circle or cannot cover the entire pool, set the tube B to position “ ” as below: Note: You will hear a “click” sound everytime you adjust the fin. Bumper Use of the bumper is optional and can be applied in the following situation: If the robot tends to follow the perimeter of a round pool, clipping a bumper on each side of the robot will eliminate this pattern. -
Page 11: Operation
OPERATION WARNING! Make sure the robot is off. 1. Bring your robot to the side of your pool. NOTE: Do not place the robot in the pool corner and against the pool wall as starting location. Attach the hook of the float to the handle of the swivel head. - Page 12 Power indicator lights: As the robot moves around the pool and collects debris, battery levels will gradually drop and the indicator lights will follow suit. 4 lights ON Up to 120 minutes left Only 10 minutes of usage remains Last light blinks once the last light starts blinking.
-
Page 13: Emptying The Debris Compartment
EMPTYING THE DEBRIS COMPARTMENT WARNING! Using the robot without its filter cover in place will VOID your warranty. In order to maximize the cleaning efficiency, clean the debris compartment and the filter cover before and after each use. CAUTION! Before cleaning the debris compartment, make sure the robot is OFF. 1. -
Page 14: Maintenance & Storage
MAINTENANCE & STORAGE NOTE: 1. Battery discharges on its own during storage. Make sure to fully charge the robot before storage. 2. You must recharge the battery at least once every three months when it is not in use. Unplug the external adaptor from the socket and the charging cable from the charging base. IMPORTANT: Make sure to unplug the charging base from the swivel head after charging is complete. -
Page 15: How To Remove The Battery Pack
Do not expose the battery to fire or intense heat as this may result in an explosion. CAUTION! If a battery leak occurs, avoid any contact with the leaking fluids and place the damaged battery in a plastic bag. If leaking fluids come in contact with skin and clothing, wash immediately with plenty of soap and water. -
Page 16: Troubleshooting
TROUBLESHOOTING Problem Possible Cause Solution Robot does not capture debris Battery is running out Charge the robot again. Impeller is jammed Power off the robot and inspect the hole under the swivel head to see if the impeller is jammed by large debris. If necessary, contact your dealer for further instructions. - Page 17 - Verify the smoothening-ring and bottom plate are installed correctly (refer to below diagrams) Inspect the smoothening-ring for potential damages and wear and tear. Replace with a new one if necessary Suction mouth’s flap ( at cleaner bottom) Suction mouth’s flap works like a door to prevent the debris from Debris escapes from the robot is damaged escaping from the debris compartment.
- Page 18 (1) This device may not cause harmful interference, and (2) this device must accept any interference received, including interference that may cause undesired operation. Changes or modifications not expressly approved by Hayward could void the user’s authority to operate this equipment.
Need help?
Do you have a question about the AquaVac 250 and is the answer not in the manual?
Questions and answers