Advertisement
Quick Links
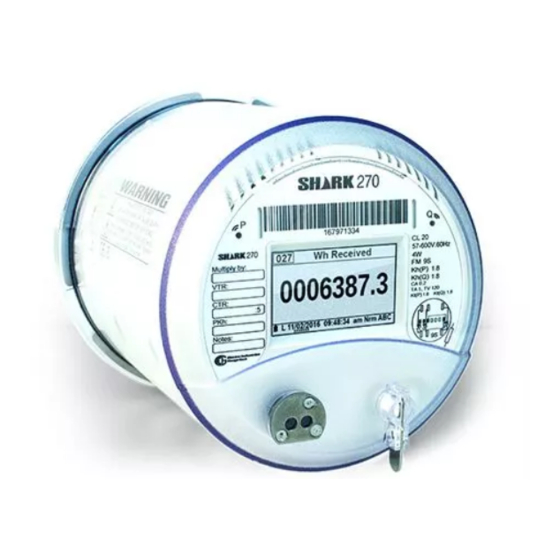
Shark 270 Switchboard Meter Quickstart Guide
CAUTION! Installation of the Shark® 270 meter must be performed only by qualified personnel
who follow standard safety precautions during all procedures. Those personnel should have
appropriate training and experience with high voltage devices. Appropriate safety gloves, safety
glasses and protective clothing are recommended.
During normal operation of the Shark® meter, dangerous voltages flow through many parts of the unit,
includ-
ing: Terminals and any connected CTs (Current Transformers) and PTs (Potential Transformers), all I/O Mod-
ules
and their circuits. All Primary and Secondary circuits can, at times, produce lethal voltages and currents. Avoid
contact with any current-carrying surfaces.
Do not use the meter or any I/O device for primary protection or in an energy-limiting capacity. The meter can
only be used as secondary protection.
IMPORTANT! Refer to your meter's Installation and Operation Manual for additional safety warnings before
performing installation, wiring, or maintenance of your meter. See the link to the manual, below.
NOTE: This Quickstart Guide gives basic installation, wiring, and programming instructions.For additional
meter operation and programming information, refer to your meter's Installation and Operation Manual and
the Communicator PQA
site:
User Manual:
https://www.electroind.com/products/shark-270-swb3-switchboard-case/
From the webpage, click Technical Documents>User Manual.
Software Manual:
https://www.electroind.com/products/communicatorpqa-software-application-5/
From the webpage, click Technical Documents>User Manual.
CommunicatorPQA
TM
https://www.electroind.com/products/communicatorpqa-software-application-5/
From the webpage, click Download ComPQA Pro. To get a Professional license for the software, email
sales@electroind.com or call 516-334-0870.
All EIG's metering and software products' literature can be accessed from:
https://www.electroind.com/all-products/
For software and metering integration, EIG's Technical Support Engineers are available on an hourly or daily
basis to help with typical commissioning assistance, which includes:
•
Verifying meter installation and wiring.
•
Verifying proper system integration.
•
Working with 3rd parties to ensure cross compatibility.
•
Advising users on best practices for optimal implementation.
You can reach Technical Support from 8 a.m. to 8 p.m. EST, Monday-Friday, at 516-334-0870.
Electro Industries/GaugeTech
Powered by Innovation™
, MeterManagerPQA
, and EnergyPQA.com
TM
TM
Setup Software:
Shark® 270 Switchboard Meter Quickstart
Software User Manual on EIG's web-
TM
™
#
Doc
E186707
V.1.04
QS - 1
Advertisement

Subscribe to Our Youtube Channel
Summary of Contents for Electro Industries/GaugeTech Shark 270
- Page 1 Shark® 270 Switchboard Meter Quickstart Shark 270 Switchboard Meter Quickstart Guide CAUTION! Installation of the Shark® 270 meter must be performed only by qualified personnel who follow standard safety precautions during all procedures. Those personnel should have appropriate training and experience with high voltage devices. Appropriate safety gloves, safety glasses and protective clothing are recommended.
- Page 2 Shark® 270 Switchboard Meter Quickstart Hardware Installation: Front Dimensions Back Dimensions Side Dimensions Cutout Dimensions Electro Industries/GaugeTech ™ E186707 V.1.04 QS - 2 Powered by Innovation™...
- Page 3 LOCATE UNIT TO BE CHANGED. TOOLS NEEDED #2 PHILIPS SCREWDRIVER GE CASE 3. INSERT AND INSTALL SHARK 270 SWB3 UNIT INTO PANEL CUT OUT USING INCLUDED MOUNTING CLIPS. 4. INSERT MOUNTING CLIPS INTO SIDE SLOTS. EIG CASE REST METER ON CUTOUT WHILE MOUNTING.
- Page 4 THE ENDING THREADS, WHICH WILL BE IN THE PANEL, RATHER THAN THE THREADS NEEDED FOR THE LOCKING NUT. 3. INSTALL FLAT WASHER, SPLIT WASHER, AND NUT FROM BAG. NOTE: Alternatively, you can use the mounting brackets for new installations. Electro Industries/GaugeTech ™ E186707 V.1.04 QS - 4 Powered by Innovation™...
-
Page 5: Electrical Installation
Ia-Lo Ia-Hi Ib-Lo Ib-Hi Ic-Lo Ic-Hi Earth Ground FUSES Earth Ground LOAD * For ratings, see : Voltage Fuses, on page 9-4 of the meter’s Installation and Operation Manual. Electro Industries/GaugeTech ™ E186707 V.1.04 QS - 5 Powered by Innovation™... - Page 6 (+) (-) Ia-Lo Ia-Hi Ib-Lo Ib-Hi Ic-Lo Ic-Hi Earth Ground FUSES Earth Ground LOAD For ratings, see : Voltage Fuses, on page 9-4 of the meter’s Installation and Operation Manual. Electro Industries/GaugeTech ™ E186707 V.1.04 QS - 6 Powered by Innovation™...
-
Page 7: Test Pulse
VARh (Q1+Q2) or W (Q1+Q4)Demand, VAR (Q1+Q2) Demand, (Q3+Q4) VAR (Q3+Q4) Demand, VA Demand W (Q2+Q3) Demand, Wh (Q2+Q3) VARh (Q1+Q2) or VAR (Q1+Q2) Demand, (Q3+Q4) VAR (Q3+Q4) Demand, VA Demand Electro Industries/GaugeTech ™ E186707 V.1.04 QS - 7 Powered by Innovation™... - Page 8 1. From the CommunicatorPQA software’s Main screen, click the Connect icon in the Icon Bar. 2. From the CommunicatorPQA software’s Main screen, click the Connect icon in the Icon Bar. Electro Industries/GaugeTech ™ E186707 V.1.04 QS - 8 Powered by Innovation™...
- Page 9 Adapter Options). b. Right-click on the connection you want to use. c. Click the Properties button. d. Click on Internet Protocol Version 4 (TCP/IPv4) and click the Properties button. Electro Industries/GaugeTech ™ E186707 V.1.04 QS - 9 Powered by Innovation™...
- Page 10 1. The first Device Profile screen is the CT, PT Ratios and System Hookup settings screen.Click General Settings>CT, PT Ratios and System Hookup from the left side of the Device Profile screen to access this screen from another settings screen. Electro Industries/GaugeTech ™ E186707 V.1.04...
- Page 11 See Chapter 26, Section 26.1.2 in the software manual (see page QS-1 for the download link; alternatively, you can click Help>Contents from the Main screen to open the manual) for instructions on setting up Time Sync for the meter. Electro Industries/GaugeTech ™ E186707 V.1.04 QS - 11 Powered by Innovation™...
- Page 12 Help button on a settings screen, or by selecting Help>Contents from the top of the CommunicatorPQA software’s Main screen. Shark® is a registered trademark of Electro Industries/GaugeTech. CommunicatorPQA , MeterManagerPQA , and Ener- gyPQA.com...


Need help?
Do you have a question about the Shark 270 and is the answer not in the manual?
Questions and answers