Table of Contents
Advertisement
Quick Links
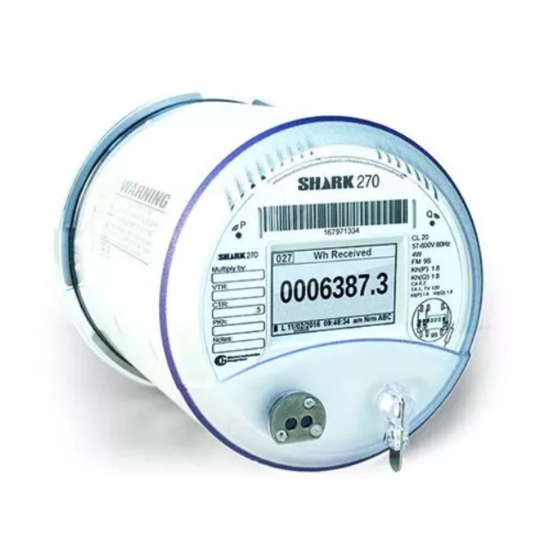
Shark® 270 Meter Option Card Kit Quickstart Guide
The Shark® 270 meter has slots for up to two Option cards.
Many times, the cards are ordered at the time of meter purchase and are
installed at the factory. Option card kits also can be ordered separately:
this guide explains the installation procedure for the kits. See the Shark®
270 Meter Installation and Operation Manual, for more details about the
Option cards.
WARNING! FOR SAFETY, THE METER MUST BE REMOVED FROM
BOTH THE SOCKET (IF APPLICABLE) AND FROM POWER, BEFORE
ATTEMPTING TO PERFORM ANY OPERATION ON IT.
The Option card kits contain the Option card and a communication cable.
The cards are installed in the back of the meter. Socket meter
instructions follow; see QS-3 for switchboard case meter instructions.
The only tools you need to install an Option card in the socket meter are:
- #1 Phillips screwdriver for steps 4, 8 and 20.
- 8 mm Flat blade torque screwdriver set to 30 in-lbs for steps 5 and 19.
Follow these instructions to install an Option card in the socket meter:
1. Power down the meter:
- If the meter is remote powered, disconnect the meter from remote
power; short all current transformers' secondary windings to protective
earth.
- If the meter is blade powered, if possible remove power to the meter. If
power cannot be removed from the meter, disconnect the load side of
the meter.
2. Remove the meter from the socket.
3. Place the meter, blade side down, on a clean, smooth surface. Remove the
clear cover by holding the base with one hand, rotating the cover counter-
clockwise with your other hand, and then lifting off the cover.
4. Unscrew the 4 screws securing the half covers and remove the two
halves (picture 1).
5. Turn the meter on its base.
a. Loosen by only a couple of turns the two captive screws (pivot point) -
one facing you and one on the far side, located closest to the meter
power plug (picture 2, a and b).
b. Completely unscrew the remaining 4 captive screws (2 captive screws
if the meter has the 45S base).
6. Hold the meter face securely with one hand; with your other hand, move
the base of the meter to the right, so that the rear of the meter is
accessible (picture 3).
CAUTION! HOLD THE METER FACE IN YOUR HAND TO AVOID DAMAGING THE GLASS.
Electro Industries/GaugeTech
Electro Industries/GaugeTech
The Leader In Power Monitoring and Smart Grid Solutions
The Leader In Power Monitoring and Smart Grid Solutions
Shark® 270 Meter Option Card Kit Quickstart
a
#
Doc
E159714
V.1.02
Picture 1
b
Picture 2
Pivot
screws on
opposite
sides
Meter face
Picture 3
QS - 1
Advertisement
Table of Contents

Related Manuals for Electro Industries/GaugeTech Shark 270


Summary of Contents for Electro Industries/GaugeTech Shark 270
- Page 1 6. Hold the meter face securely with one hand; with your other hand, move the base of the meter to the right, so that the rear of the meter is accessible (picture 3). CAUTION! HOLD THE METER FACE IN YOUR HAND TO AVOID DAMAGING THE GLASS. Electro Industries/GaugeTech Electro Industries/GaugeTech E159714 V.1.02...
- Page 2 White INP300S Green Plug inserted into card Keystone jack Wires routed Picture 7 Electro Industries/GaugeTech Electro Industries/GaugeTech E159714 V.1.02 QS - 2 The Leader In Power Monitoring and Smart Grid Solutions The Leader In Power Monitoring and Smart Grid Solutions...
- Page 3 (picture 10). Latch Picture 9 Paddle Board Lever Picture 10 Electro Industries/GaugeTech Electro Industries/GaugeTech E159714 V.1.02 QS - 3 The Leader In Power Monitoring and Smart Grid Solutions The Leader In Power Monitoring and Smart Grid Solutions...
- Page 4 (picture 14). RS485/KYZ port RS485/KYZ port connector Picture 14 unplugged Electro Industries/GaugeTech Electro Industries/GaugeTech E159714 V.1.02 QS - 4 The Leader In Power Monitoring and Smart Grid Solutions The Leader In Power Monitoring and Smart Grid Solutions...
- Page 5 Picture 16 10. Switchboard case Keystone Jack placements for the Option cards are shown in the table on the next page. Electro Industries/GaugeTech Electro Industries/GaugeTech E159714 V.1.02 QS - 5 The Leader In Power Monitoring and Smart Grid Solutions...
- Page 6 V-slot Before tightening, check that the screw detail is oriented correctly. Picture 17 Electro Industries/GaugeTech Electro Industries/GaugeTech E159714 V.1.02 QS - 6 The Leader In Power Monitoring and Smart Grid Solutions The Leader In Power Monitoring and Smart Grid Solutions...
- Page 7 I/O case, showing cards connectors Picture 20 Electro Industries/GaugeTech Electro Industries/GaugeTech E159714 V.1.02 QS - 7 The Leader In Power Monitoring and Smart Grid Solutions The Leader In Power Monitoring and Smart Grid Solutions...
- Page 8 The manuals can be found on EIG’s website: Press the latch https://electroind.com/ Shark is a registered trademark of Electro Industries/GaugeTech.The distinctive shapes, styles, and overall appearances of all Shark® meters are trademarks of Electro Industries/GaugeTech. Communicator EXT is a trademark of Picture 24 Electro Industries/GaugeTech.
Need help?
Do you have a question about the Shark 270 and is the answer not in the manual?
Questions and answers