Table of Contents
Advertisement
Quick Links
Advertisement
Table of Contents

Subscribe to Our Youtube Channel
Related Manuals for Electro Industries/GaugeTech Nexus 1500+


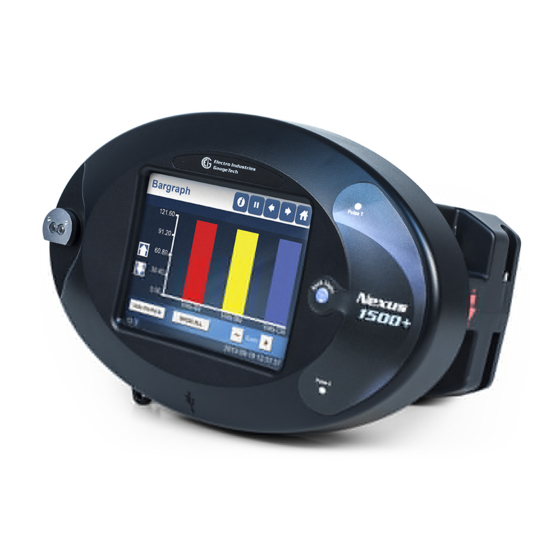
Summary of Contents for Electro Industries/GaugeTech Nexus 1500+
- Page 1 V.1.05 June 24, 2019...
- Page 2 This page intentionally left blank.
-
Page 3: Copyright Notice
Electro Industries/GaugeTech. © 2019 Electro Industries/GaugeTech Nexus® is a registered trademark of Electro Industries/GaugeTech. The distinctive shapes, styles and overall appearances of the Nexus® 1500+ meters is a trademark of Electro Industries/GaugeTech. -
Page 4: Customer Service And Support
516-334-0870 or fax 516-338-4741. Product Warranty Electro Industries/GaugeTech warrants all products to be free from defects in material and workmanship for a period of four years from the date of shipment. During the warranty period, we will, at our option, either repair or replace any product that proves to be defective. -
Page 5: Use Of Product For Protection
Statement of Calibration Our instruments are inspected and tested in accordance with specifications published by Electro Industries/GaugeTech. The accuracy and a calibration of our instruments are traceable to the National Institute of Standards and Technology through equipment that is calibrated at planned intervals by comparison to certified standards. -
Page 6: About Electro Industries/Gaugetech (Eig)
GaugeTech changed the face of power monitoring forever with its first breakthrough innovation: an affordable, easy-to-use AC power meter. More than forty years since its founding, Electro Industries/GaugeTech, the leader in power monitoring and control, continues to revolutionize the industry with the highest quality, cutting edge power monitoring and control technology on the market today. -
Page 7: Table Of Contents
Copyright Notice Customer Service and Support Product Warranty Use of Product for Protection Statement of Calibration Disclaimer Symbols Used in This Manual About Electro Industries/GaugeTech (EIG) 1.1: Product Handling 1: Introduction 1.2: Safety Precautions 1.3: Storage 1.4: Enclosure Compliance 2: Installation 2.1: Recommended Procedures for Wire Entry Hole Cutting... - Page 8 4.2: Troubleshooting 5. Maintenance 5.1: Removing a Meter From Service 5.2: Reinstalling the Meter 6. Ordering Information Electro Industries/GaugeTech Electro Industries/GaugeTech E184701 TOC-2 The Leader In Power Monitoring and Smart Grid Solutions The Leader In Power Monitoring and Smart Grid Solutions...
-
Page 9: Product Handling
(falling dirt). (Taken from NEMA Enclosure Types from the National Electrical Manufacturers Association.) Electro Industries/GaugeTech Electro Industries/GaugeTech E184701 The Leader In Power Monitoring and Smart Grid Solutions... -
Page 10: Safety Precautions
If further information is desired by purchaser regarding a particular installation, operation, or maintenance of particular equipment, contact an EIG repre- sentative. Electro Industries/GaugeTech Electro Industries/GaugeTech E184701 The Leader In Power Monitoring and Smart Grid Solutions... -
Page 11: Storage
The temperature rating for indoor enclosure storage is (-20 to +60) C/(-4 to +140) 1.4: Enclosure Compliance UL / cUL Listed, UL508A, File number: E358101. Electro Industries/GaugeTech Electro Industries/GaugeTech E184701 The Leader In Power Monitoring and Smart Grid Solutions The Leader In Power Monitoring and Smart Grid Solutions... - Page 12 1:Introduction This page intentionally left blank. Electro Industries/GaugeTech Electro Industries/GaugeTech E184701 The Leader In Power Monitoring and Smart Grid Solutions The Leader In Power Monitoring and Smart Grid Solutions...
-
Page 13: 2: Installation
AVERTISSEMENT! Attention extrême lors de la monture de l'enceinte et lors de la mise à terre pour prévenir les articules métalliques, remplissage et autre contaminant de l'entrée de l'enceinte qui peuvent provoquer une condition dangereuse de l'équipe- ment. Electro Industries/GaugeTech Electro Industries/GaugeTech E184701 The Leader In Power Monitoring and Smart Grid Solutions... - Page 14 1/4 A L (+) L(+) N (-) Nexus1500+ Meter CHASSIS DOOR Figure 2.1: 120 Configuration Internal Wiring Schematic Electro Industries/GaugeTech Electro Industries/GaugeTech E184701 The Leader In Power Monitoring and Smart Grid Solutions The Leader In Power Monitoring and Smart Grid Solutions...
- Page 15 TRANSFORMER L (+) L(+) N (-) Nexus1500+ Meter DOOR CHASSIS Figure 2.2: 277 Configuration Internal Wiring Schematic Electro Industries/GaugeTech Electro Industries/GaugeTech E184701 The Leader In Power Monitoring and Smart Grid Solutions The Leader In Power Monitoring and Smart Grid Solutions...
- Page 16 DC V(+) V (-) DC V(-) Nexus1500+ Meter CHASSIS DOOR Figure 2.3: 24 Configuration Internal Wiring Schematic Electro Industries/GaugeTech Electro Industries/GaugeTech E184701 The Leader In Power Monitoring and Smart Grid Solutions The Leader In Power Monitoring and Smart Grid Solutions...
-
Page 17: Recommended Procedures For Wire Entry Hole Cutting
7 " 3 " 5 .5 " 9 .5 " Figure 2.4: Recommended Locations for Wire Entry Electro Industries/GaugeTech Electro Industries/GaugeTech E184701 The Leader In Power Monitoring and Smart Grid Solutions The Leader In Power Monitoring and Smart Grid Solutions... - Page 18 IMPORTANT! • All wire entry into the enclosure shall be accomplished with the use of recognized fittings or strain reliefs. Bare holes shall not be used. Electro Industries/GaugeTech Electro Industries/GaugeTech E184701 The Leader In Power Monitoring and Smart Grid Solutions...
-
Page 19: Enclosure Installation
2: Installation 2.2: Enclosure Installation 14.28" 12.00" 0.31" Figure 2.6: Enclosure Front Dimensions Electro Industries/GaugeTech Electro Industries/GaugeTech E184701 The Leader In Power Monitoring and Smart Grid Solutions The Leader In Power Monitoring and Smart Grid Solutions... - Page 20 2: Installation 12.09" 10.29" Figure 2.7: Enclosure Side Dimensions Electro Industries/GaugeTech Electro Industries/GaugeTech E184701 The Leader In Power Monitoring and Smart Grid Solutions The Leader In Power Monitoring and Smart Grid Solutions...
-
Page 21: 1: Installation Steps
Use shims, if required, to prevent deformation of the enclosure when tightening the bolts, if the mounting surface is distorted. Electro Industries/GaugeTech Electro Industries/GaugeTech E184701 The Leader In Power Monitoring and Smart Grid Solutions... - Page 22 4. Tighten all four mounting bolts after any required shimming is completed. See the figure below. Mounting Bolt Locations Figure 2.9: Mounting Bolt Locations Electro Industries/GaugeTech Electro Industries/GaugeTech E184701 2-10 The Leader In Power Monitoring and Smart Grid Solutions The Leader In Power Monitoring and Smart Grid Solutions...
-
Page 23: 2: Door Locking Instructions
The padlock bracket can be secured in place with a padlock (3/8 inch shackle diameter). See the figure below. Enclosure secured with padlock Figure 2.10: Door with Lock Electro Industries/GaugeTech Electro Industries/GaugeTech E184701 2-11 The Leader In Power Monitoring and Smart Grid Solutions... - Page 24 2: Installation This page intentionally left blank. Electro Industries/GaugeTech Electro Industries/GaugeTech E184701 2-12 The Leader In Power Monitoring and Smart Grid Solutions The Leader In Power Monitoring and Smart Grid Solutions...
-
Page 25: Electrical Wiring
C/194 F Minimum; use copper conductors only. Short circuit current rating is 10kA rms symmetrical. **Or as required by the NEC or local codes. Electro Industries/GaugeTech E184701 The Leader In Power Monitoring and Smart Grid Solutions Electro Industries/GaugeTech The Leader In Power Monitoring and Smart Grid Solutions... -
Page 26: Wiring Instructions
AVERTISSEMENT! Branchez d'abord la mise à la terre comme indiqué dans le dessin ci-dessous. EARTH GROUND POST Installer Supplied “EARTH GROUND” Figure 3.1: Earth Ground Connection Electro Industries/GaugeTech E184701 The Leader In Power Monitoring and Smart Grid Solutions Electro Industries/GaugeTech The Leader In Power Monitoring and Smart Grid Solutions... -
Page 27: 1: Wiring Diagrams
D'UNE ACTIVITÉ DE CÂBLAGE DANS L'ENCEINTE DE L'ASSEMBLAGE NEXUS® 1500+. 3.1.1: Wiring Diagrams The wiring diagrams for the Nexus® 1500+ in Enclosure begin on the next page. Electro Industries/GaugeTech E184701 The Leader In Power Monitoring and Smart Grid Solutions Electro Industries/GaugeTech... - Page 28 Va Vb Earth Ground *Optional Earth Ground LOAD Figure 3.2: 4 Wire WYE Direct Hookup, 3 Element Electro Industries/GaugeTech E184701 The Leader In Power Monitoring and Smart Grid Solutions Electro Industries/GaugeTech The Leader In Power Monitoring and Smart Grid Solutions...
- Page 29 Ground *Optional Earth Ground Earth Ground LOAD Figure 3.3: 4 Wire WYE 3 PT Hookup, 3 Element Electro Industries/GaugeTech E184701 The Leader In Power Monitoring and Smart Grid Solutions Electro Industries/GaugeTech The Leader In Power Monitoring and Smart Grid Solutions...
- Page 30 Ground Earth Ground Short Vb to Vn LOAD Figure 3.4: 4 Wire WYE Direct Hookup, 2.5 Element Electro Industries/GaugeTech E184701 The Leader In Power Monitoring and Smart Grid Solutions Electro Industries/GaugeTech The Leader In Power Monitoring and Smart Grid Solutions...
- Page 31 Short Vb to Vn Earth Ground LOAD Figure 3.5: 4 Wire WYE 2 PT Hookup 2.5 Element Electro Industries/GaugeTech E184701 The Leader In Power Monitoring and Smart Grid Solutions Electro Industries/GaugeTech The Leader In Power Monitoring and Smart Grid Solutions...
- Page 32 Ground Earth Ground Short Vb to Vn LOAD Figure 3.6: 3 Wire Delta Direct Hookup, 2 Element Electro Industries/GaugeTech E184701 The Leader In Power Monitoring and Smart Grid Solutions Electro Industries/GaugeTech The Leader In Power Monitoring and Smart Grid Solutions...
- Page 33 Short Vb to Vn Earth Ground LOAD Figure 3.7: 3 Wire Delta 2 PT Hookup, 2 Element Electro Industries/GaugeTech E184701 The Leader In Power Monitoring and Smart Grid Solutions Electro Industries/GaugeTech The Leader In Power Monitoring and Smart Grid Solutions...
-
Page 34: Hookup Options
- refer to the diagram below. As Shipped Jumper from Vn to Vb (no jumper installed) Figure 3.8: Wiring as Shipped, and Modified Electro Industries/GaugeTech E184701 3-10 The Leader In Power Monitoring and Smart Grid Solutions Electro Industries/GaugeTech The Leader In Power Monitoring and Smart Grid Solutions... -
Page 35: 4: Operation
<2 Ohms. 2. With the unit fully powered, measure the voltage on the input side and output side of the fuse. The voltages should differ by less than 1 Volt. Electro Industries/GaugeTech Electro Industries/GaugeTech E184701... - Page 36 4: Operation This page intentionally left blank. Electro Industries/GaugeTech Electro Industries/GaugeTech E184701 The Leader In Power Monitoring and Smart Grid Solutions The Leader In Power Monitoring and Smart Grid Solutions...
-
Page 37: Maintenance
The four screws on each of the two shorting blocks are used to short the high (+) sides and the low (-) sides to an internal buss bar. The pre-installed jumper connects all lows together and to ground. Electro Industries/GaugeTech Electro Industries/GaugeTech E184701... - Page 38 Figure 5.1: Shorting Block Location WARNING! When you re-install the meter, make sure all CT connections are made BEFORE unscrewing the shorting screws. See Section 5.2. Electro Industries/GaugeTech Electro Industries/GaugeTech E184701 The Leader In Power Monitoring and Smart Grid Solutions...
- Page 39 5. Unscrew and disconnect all the current leads to the meter. 6. Disconnect all connectors to the meter. 7. Remove the 4 DIN mounting brackets. 8. Remove the meter. Electro Industries/GaugeTech Electro Industries/GaugeTech E184701 The Leader In Power Monitoring and Smart Grid Solutions...
-
Page 40: Reinstalling The Meter
Figure 5.2: Shorting Screws Returned to Their Storage Positions 7. Verify that no foreign material remains inside the enclosure - if there is any, clean it out. 8. Energize all circuits and verify operation. Electro Industries/GaugeTech Electro Industries/GaugeTech E184701 The Leader In Power Monitoring and Smart Grid Solutions... -
Page 41: Ordering Information
8. I/O Slot 1: X - No option NTRJ - Second Ethernet card NTFO - Second fiber optic network card (ST terminated) Electro Industries/GaugeTech Electro Industries/GaugeTech E184701 The Leader In Power Monitoring and Smart Grid Solutions The Leader In Power Monitoring and Smart Grid Solutions... - Page 42 AC @50/60 Hz or (100-240) V DC power supply, with 60Hz frequency, Current Class 20, V2 virtual switch, no expansion communication port, a fiber optic I/O card, and a relay output I/O card. Electro Industries/GaugeTech Electro Industries/GaugeTech E184701 The Leader In Power Monitoring and Smart Grid Solutions...
Need help?
Do you have a question about the Nexus 1500+ and is the answer not in the manual?
Questions and answers