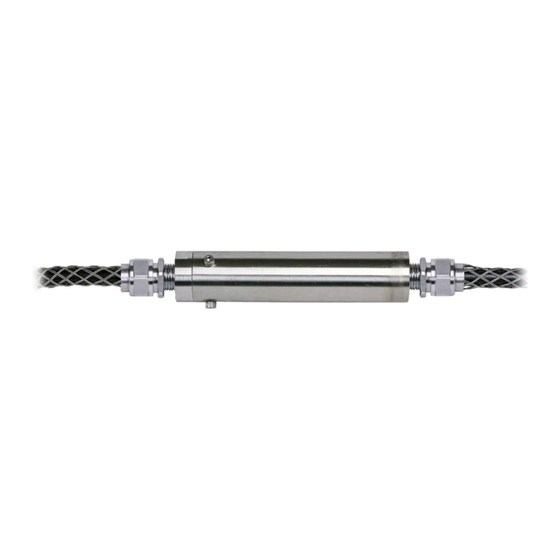
Summary of Contents for Geokon 4500-9-HDF1
- Page 1 Armored Cable Splice Kit Model 4500-9-HDF1 Model 4500-9-HDF2 Instruction Manual ©2020, GEOKON. All rights reserved. Document Revision: A | Release date: 2/20/20...
- Page 3 WARRANTY STATEMENT warrants its products to be free of defects in materials and workmanship, GEOKON under normal use and service for a period of 13 months from date of purchase. If the unit should malfunction, it must be returned to the factory for evaluation, freight prepaid.
-
Page 5: Table Of Contents
TABLE OF CONTENTS 1. SPLICING PREP ............................1.1 REMOVABLE END PREPARATION ..................1.1.1 ARMORED CABLE ..........................1.1.2 UNARMORED CABLE ........................1.2 FIXED END PREPARATION ......................2. MAKING THE SPLICE ..........................2.1 CONNECT THE WIRES ........................2.2 ADJUST THE SPLICE POSITION .................. -
Page 7: Splicing Prep
Prepare and pour the encapsulant into the tube body, fixed end down. Reconnect the removable end cap to the tube body. Wait for the encapsulant to cure. ARMORED CABLE SPLICE KIT. MODELS 4500-9-HDF1 AND 4500-9-HDF2 | SPLICING PREP | 1... -
Page 8: Removable End Preparation
Slide the black 02-500PEI armored cable through outer end of the Kellems grip and and through the fitting nut. Kellems grip Fitting Nut Armored Cable Note: Compress the Kellems grip lengthwise to aid in sliding the cable. 2 | SPLICING PREP | GEOKON... - Page 9 Bend the exposed armor backward over the outer jacket. Armor Remove the paper and 25 mm (1 inch) of inner jacket to expose the braided shield. Inner Jacket Braided Shield ARMORED CABLE SPLICE KIT. MODELS 4500-9-HDF1 AND 4500-9-HDF2 | SPLICING PREP | 3...
- Page 10 Note: Do not connect the fitting nut to the connector adapter until you after you have finished splicing the wire leads. Refer to Section 2 for more information. For instructions on making the splice, see Section 2. 4 | SPLICING PREP | GEOKON...
-
Page 11: Unarmored Cable
Strip the cable’s blue outer jacket back approximately 40 mm (1 ½ inches) from the end to expose the mylar-coated twisted-pair of wire leads. Unwind the leads to separate the pair and the shield wire. ARMORED CABLE SPLICE KIT. MODELS 4500-9-HDF1 AND 4500-9-HDF2 | SPLICING PREP | 5... -
Page 12: Fixed End Preparation
Slide the black 02-500PEI armored cable through outer end of the Kellems grip and and through the fitting nut. Armored Cable Fitting Nut Kellems grip Note: Compress the Kellems grip lengthwise to aid in sliding the cable. 6 | SPLICING PREP | GEOKON... - Page 13 Strip the cable’s black outer jacket back approximately 40 mm (1.5 inches) from the end to expose the armor and wire leads. Bend the exposed armor backward over the outer jacket. Armor ARMORED CABLE SPLICE KIT. MODELS 4500-9-HDF1 AND 4500-9-HDF2 | SPLICING PREP | 7...
- Page 14 Gauge Armor Gauge Shield Thermistor Thermistor Note: Do not connect the fitting nut to the connector adapter until you after you have finished splicing the wire leads. Refer to Section 2 for more information. 8 | SPLICING PREP | GEOKON...
-
Page 15: Making The Splice
Unscrew and remove the ends from the center of the Posi-Lock connector. Insert one bare wire end through one of the Posi-Lock end. Insert the matching other bare wire end through the other Posi-Lock end. ARMORED CABLE SPLICE KIT. MODELS 4500-9-HDF1 AND 4500-9-HDF2 | MAKING THE SPLICE | 9... -
Page 16: Adjust The Splice Position
Ensure the grommet is firmly and snugly in place on the adapter connector. Slide the fitting nut over the grommet and screw it onto the adapter connector. Note: Make sure the cable doesn’t move during this step. 10 | MAKING THE SPLICE | GEOKON... -
Page 17: Assemble The Removable End Cap
Refer to Section 3 for more information. When all the connections are complete, use the supplied CK200 encapsulant to protect the splice, as instructed in Section 3. ARMORED CABLE SPLICE KIT. MODELS 4500-9-HDF1 AND 4500-9-HDF2 | MAKING THE SPLICE | 11... -
Page 18: Encapsulant Mixing Instructions
Take the removable end cap and slide it into the splice tube. Secure the end cap to the tube by reinstalling the three #10-32 x 3/8” hex socket head cap screws. Keep the splice tube vertical during the curing process. 12 | ENCAPSULANT MIXING INSTRUCTIONS | GEOKON... - Page 19 Allow 2 hours (minimum) for the epoxy to cure before installing. ARMORED CABLE SPLICE KIT, MODELS 4500-9-HDF1 AND 4500-9-HDF2 | ENCAPSULANT MIXING INSTRUCTIONS | 13...
- Page 24 GEOKON Phone: +1 (603) 448-1562 GEOKON 48 Spencer Street Email: info@geokon.com is an ISO 9001:2015 Lebanon, New Hampshire Website: www.geokon.com registered company 03766, USA...

Need help?
Do you have a question about the 4500-9-HDF1 and is the answer not in the manual?
Questions and answers