Advertisement
Installation
Instructions
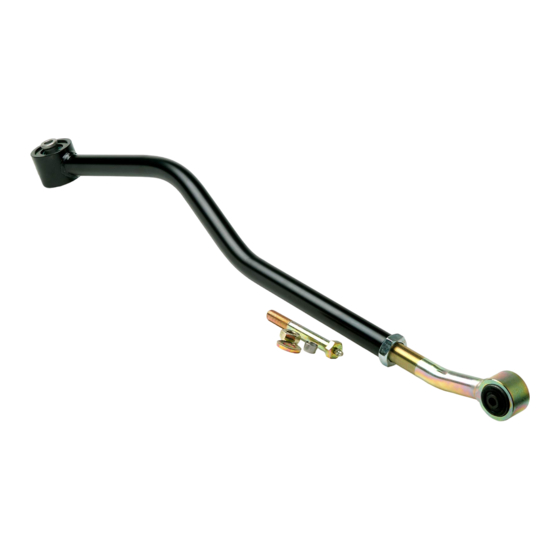
Product: Adjustable Trackbar
Part Number: PN OGS125 / OGS126
Welcome
CONGRATULATIONS on purchasing a new
Adjustable Trackbar from JKS Manufacturing.
We are committed to providing you with the
best products available and your satisfaction is
our first priority.
PLEASE READ these Installation Instructions
carefully, and save them for future reference,
as they contain important installation and
Maintenance information.
JKS Adjustable Trackbar Installation
Important
NOT COMPATIBLE WITH right hand drive
vehicles.
CHECK TORQUE SPECIFICATIONS
regularly.
Tools Required
Metric/Standard Socket Wrench Set
Torque Wrench
Tie Rod End Remover *
Tape Measure
1-7/16" Open-End Wrench
9/16" Drill Bit
Flat Metal File *
Heavy Duty Ratchet Strap *
Anti-Seize Lubricant
Grease Gun with Zerk Fitting Coupler
Wheel Bearing Grease
* Asterisk denotes tools that are not required for some
applications. Thoroughly read instructions first to
determine which tools will be required for your
application.
PN OGS125 / OGS126
Parts
A
OE Rubber Bushing
B
Male Threaded (Axle) End
C
1" NF Jam Nut
D
Female Threaded (Chassis) End
E
9/16" SAE Flat Washer
F
Preload Washer
G
9/16" NF GR8 Ovalok Nut
H
Polyurethane Bushing
I
Snap Ring
J
9/16" x 4-1/2" GR8 Greaseable Bolt
K
Preload Washer
L
2.5" Johnny Joint Ball
M
Polyurethane Bushing
N
Tapered Split Cone
Page 1 of 3
Advertisement
Table of Contents

Summary of Contents for JKS OGS125
- Page 1 Instructions Tools Required Product: Adjustable Trackbar Metric/Standard Socket Wrench Set Torque Wrench Part Number: PN OGS125 / OGS126 Tie Rod End Remover * Tape Measure Welcome 1-7/16” Open-End Wrench CONGRATULATIONS on purchasing a new ...
- Page 2 Adjustable Trackbar installation can be completed. After each adjustment, have your partner hold the steering wheel steady while you take measurements. JKS Adjustable Trackbar Installation PN OGS125 / OGS126 Page 2 of 3...
- Page 3 If necessary, rotate fore/aft until the space between the trackbar and chassis rail bracket is even. 2011 JKS Manufacturing, Inc & Aftermarketing, LLC Revision Date 5/13/2011 IMPORTANT: The Chassis End of Adjustable Trackbar must be in the “neutral” position (as illustrated above) before the Jam Nut is tightened.


Need help?
Do you have a question about the OGS125 and is the answer not in the manual?
Questions and answers