Advertisement
Quick Links
8. Hanging the Door
With the track and the hangers firmly fixed in
position, hang the door on to the track whilst
locating the floor guide into the guide channel in
the bottom of the door. Carefully check the
door can slide smoothly and that there are no
clearance problems.
Install the hanger anti-rise bolts to both of the
hangers as shown in diagram 8.
9. Installation of the Opening Brake
Slide the door to the fully open position, insert
the Opening Brake Rack into the groove on the
track as shown in diagram 9a. Then align the
front edge of the leading hanger with the
aligning mark on the brake rack as shown on
diagram 9b. Screw the rack to the wall through
the four holes in the rack with suitable fixings.
Remove all debris from the track as this will
damage the track and the rollers.
Diagram 9a.
10. Installation of the Hydraulic Control unit
With the door in the closed position fix the
Hydraulic Control Unit to the leading hanger as
shown in diagram 10a with the M5 x 12 screws
provided. Pull the control wire from the Power
Spring Unit and hook the wire loop on to the
leading hanger body as shown in diagram 10b.
Diagram 10a.
11. Adjusting the Closing Power and Speed
To make pulling power stronger
Adjust the closing power by firstly removing the
fixing screw. Adjust the Power Spring Unit as
shown in the diagram 11a. When complete re-
tighten the fixing screw back into its original
position as shown in diagram 11a.
Diagrams shown are for right handed sliding
doors, for left handed sliding doors the
procedures are the opposite.
To adjust the door closing speed as shown in
diagram 11b. Perform this calibration about
250mm from the fully closed position with a flat
head screwdriver, and then ensure that the door
closes with an appropriate and safe speed from
the fully opened position. Do not turn the
speed adjustment valve more than two full
revolutions.
Diagram 8.
Diagram 9b.
Diagram 10b.
To make pulling power weaker
Diagram 11a.
Diagram 11b.
SIROCCO Self Closing System
SLIDING & FOLDING DOOR HARDWARE
Fitting Instructions
Self closing system for a single door between 800 to 1200mm wide. For metal or timber doors with a thickness between 30mm and
46mm. Complete with a hydraulically controlled soft close feature, and a brake to reduce opening speed to prevent damage to the door
and system. Consistent hydraulic closing operational range between temperature ranges of -10°C to 40°C.
(Read instructions thoroughly before commencing installation).
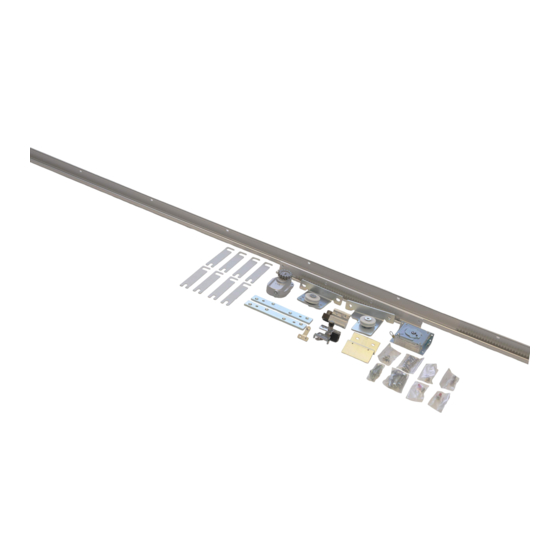
Parts List
Part
Qty
1 Aluminium track 2200mm
1
2 Leading hanger
1
3 Trailing hanger
1
4 Hydraulic Control Unit
1
5 Closing brake rack
1
6 Opening brake rack
1
7 Power spring mounting bracket
1
8 Height adjustment plates
7
9 Power spring unit
1
10 M5 X 16 pan head screw
10
11 M8 x 35 hexagon bolt
4
12 M5 x 12 pan head screw
2
13 Anti rise bolt
2
14 Spring washer (Countersunk 10mm dia)
2
15 M5 X 12 pan head screw
2
16 M4 X 6 pan head screw
2
17 Guide roller
1
Opening door stop
1
Door stop roller
1
18
M6 X 20 Hexagon bolt
1
M5 X 12 pan head screw
2
19 Closing door stop
1
Wooden door plate
2
20
Ø5 X 30 screws (Countersunk flat head)
8
Delayed timer body (optional)
1
21
Time adjusting plate (optional)
1
22 Guide channel (optional)
1
Tools Required
Spirit level, Posi-drive screwdriver, Flat head screwdriver, Metal cutting saw, Drill
with metal and masonry drill bits and a Tape measure
General Elevation of
Completed Installation
The elevation view is showing right hand
opening of the door. Left hand opening is
simply a mirror image. Right hand closing is
shown in all images.
for sliding doors up to 80kg.
November 2008
Advertisement

Related Manuals for Henderson SIROCCO


Summary of Contents for Henderson SIROCCO
- Page 1 8. Hanging the Door SIROCCO Self Closing System SLIDING & FOLDING DOOR HARDWARE With the track and the hangers firmly fixed in position, hang the door on to the track whilst locating the floor guide into the guide channel in Fitting Instructions for sliding doors up to 80kg.
- Page 2 1. Cutting the Track 5. Installation of the Power Spring Unit Place the mounting bracket so it is The track must be cut 180mm shorter than twice the door width. After cutting touching the edge of the track. Adjust the track check the location of the last pre- the height of the bracket to align the marker point with the track as shown drilled screw hole if it is more than 100mm...
Need help?
Do you have a question about the SIROCCO and is the answer not in the manual?
Questions and answers