Table of Contents
Advertisement
Quick Links
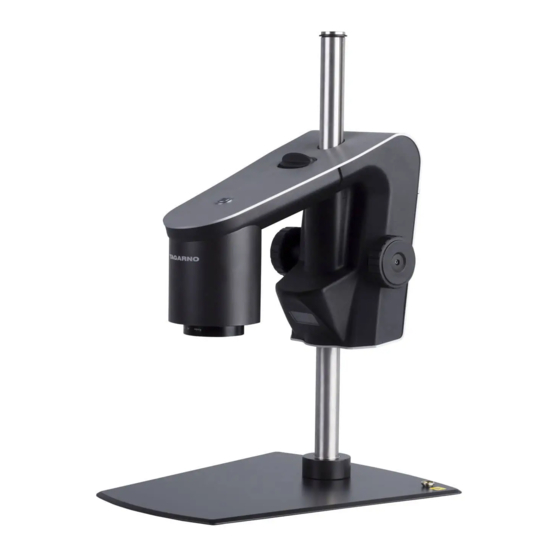
MANUAL | TAGARNO FHD PRESTIGE
VERSION: 2.4 | FIRMWARE 5.20 | 2020-09-15
CONTENTS
1.
2.
3.
4.
5.
6.
7.
8.
9.
Go to tagarno.com/productmanuals to find manuals and tutorial videos.
11.
2
12.
2
13.
2
14.
3
15.
4
16.
5
18.
6
19.
10
20.
15
18
20
21
23
24
24
24
25
26
1
Advertisement
Table of Contents

Related Manuals for tagarno FHD PRESTIGE


Summary of Contents for tagarno FHD PRESTIGE
-
Page 1: Table Of Contents
INTENDED USE SYSTEM UPDATE WARNINGS LICENSE ACTIVATION TIPS TECHNICAL SPECIFICATIONS YOU HAVE RECEIVED PC REQUIREMENTS ASSEMBLING MAINTENANCE CONNECTING WARRANTY OPERATION ERGONOMIC RECOMMENDATIONS SETUP MENU DECLARATION OF CONFORMITY STANDARD APPS COMPLIANCE STATEMENTS Go to tagarno.com/productmanuals to find manuals and tutorial videos. -
Page 2: Intended Use
Do not dismantle any parts of the microscope, except where noted in the manual Never disassemble or clean internal optical surfaces 10. Use only the power supply provided from TAGARNO 11. Always turn off the system before unplugging, when possible 12. -
Page 3: You Have Received
4. YOU HAVE RECEIVED Smart guide Camera arm with lens Rod, washers, screw Base XPLUS FHD control box Power supply USB A-B 3.0 cable HDMI - HDMI cable Hex keys x 3 USB memory stick OPTIONS Ring light white Diffusor lens kit Fresnel lens kit Polarizer kit Lights control box... -
Page 4: Assembling
5. ASSEMBLING TIP! Find the "How to Install" tutorial video here: www.tagarno.com/installprestige Assemble base and rod with the screw. Tighten the rod both below Pull the release button and place the camera arm on the rod. the base vertically and horizontally on top of the base. -
Page 5: Connecting
ESD Grounding point. Only black models Power supply DC Jack Power socket Input: 12V 1.7A (DC) Use only the power supply provided by TAGARNO: Brand/Model: Mean Well/GSM40A12 Protection Class I Input: 100-240V 1.0-0.5A, 50/60Hz Overvoltage category ll Output: 12V 3.34A Max... -
Page 6: Operation
7. OPERATION TIP! Find the "How to Use" tutorial video here: www.tagarno.com/useprestige OPERATION | ADJUSTMENTS AND POWER (1/4) Place the camera arm in the appropriate height according to the Adjust the friction according to your personal preference. lens you are using. - Page 7 OPERATION | XPLUS FHD CONTROL BOX (2/4) These settings will also be activated in Auto exposure mode. XPLUS FHD Control box for TAGARNO FHD functions. Otherwise, exposure compensation is the only setting Do only connect equipment distributed by TAGARNO. visible. Iris, gain and exposure time will automatically be adjusted to recommended settings and cannot be adjusted in this mode.
- Page 8 Save image on USB memory stick The image will be saved on the inserted USB memory stick. If you are using another TAGARNO unit than TAGARNO However, if your USB memory stick is not compatible with your FHD TREND, a window on the screen will provide you with microscope, a pop-up warning will instead ask you to format your information.
- Page 9 OPERATION | KEYBOARD (4/4) When using a keyboard, you can use the shortcuts below to operate your TAGARNO FHD digital microscope. NB: These shortcuts only work when you are not using one of the applications or renaming a photo. Open menu and navigate menu (arrows) Use the up and down arrows to open the microscope menu.
-
Page 10: Setup Menu
8. SETUP MENU SETUP MENU (1/5) The setup menu in your TAGARNO FHD microscope provides you NB: If the camera’s field of view does not contain a white object, with 2 entrances to setup your microscope exactly as you like it. - Page 11 NB! When using an attached scanner to name captured images on the Set the ruler color to your prefered color choice to separate it from TAGARNO FHD microscopes we advise that the scanner is connected your displayed object. Choose between 6 different colors: Yellow, Blue, directly to one of the two USB ports on the microscope.
- Page 12 SETUP MENU (3/5) 4. Auto capture mode 13. Scale bar To automatically capture images at a certain interval, activate the auto Scale bar indicates the size of an inspected object. The scale bar will image capture mode. operate in standard magnification and in all activate applications, except for Verification lines and Measurement application.
- Page 13 9. PNG reference Manuals and videos Import a PNG file and add it as overlay on top of your live image. The Go to www.tagarno.com/productmanuals to find application manuals PNG file can be recalled via the Preset feature. and tutorial videos.
- Page 14 5. Format USB storage This TAGARNO FHD device is designed to only support USB storages with a FAT32 formatted file system. If your USB storage does not currently have this file system, use this function to format the USB storage.
-
Page 15: Standard Apps
9. STANDARD APPS STANDARD APPS (1/2) 1. FOCUS STACKING 2. RULER With Focus stacking, you can stack images with different focuses on With Ruler, you can add vertical and/or horizontal rulers in a variety of top of each other to create one ultra-sharp image. colors on top of your live image. - Page 16 STANDARD APPS (2/2) If encountering problems finding focus, please use “Optimal Working 4. Import a custom watermark Distance” in the microscope camera settings menu, before using the At this stage, you are able to import a custom watermark by inserting Ruler app.
- Page 17 System information window in the microscope Setup menu. Access files with Windows operation system: • Open the File Explorer and type: \\tagarno-snxxxxx Access files with mac operation system: • Open the Connect to server window and type: smb://tagarno-snxxxxx/ •...
-
Page 18: System Update
Plug the USB memory stick into one of the two USB 2.0 inputs at the back of the microscope. • To install a new application or updates to your TAGARNO, you need to perform a system update on your current microscope. USB 2.0 input •... - Page 19 Please see the user manual for further information regarding the use of TAGARNO applications. If you have trouble performing a system update please contact the TAGARNO distributor from which you have purchased the product or When the system update is complete, the microscope will send an e-mail to support@tagarno.com.
-
Page 20: License Activation
12. LICENSE ACTIVATION After purchasing a TAGARNO application, you need to activate it with A. Access the Setup menu by pressing the round center a unique license key file. button on the XPLUS FHD control box until the Setup menu appears... -
Page 21: Technical Specifications
13. TECHNICAL SPECIFICATIONS TECHNICAL SPECIFICATIONS (1/2) Work depth Work height Dimensions H: 464mm/18.3" / D: 325mm/12.8" / W: 275mm/10.8" Weight 11 kg/24.25 lbs Camera resolution FHD 1080p, 1920x1080@25/30/50/60Hz Camera zoom 30x optical Work height Min: 33.5mm/1.32", Max: 288mm/11.34" Work depth 150mm/5.91”... - Page 22 XPLUS FHD Control box Table mount monitor arm Cleaning kit Foot switch Wall mount monitor arm Dust cover TAGARNO Ring light White Circular tilting table Coaxial light TAGARNO Ring light IR Height Adjustment Table Glass table TAGARNO Ring light UV...
-
Page 23: Pc Requirements
14. PC REQUIREMENTS FULL HD 1080P @ 50/60HZ Desktop Laptop Windows 7, 8 or 10 (with DirectX 11) Memory Intel® Core™ i5 or i7 @2.4GHz, CPU: Intel® Core™ i5 or i7 @2.4GHz (4th generation named 4xxx or newer) (4th generation named 4xxx or newer) Hard Disc Space 1GB required (SSD type recommended) Connections... -
Page 24: Maintenance
Warranty terms for the product shall be as follows: TAGARNO warrants that the product will correspond with the specification at the time of delivery and will be free from defects in material and workmanship for a period of 24 months (2 years) from date of invoice from Supplier. -
Page 25: Declaration Of Conformity
COUNTRY Denmark PHONE +45 76251111 DESCRIPTION TAGARNO A/S hereby declares that the product listed above, consisting of a camera unit and a 12V power supply, is in compliance with the following European directives: 2006/25/EU Artificial Optical Radiation 2014/30/EU Electromagnetic Compatibility... -
Page 26: Compliance Statements
20. COMPLIANCE STATEMENTS INDUSTRY CANADA COMPLIANCE STATEMENT CAN ICES-3 (A)/NMB-3(A) This Class A digital apparatus meets the requirements of the Canadian Interference-Causing Equipment Regulations. Cet appareil numérique de la Classe A respecte toutes les exigences du Règlement sur le Matériel Brouilleur du Canada. FCC COMPLIANCE STATEMENT (UNITED STATES) Federal Communications Commission (FCC) Statement This equipment has been tested and found to comply with the limits for a Class A digital device, pursuant to Part 15 of the...
Need help?
Do you have a question about the FHD PRESTIGE and is the answer not in the manual?
Questions and answers