Advertisement
Quick Links
I N S T A L L A T I O N I N S T R U C T I O N S
TIL1X2UU
TIL1X3UU
TIL1X4UU
TILVABUU
Accessory
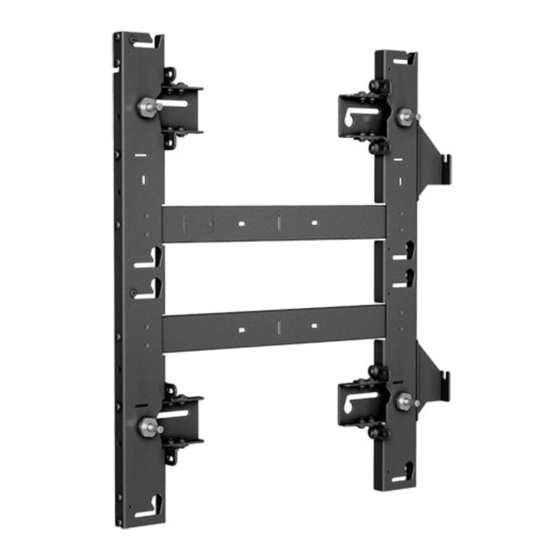
UU Series LED Wall Mounts / Accessory
Spanish Product Description
German Product Description
Portuguese Product Description
Italian Product Description
Dutch Product Description
French Product Description
TIL1X2UU / TIL1X3UU / TIL1X4UU /
TILVABUU
Advertisement

Related Manuals for CHIEF UU Series


Summary of Contents for CHIEF UU Series
- Page 1 I N S T A L L A T I O N I N S T R U C T I O N S TIL1X2UU TIL1X3UU TIL1X4UU TILVABUU Accessory UU Series LED Wall Mounts / Accessory Spanish Product Description German Product Description Portuguese Product Description Italian Product Description Dutch Product Description...
-
Page 2: Important Safety Instructions
Return the mounting system to a service center for ACCESSORY: AN ACCESSORY is the secondary Chief examination and repair. product which is attached to a primary Chief product, and may have a component attached or setting on it. WARNING: Do not use this mounting system outdoors. - Page 3 TIL1X2UU / TIL1X3UU / TIL1X4UU / TILVABUU Installation Instructions LEGEND Tighten Fastener Pencil Mark Apretar elemento de fijación Marcar con lápiz Befestigungsteil festziehen Stiftmarkierung Apertar fixador Marcar com lápis Serrare il fissaggio Segno a matita Bevestiging vastdraaien Potloodmerkteken Serrez les fixations Marquage au crayon Loosen Fastener Drill Hole...
- Page 4 Installation Instructions TIL1X2UU / TIL1X3UU / TIL1X4UU / TILVABUU TABLE OF CONTENTS...
-
Page 5: Tools Required For Installation
Level [2 ft. long] (for installation into steel stud walls) [4+ ft. long] 7/32" [6+ ft. long] Chief brand FCAT1 Toggler Kit; OR 3/8" 1/2" Hardware for installation to steel stud wall: • 1/4-20 Toggler Snaptoggle BB (Qty 4) [Small level] •... -
Page 6: Pre-Installation
TIL1X2UU / TIL1X3UU / TIL1X4UU / TILVABUU Installation Instructions PRE-INSTALLATION • Vertical Connector Brackets [sold separately] If the video wall requires multiple rows, decide on whether the installation will start with the top or IMPORTANT ! : Reference the LED screen installation bottom row. -
Page 7: Installation
Installation Instructions TIL1X2UU / TIL1X3UU / TIL1X4UU / TILVABUU INSTALLATION If Starting LED Wall Installation With the Bottom Row NOTE: If you’re starting the installation at the bottom of the Adding Vertical Connector Kit LED video wall, the vertical connector brackets should NOTE: If more LED screens will need to be added to the top or be attached to the TOP of the mounts to create the... - Page 8 TIL1X2UU / TIL1X3UU / TIL1X4UU / TILVABUU Installation Instructions Adding Side Connectors NOTE: If desired, the mount installation may be started in the middle of the video wall, attaching mounts out from the NOTE: To assist in mount installation, install the side center to the left and right ends.
- Page 9 Installation Instructions TIL1X2UU / TIL1X3UU / TIL1X4UU / TILVABUU Installing First Mount The TIL1X2UU / TIL1X3UU /TIL1X4UU (Unilumins Upanel S 14-1/4 inches and Barco XT Series) LED wall mounts are designed to be mounted to: • a bare 8" concrete or 8"x8"x16" concrete block wall; or •...
- Page 10 TIL1X2UU / TIL1X3UU / TIL1X4UU / TILVABUU Installation Instructions Place a level across front of the mount at bottom of teardrop Just a tip - Tighten down the lag screw on the slots. (See Figure 8) side that does NOT need to be raised. This Check the level of the mount at the teardrop slots.
- Page 11 Installation Instructions TIL1X2UU / TIL1X3UU / TIL1X4UU / TILVABUU 14. Drill pilot holes in centerline of lower slots (see Table 1 for size) and follow fastener information (appropriate for wall type) located in Table 1. (See Figure 11) 15. Double check the level of the mount along the side of the mount.
- Page 12 TIL1X2UU / TIL1X3UU / TIL1X4UU / TILVABUU Installation Instructions Adding Additional Mounts Connecting Mounts Side to Side Just a tip - To assist in mount installation, install the side connectors BEFORE the mounts are attached to the wall. See previous Adding Side Connectors section.
- Page 13 Installation Instructions TIL1X2UU / TIL1X3UU / TIL1X4UU / TILVABUU Just a tip - Just a tip - The plumb on these mounts at this The lag screws need to be at the point doesn’t have to be perfect. Final adjustments top of the mounting slot to allow the mount to be can be done once all the mounts are installed.
- Page 14 TIL1X2UU / TIL1X3UU / TIL1X4UU / TILVABUU Installation Instructions Checking Placement and Alignment Loosely install the self-tapping screws then wrap the string around the screw and tighten. (See Figure 17) The holes around mounting slots on the mounts can be Run the string tightly between the same hole at each end of used for the included #10 x 1/2"...
- Page 15 Installation Instructions TIL1X2UU / TIL1X3UU / TIL1X4UU / TILVABUU Install one or two #10 x 1/2" Phillips self-tapping screws (C) near the mounting button slots on the far left mount. One or two is typically all that is needed per mount. (See Figure NOTE: There are 2 places on NOTE:...
- Page 16 TIL1X2UU / TIL1X3UU / TIL1X4UU / TILVABUU Installation Instructions When installing a row of cabinets, slide some of them into When installing a column of cabinets to check alignment, it place and connect them to make sure the cabinets are is a good idea to ensure that the connectors all slide into aligned.
- Page 17 Installation Instructions TIL1X2UU / TIL1X3UU / TIL1X4UU / TILVABUU Connecting Mounts Above or Below First Row • Hanging Mounts from an Upper Row (E) x 2 Hang the lower mount on the partially installed Phillips head screws (M) in the vertical connectors (L).
- Page 18 Slide left column all the way to the left to allow for clearance NOTE: Chief LED mounts are designed for the cabinets to be when installing the next column. (See Figure 25) installed starting with columns, but it is also acceptable to install the bottom row of cabinets first.
-
Page 19: Connecting The Cabinets
Installation Instructions TIL1X2UU / TIL1X3UU / TIL1X4UU / TILVABUU While installing the cabinets, occasionally check to be sure the connector fit and easily slide into place. (D) x 2 Just a tip - When installing the cabinets do not force them together. If the alignment needs correcting the plumb may need to be adjusted or there may be interference somewhere in the installation. - Page 20 TIL1X2UU / TIL1X3UU / TIL1X4UU / TILVABUU Installation Instructions Fastener Installation Methods Steel Stud IMPORTANT ! : See Table 1 for appropriate hardware IMPORTANT ! : See Site Requirements for Steel Stud and pilot hole sizes for various wall types. Installation section before proceeding with Steel Studs IMPORTANT ! : The expanse of the LED wall will most installation to ensure installation site meets requirements!
- Page 21 Installation Instructions TIL1X2UU / TIL1X3UU / TIL1X4UU / TILVABUU Line up anchor with attachment point. Steel stud Insert 1/4-20 x 1-3/4" Phillips pan head screw through 1/4" (if present) washer, corresponding mounting hole in wall bracket and Drywall into anchor, and tighten until flush against wall bracket. DO NOT over tighten! (See Figure 32) Washer Phillips...
- Page 22 Installation Instructions TIL1X2UU / TIL1X3UU / TIL1X4UU / TILVABUU DIMENSIONS TIL1X2UU DIMENSIONS: INCHES [MILLIMETERS]...
- Page 23 TIL1X2UU / TIL1X3UU / TIL1X4UU / TILVABUU Installation Instructions DIMENSIONS...cont’d TIL1X2UU cont’d TIL1X3UU DIMENSIONS: INCHES [MILLIMETERS]...
- Page 24 Installation Instructions TIL1X2UU / TIL1X3UU / TIL1X4UU / TILVABUU DIMENSIONS...cont’d TIL1X3UU cont’d DIMENSIONS: INCHES [MILLIMETERS]...
- Page 25 Installation Instructions TIL1X2UU / TIL1X3UU / TIL1X4UU / TILVABUU DIMENSIONS...cont’d TIL1X4UU DIMENSIONS: INCHES [MILLIMETERS]...
- Page 26 TIL1X2UU / TIL1X3UU / TIL1X4UU / TILVABUU Installation Instructions DIMENSIONS...cont’d TIL1X4UU cont’d TILVABUU DIMENSIONS: INCHES [MILLIMETERS]...
- Page 27 Installation Instructions TIL1X2UU / TIL1X3UU / TIL1X4UU / TILVABUU DIMENSIONS...cont’d 3X3 Configuration - TIL1X3UU DIMENSIONS: INCHES [MILLIMETERS]...
- Page 28 TIL1X2UU / TIL1X3UU / TIL1X4UU / TILVABUU Installation Instructions DIMENSIONS...cont’d 3X3 Configuration - TIL1X3UU cont’d 4X4 Configuration - TIL1X4UU DIMENSIONS: INCHES [MILLIMETERS]...
- Page 29 Installation Instructions TIL1X2UU / TIL1X3UU / TIL1X4UU / TILVABUU DIMENSIONS...cont’d 4X4 Configuration - TIL1X4UU cont’d DIMENSIONS: INCHES [MILLIMETERS]...
- Page 30 TIL1X2UU / TIL1X3UU / TIL1X4UU / TILVABUU Installation Instructions DIMENSIONS...cont’d 5X5 Configuration - TIL1X5UU DIMENSIONS: INCHES [MILLIMETERS]...
- Page 31 Installation Instructions TIL1X2UU / TIL1X3UU / TIL1X4UU / TILVABUU DIMENSIONS...cont’d 5X5 Configuration - TIL1X5UU cont’d DIMENSIONS: INCHES [MILLIMETERS]...
-
Page 32: Installation Instructions
TIL1X2UU / TIL1X3UU / TIL1X4UU / TILVABUU Installation Instructions USA/International A 6436 City West Parkway, Eden Prairie, MN 55344 P 800.582.6480 / 952.225.6000 F 877.894.6918 / 952.894.6918 Europe A Franklinstraat 14, 6003 DK Weert, Netherlands P +31 (0) 495 580 852 F +31 (0) 495 580 845 Asia Pacific A Office No.
Need help?
Do you have a question about the UU Series and is the answer not in the manual?
Questions and answers