Table of Contents
Advertisement
Quick Links
Thank you for purchasing a quality rocking chair from Hinkle Chair Company. Hinkle Chair Company is a family-owned
business that has made hardwood furniture in the same location in Springfield, Tennessee since 1834. Your chair comes with a
rich heritage and will become a treasured family heirloom. If you should have any comments or questions please call the toll
free number below between 8:00 am and 4:30 PM CST Monday through Friday. Again, we appreciate your business and hope
you get many years of enjoyment from this chair.
NOTICE: The Rocking Chair product that you have purchased requires some assembly. As with all furniture, proper assembly
is necessary for the safe and comfortable use of your rocker. Hinkle Chair Company cannot be responsible for any damage or
injury that results from the improper assembly of the chair. Please read and follow the assembly steps carefully and if you have
any questions regarding the proper assembly of your rocker please call The Hinkle Chair Company Helpline (800) 251-3025
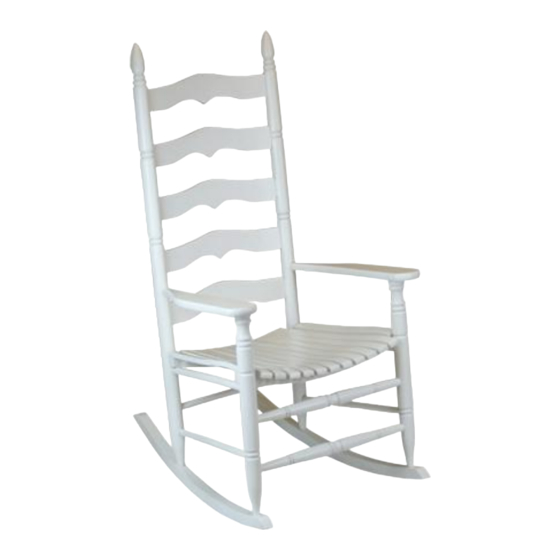
PLEASE NOTE: The Rocker you have purchased is depicted above. Many of our rockers assemble with the exact same
steps and the only difference is the appearance of the chair. If the rocker depicted in the assembly steps does not look
the chair you purchased, it assembles with the same steps. Also, all references of left and right in these instructions are
from the perspective of standing in front of the chair facing it, not siting in it.
#400 SLAT ROCKER
ASSEMBLY INSTRUCTIONS
1
Advertisement
Table of Contents

Related Manuals for Hinkle Chair Company 400 SLAT ROCKER


Summary of Contents for Hinkle Chair Company 400 SLAT ROCKER
- Page 1 NOTICE: The Rocking Chair product that you have purchased requires some assembly. As with all furniture, proper assembly is necessary for the safe and comfortable use of your rocker. Hinkle Chair Company cannot be responsible for any damage or injury that results from the improper assembly of the chair. Please read and follow the assembly steps carefully and if you have any questions regarding the proper assembly of your rocker please call The Hinkle Chair Company Helpline (800) 251-3025 PLEASE NOTE: The Rocker you have purchased is depicted above.
- Page 2 FAILURE TO FOLLOW THESE PROCEDURES WILL VOID YOUR WARRANTY! Hinkle Chair Company has made every effort to provide you with a ready-to-assemble product that has the same quality as our fully assembled rocking chairs. Please follow the instructions below to protect you (The Customer) from accepting responsibility for a product that is damaged or incomplete.
- Page 3 400 SLAT ROCKING CHAIR F-L/R SCREWS-NAILS BUTTONS PARTS INCLUDED: 1- CHAIR BACK (A) 1- RIGHT ARM (F-R) 1- CHAIR FRONT (B) 4- WOODEN BUTTONS 1- SEAT (C) 4- NAILS 4- 2” SCREWS 2- SIDE SPINDLES (D-1) 4- 1.5” SCREWS 2- UPPER SIDE SPINDLES (D-2) 2- ROCKER RUNNERS (E) 1- LEFT ARM (F-L) TOOLS REQUIRED (NOT INCLUDED) RUBBER MALLET, HAMMER...
- Page 4 400 SLAT ROCKING CHAIR NOTE: ALL PERSPECTIVE OF LEFT AND RIGHT IN THESE INSTRUCTIONS ARE FROM THE PERSPECTIVE OF STANDING IN FRONT FACING THE CHAIR, NOT SITTING IN IT. STEP 1: Lay your chair on the shipping Ensure the countersink portion of the pre- Box during assembly to protect drilled holes are facing out at a 45 degree it.
- Page 5 400 SLAT ROCKING CHAIR STEP 3: Place the seat (C) into the chair. Do not put Place chair upright and insert the tenon of the arm screws in at this time. The seat must be Arm (F-L/R) into the predrilled hole in the chair placed in the chair before the next step./ chair back (A).
- Page 6 400 SLAT ROCKING CHAIR STEP 4: If you are having difficulty getting the rear Take the nails provided and place one in each of the runner pre-drilled hole on the tenon you may pre-drilled holes in the side of the runner (E). Drive have to tap on the chair back (A) post forward nails flush with side of runner.
- Page 7 400 SLAT ROCKING CHAIR STEP 6: Locate the upper side spindles (D-2) and Pull Seat down onto D-2. With the chair lying on 4 of the 1.5” screws. You will notice that on its back; locate the pre-drilled hole in the bottom there are indentations on one set of holes on of the seat.
- Page 8 400 SLAT ROCKING CHAIR STEP 7: With a hammer, gently tap the button into the pre- With a hammer, gently tap the button into the pre- drilled hole into the chair back. Tap until drilled hole on the inside of the arm. Tap until flush with the back post.
Need help?
Do you have a question about the 400 SLAT ROCKER and is the answer not in the manual?
Questions and answers