Table of Contents
Advertisement
Available languages
Available languages
Quick Links
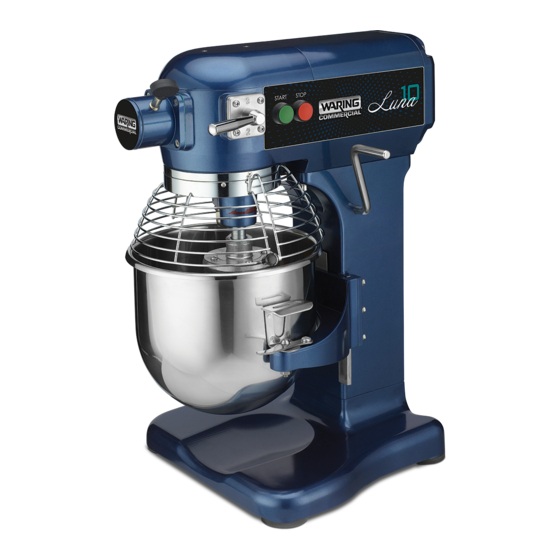
10.0-QUART/20.0-QUART STAND MIXERS
BATIDORAS DE PIE DE 10 L Y 20 L
BATTEUR SUR SOCLE DE 10 L ET 20 L
WSM10L/WSM20L
For your safety and continued enjoyment of this product,
always read the instruction book carefully before using.
Para su seguridad y para disfrutar plenamente de este producto,
siempre lea cuidadosamente las instrucciones antes de usarlo.
Afin que cet appareil vous procure en toute sécurité beaucoup
de satisfaction, lire attentivement le mode d'emploi avant de l'utiliser.
Advertisement
Chapters
Table of Contents

Related Manuals for Waring WSM10L


Summary of Contents for Waring WSM10L
- Page 1 10.0-QUART/20.0-QUART STAND MIXERS BATIDORAS DE PIE DE 10 L Y 20 L BATTEUR SUR SOCLE DE 10 L ET 20 L WSM10L/WSM20L For your safety and continued enjoyment of this product, always read the instruction book carefully before using. Para su seguridad y para disfrutar plenamente de este producto, siempre lea cuidadosamente las instrucciones antes de usarlo.
-
Page 2: Important Safeguards
5. The use of attachments not recommended or sold by Waring may cause fire, electric shock or injury. 6. Do not use more than one attachment at a time. -
Page 3: Table Of Contents
17. Keep machine clean. 18. Disconnect power supply before performing maintenance. SAVE THESE INSTRUCTIONS FOR COMMERCIAL USE ONLY CONTENTS Important Safeguards ................2 Grounding Instructions ..............4–5 Extension Cords .................5 Parts & Accessories ................6 Installation ..................7 Operating Instructions ................8 Attaching Bowl to Mixer ..............9 Mixing Ingredients ................ -
Page 4: Grounding Instructions
NOTE: The maximum rating is based on the attachment that draws the greatest power. Other recommended attachments may draw significantly less power. WARNING: RISK OF FIRE OR ELECTRIC SHOCK The lightning flash with an arrowhead symbol within an equilateral triangle is intended to alert the user to the presence of uninsulated, dangerous voltage within the product’s enclosure that may be of sufficient magnitude to constitute a risk of fire or electric shock to persons. -
Page 5: Extension Cords
GROUNDING METHOD SPECIAL CORD SET INSTRUCTIONS A short power-supply cord is provided to reduce the risks resulting from becoming entangled in or tripping over a longer cord. Longer extension cords are available and may be used if care is exercised in their use. If a long extension cord is used, the marked electrical rating of the extension cord must be at least as great as the electrical rating of the appliance, and the longer cord should be arranged so that it will not... -
Page 6: Parts & Accessories
PARTS & ACCESSORIES WSM10LDH WSM10LMP WSM10LW WSM20LDH WSM20LMP 1. START Button 9. Bowl Clamp 2. STOP Button 10. Speed Control 3. Attachment Hub 11. Bowl Guard WSM20LW 4. Attachment Hub 12. Bowl Screws 13. Rubber Feet 5. Bowl-Lift Lever 14. Bowl Cradle 6. -
Page 7: Installation
Contact your local representative first. 2. Remove the corrugated box from the skid by removing the bands on the box. NOTE: The WSM10L and WSM20L are shipped in a wooden crate; only the bolts at the bottom of the crate on all four sides need to be removed. -
Page 8: Operating Instructions
Use at least two other people to tilt the unit and install rubber feet. 6. Inspect mixer to make sure all parts have been provided (i.e., bowl, paddle, whisk, and dough hook). 7. Read the electrical information found on the data plate located at the rear of the machine. -
Page 9: Attaching Bowl To Mixer
ABOUT THE REMOVABLE BOWL GUARD (Models WSM10L and WSM20L) The interlocking bowl guard is easy to remove and reattach for easy cleaning in a sink or dishwasher. NOTE: When bowl guard is open or not properly installed, mixer will not operate. -
Page 10: Mixing Ingredients
ATTACH AGITATOR TO MIXER (i.e., Beater, Mixing Paddle, Dough Hook, Whisk) Install bowl BEFORE attaching agitator. NOTE: It is easier to install the agitator before adding the ingredients into the bowl. 1. Rotate bowl guard to the left, so it rests in the open position. -
Page 11: Setting And Changing Speed
CAUTION SETTING AND CHANGING SPEED Three fixed speeds are available for use: first (1), second (2) and third (3). IMPORTANT: When mixing product, it is recommended to follow the Capacity Chart on page 15. Select the appropriate speed setting by lifting or lowering the speed control lever. -
Page 12: Cleaning Instructions
Remove the agitator from the planetary shaft by lifting it upward, then rotating it counterclockwise until it is unlocked. Lower the agitator and remove from the planetary shaft. Push each bowl clamp backward to unlock the bowl from the bowl cradle. Lift up slightly on bowl, so it clears pins on the bowl cradle. - Page 13 Planetary Shaft Wipe with clean damp cloth; dry and sanitize. Clean after each use. Apply a light quantity of Waring oil (mineral oil) to the planetary shaft after cleaning. Exterior Hand-wash using mild soap and water; rinse, dry, Daily and sanitize.
-
Page 14: Recommended Maintenance
IMPORTANT POINTS Waring mixer will provide years of uninterrupted service if you do the following: RECOMMENDED MAINTENANCE PART REQUIRED ACTION FREQUENCY Bowl Slide Apply Waring oil (mineral oil) on bowl If bowl becomes difficult to slide. Raise and lower bowl to distribute raise or lower. - Page 15 CAPACITY CHART & SUGGESTED SPEED CONTROL PRODUCT DESCRIPTION ATTACHMENT AGITATOR SPEED 10-QUART 20-QUART Final bread and roll 1st Speed Dough hook 10 lb. 25 lb. dough weight only Final pizza 1st Speed Dough hook 9 lb. 25 lb. dough weight only Pie crust Flat beater...
-
Page 16: Warranty
Waring Service Center at 314 Ella T. Grasso Ave., Torrington, CT 06790, or any Factory Approved Service Center. This warranty... -
Page 17: Troubleshooting
TROUBLESHOOTING PROBLEM POSSIBLE CAUSES ACTION REQUIRED Mixer will not Bowl guard not in closed position. Rotate guard to the right until fully operate closed. Bowl not raised. Raise bowl to highest position. Power not connected properly. Check all power connections. Plug into a live socket. - Page 18 Residue Contaminated hub due to buildup Technician to remove hub and clean interior. leaking from of meat and/or vegetable juices To avoid problem, wipe hub and dry after (especially tomatoes). each use. *Note: Acid from tomato juices will corrode/contaminate interior parts! Agitators Defective or dented bowl.
-
Page 19: Medidas De Seguridad Importantes
5. El uso de accesorios/aditamentos no recomendados o provistos por Waring presenta un riesgo de incendio, descarga eléctrica o heridas. 6. No use más de un accesorio/aditamento a la vez. - Page 20 14. No permita que el cable cuelgue del borde de la mesa o de la encimera. 15. No introduzca las manos en el bol durante el funcionamiento. 16. Coloque el aparato sobre una superficie estable y limpia. Manténgalo alejado de áreas sobrecalentadas o muy húmedas, y de equipos que sean altamente electromagnéticos o que puedan producir un fuerte campo electromagnético.
-
Page 21: Instrucciones De Puesta A Tierra
NOTA: la potencia nominal máxima está basada en el accesorio/ aditamento que consume más electricidad. Otros accesorios/ aditamentos pueden utilizar menos electricidad. ADVERTENCIA: RIESGO DE INCENDIO O DESCARGA ELÉCTRICA El símbolo de relámpago con punta de flecha dentro de un triángulo equilátero tiene como fin alertar al usuario de la presencia de voltajes peligrosos no aislados en el interior del aparato, los cuales pueden ser de suficiente magnitud... -
Page 22: Uso De Extensiones
MÉTODO DE PUESTA A TIERRA USO DE EXTENSIONS El cable provisto con este aparato es corto, para reducir el riesgo de que alguien se enganche o tropiece con un cable más largo. Se podrá usar una extensión eléctrica, pero con cuidado. La clasificación nominal de la extensión debe ser por lo menos igual a la del aparato. -
Page 23: Piezas Y Accesorios
PIEZAS Y ACCESORIOS WSM10LDH WSM10LMP WSM10LW WSM20LDH WSM20LMP Botón START Botón STOP Puerto de conexión de los aditamentos Tornillo de sujeción de los aditamentos Palanca elevadora del bol Asa de la tapa antisalpicaduras Eje planetario WSM20LW Asas del bol Abrazadera del bol Control de velocidad Tapa antisalpicaduras Pies de goma... -
Page 24: Instalación
2. Retire del palé la caja de cartón que contiene la unidad, quitando las bandas de fijación. NOTA: los modelos WSM10L y WSM20L se envían en una caja de madera. Para quitar la caja del palé, se deben quitar los pernos ubicados en los cuatros lados de la parte inferior de la caja. -
Page 25: Instrucciones De Operación
• Debe haber suficiente espacio detrás de la unidad para no bloquear la salida de ventilación trasera. Pida ayuda a por lo menos otras dos personas para inclinar la unidad e instalar los pies de goma. 6. Inspeccione el aparato para asegurarse de que incluye todas las piezas (bol, batidor plano, batidor de alambre y gancho amasador). -
Page 26: Instalación Del Bol
TAPA ANTISALPICADURAS REMOVIBLE (modelos WSM10L y WSM20L) La tapa antisalpicaduras es fácil de instalar y quitar, y puede lavarse a mano o en el lavavajillas. NOTA: la unidad no se encenderá si la tapa antisalpicaduras está abierta o mal instalada. -
Page 27: Mezcla
CONEXIÓN DEL AGITADOR (batidor, batidor plano, gancho amasador, batidor de alambre) Instale el bol ANTES de conectar el agitador. NOTA: es más fácil instalar el agitador antes de colocar los ingredientes en el bol. 1. Gire la tapa antisalpicaduras hacia la izquierda para abrirla. -
Page 28: Fijación/Cambio De La Velocidad
2. Levante la palanca elevadora del bol hasta que el bol se bloquee. 3. Gire la tapa antisalpicaduras hacia la derecha para cerrarla (escuchará un “clic”). NOTA: la unidad no se pondrá en marcha si la tapa antisalpicaduras está abierta o si el bol está bajado. PRECAUCIÓN FIJACIÓN/CAMBIO DE LA VELOCIDAD Hay tres velocidades fijas disponibles: baja (1), media (2) y alta (3). -
Page 29: Instrucciones De Limpieza
NOTA: reduzca la carga en un 10 % si la harina está refrigerada, si la temperatura del agua es inferior a 21 °C (70 °F) o si la mezcla contiene hielo o harina con un alto contenido de gluten. Una vez que los ingredientes estén bien mezclados, presione el botón rojo STOP para apagar la unidad. - Page 30 Eje planetario Limpiar con un paño limpio y húmedo, secar y Después de cada uso. desinfectar. Aplicar una pequeña cantidad de aceite Waring (aceite mineral) en el eje planetario después de la limpieza. Exterior Lavar a mano (con un detergente suave y agua), Todos los días.
-
Page 31: Mantenimiento Recomendado
MANTENIMIENTO RECOMENDADO PIEZA MEDIDA NECESARIA FRECUENCIA Barras de Aplique aceite Waring (aceite mineral) Si el bol llega a ser difícil de deslizamiento del bol en las barras de deslizamiento del bol. levantar o de bajar. Levante y baje el bol para distribuir el aceite uniformemente en las barras. - Page 32 TABLA DE CAPACIDADES/VELOCIDADES CUARTOS CUARTOS PRODUCTO ACCESORIO AGITADOR VELOCIDAD DE GALÓN DE GALÓN (9.5 L) (19 L) 25 lb Gancho 10 lb Masa de pan 1 (solamente) (12.75 amasador (4.55 kg) 25 lb Gancho 9 lb Masa de pizza 1 (solamente) (11.35 amasador (4 kg) Batidor 9 lb 20 lb...
-
Page 33: Garantía
(a excepción de detergentes) y semilíquidos no abrasivos, y que no haya sido sujeta a cargas que excedan su máxima capacidad. Bajo esta garantía, Waring reparará o reemplazará toda pieza que, tras estar inspeccionada por nuestro servicio posventa, demuestre defectos de fabricación o fallas de... -
Page 34: Resolución De Problemas
RESOLUCIÓN DE PROBLEMAS PROBLEMA POSIBLE CAUSA MEDIDA NECESARIA La máquina La tapa antisalpicaduras no Gire la tapa antisalpicaduras hacia la derecha no se pone en está cerrada hasta que esté completamente cerrada. marcha El bol no está en su puesto. Levante el bol y bloquéelo en su posición. - Page 35 La palanca Las barras de deslizamiento del Lubrique las barras de deslizamiento del elevadora bol carecen de lubricación. bol con aceite mineral o grasa de calidad del bol está alimentaria. Si la palanca se sigue atascando, atascada o no pida a un técnico que limpie el mecanismo funciona de subida/bajada del bol.
-
Page 36: Importantes Consignes De Sécurité
éloignés des batteurs pendant l'utilisation. 5. L’utilisation d’accessoires non recommandés ou vendus par Waring peut présenter un risque d'incendie, de choc électrique ou de blessure. 6. Remarque : ne pas utiliser plus d’un accessoire à la fois. - Page 37 16. Placer l’appareil sur une surface stable et propre. Le tenir à l'écart des endroits surchauffés ou très humides, et des équipements hautement électromagnétiques ou pouvant produire un fort champ électromagnétique. 17. Garder l’appareil propre. 18. Débrancher l’appareil avant toute opération d’entretien. CONSERVER CES INSTRUCTIONS POUR USAGE COMMERCIAL UNIQUEMENT...
-
Page 38: Instructions De Mise À La Terre
REMARQUE : la puissance nominale maximale est basée sur l'accessoire qui consomme le plus d'électricité. D'autres accessoires peuvent consommer beaucoup moins de puissance. AVERTISSEMENT : RISQUE D'INCENDIE OU DE CHOC ÉLECTRIQUE Le symbole composé d’une flèche en forme d’éclair à l'intérieur d'un triangle équilatéral, a pour objet d'alerter l'utilisateur de la présence d'une tension dangereuse non-isolée à... -
Page 39: Utilisation De Rallonges Électriques
MÉTHODE DE MISE À LA TERRE UTILISATION DE RALLONGES ÉLECTRIQUES Pour des raisons de sécurité, cet appareil est équipé d’un cordon d’alimentation court. Une rallonge pourra être utilisée au besoin, à condition que les précautions nécessaires soient prises. Veillez à ce que les spécifications électriques de la rallonge soient au moins égales à... -
Page 40: Pièces Et Accessoires
PIÈCES ET ACCESSOIRES WSM10LDH WSM10LMP WSM10LW WSM20LDH WSM20LMP 1. Bouton START (marche) 2. Bouton STOP (arrêt) 3. Moyeu de fixation des accessoires 4. Vis de fixation des accessoires 5. Levier de montée/descente du bol 6. Poignée du pare-éclaboussures 7. Arbre planétaire 8. -
Page 41: Installation
2. Retirer de la caisse/palette la boîte en carton contenant l’appareil en enlevant les bandes de fixation. REMARQUE : les modèles WSM10L et WSM20L sont expédiés dans une caisse en bois. Pour retirer la caisse, les boulons au fond de la caisse, des quatre côtés, doivent être enlevés. -
Page 42: Directives D'utilisation
• Il doit y avoir suffisamment d’espace autour de l'appareil pour pouvoir ajouter des ingrédients pendant le mélange. • Il doit y avoir suffisamment d’espace derrière l'appareil pour ne pas bloquer la sortie de ventilation arrière. Demander de l’aide à au moins deux autres personnes pour incliner l'appareil et installer des pieds en caoutchouc. -
Page 43: Installation Du Bol
• Si l'appareil s'arrête pendant le mélange (dû à la protection anti- surchauffe), diminuer la charge. PARE-ÉCLABOUSSURES AMOVIBLE (modèles WSM10L et WSM20L) Le pare-éclaboussures est facile à installer et à enlever, et peut être lavé à la main ou au lave-vaisselle. -
Page 44: Mélange Des Ingrédients
3. Une fois le bol positionné sur le support, le fixer en tirant les deux pinces de serrage vers l'avant jusqu'à ce que le bol soit bien verrouillé (Fig. 2). CONNEXION DE L’AGITATEUR (batteur, batteur plat, crochet pétrisseur, fouet) Installer le bol AVANT de connecter l’agitateur. REMARQUE : il est plus facile d’installer l’agitateur avant d’ajouter les ingrédients FIG. -
Page 45: Réglage De La Vitesse
IMPORTANT : il est conseillé de toujours démarrer l'appareil à basse vitesse (vitesse 1). Le non-respect de cette consigne peut endommager les engrenages de vitesse ou d'autres pièces. 1. Ajouter les ingrédients à mélanger dans le bol. 2. Soulever le levier de montée/descente du bol jusqu’à ce que le bol se bloque. - Page 46 REMARQUE : cet appareil est équipé d’une protection anti- surchauffe. Si l’appareil s’éteint pendant le mélange : appuyer sur le bouton STOP, débrancher l’appareil, le laisser reposer pendant deux minutes, puis le rebrancher. Appuyer sur le bouton de réinitialisation (RESET) situé au dos de l’appareil. REMARQUE : diminuer la charge de 10 % si la farine est réfrigérée, si la température de l'eau est inférieure à...
-
Page 47: Instructions De Nettoyage
Essuyer avec un chiffon propre et humide, sécher Après chaque et désinfecter. Appliquer une petite quantité d'huile utilisation. Waring (huile minérale) sur l'arbre planétaire après le nettoyage. Extérieur Laver à la main (avec un détergent doux et de l’eau), Tous les jours. -
Page 48: Nettoyage Recommandé
NETTOYAGE RECOMMANDÉ PIÈCE ACTION REQUISE FRÉQUENCE Glissières du bol Appliquer de l’huile Waring (huile Si le bol devient difficile à minérale) sur les glissières du bol. soulever ou à abaisser. Soulever et abaisser le bol pour répartir l'huile uniformément sur les glissières. -
Page 49: Tableau De Capacités
TABLEAU DE CAPACITÉS/VITESSES 20 QUARTS PRODUIT ACCESSOIRE AGITATEUR VITESSE QUARTS (19 L) (9,5 L) 25 lb Crochet 10 lb Pâte à pain 1 (seulement) (12,75 pétrisseur (4,55 kg) 25 lb Crochet 9 lb Pâte à pizza 1 (seulement) (11,35 pétrisseur (4 kg) 9 lb 20 lb Pâte à... -
Page 50: Garantie
Pour un service au titre de cette garantie, envoyez l'appareil, port payé, à l'adresse suivante ou amenez-le à un centre de réparation agréé : Waring Service Center, 314 Ella T. Grasso Ave., Torrington, CT 06790. Cette garantie a) n’est pas valable si l’appareil est endommagé, cassé, détérioré... -
Page 51: Résolution De Problèmes
RÉSOLUTION DE PROBLÈMES PROBLÈME CAUSES POSSIBLES MESURES À PRENDRE L’appareil ne Le pare-éclaboussures n’est Faire tourner le pare-éclaboussures vers la se met pas en pas fermé. droite jusqu’à ce qu’il soit complètement marche fermé. Le bol n’est pas en position. Lever et verrouiller le bol à... - Page 52 Les agitateurs L’arbre planétaire est sale ou Nettoyer l’arbre planétaire à l’aide d’un sont difficiles manque de lubrification. linge propre et humide et le lubrifier avec à installer de l’huile minérale ou une graisse de qualité sur l’arbre alimentaire. planétaire Le levier Les glissières su bol manquent Lubrifiez les glissières du bol avec de...
- Page 56 Todas marcas registradas o marcas de comercio mencionadas en ésta pertenecen a sus titulares respectivos. Toutes marques déposées ou marques de commerce ci-incluses appartiennent à leurs propriétaires respectifs. ©2019 Waring Commercial 314 Ella T. Grasso Ave. Torrington, CT 06790 www.waringcommercialproducts.com...
Need help?
Do you have a question about the WSM10L and is the answer not in the manual?
Questions and answers