Table of Contents
Advertisement
Quick Links
Advertisement
Table of Contents

Related Manuals for Bosch HRS538B.6B


Summary of Contents for Bosch HRS538B.6B
- Page 1 Built-in oven HRS538B.6B [en] Instruction manual...
-
Page 3: Table Of Contents
Table of contents [ e n ] I n s t r u c t i o n m a n u a l Intended use ......4 Basic settings. -
Page 4: Intended Use
The appliance must only be used for the replacement parts and services can be found at preparation of food and drink. The appliance www.bosch-home.com and in the online shop www.bosch-eshop.com must be supervised during operation. Only use this appliance indoors. -
Page 5: Important Safety Information
Important safety information Water in a hot cooking compartment may Risk of scalding! (Important safety ■ create hot steam. Never pour water into the information cooking compartment when the cooking compartment is hot. G eneral information Warning – Risk of injury! I m p o r t a n t s a f e t y i n f o r m a t i o n Scratched glass in the appliance door may Warning –... -
Page 6: Steam
Causes of damage Moisture in the cooking compartment: Over an Warning – Risk of electric shock! ■ extended period of time, moisture in the cooking When replacing the cooking compartment compartment may lead to corrosion. Allow the bulb, the bulb socket contacts are live. Before cooking compartment to dry after use. -
Page 7: Environmental Protection
Environmental protection Cleaning the water tank: Do not clean the water tank Open the appliance door as infrequently as possible ■ ■ in the dishwasher. Otherwise, the water tank will be when the appliance is in use. damaged. Clean the water tank with a soft cloth and standard washing-up liquid. -
Page 8: Getting To Know Your Appliance
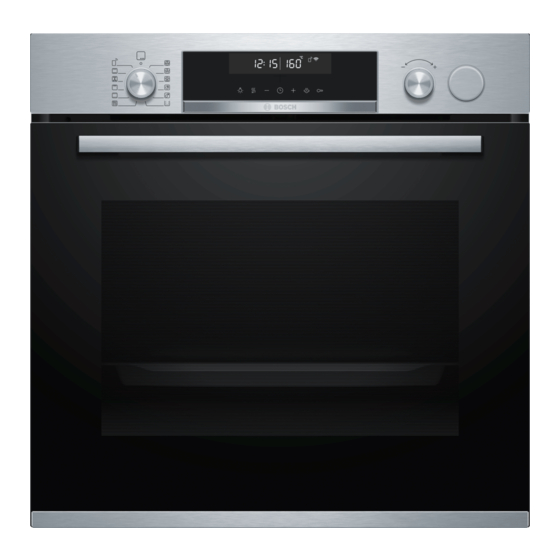
Getting to know your appliance Depending on the appliance model, individual Note: *Getting to know your details and colours may differ. appliance Control panel I n this section, we will explain the indicators and You can set your appliance's various functions on the G e t t i n g t o k n o w y o u r a p p l i a n c e controls. -
Page 9: Types Of Heating And Functions
Getting to know your appliance display. To use the individual time-setting options, touch Display the v button several times.If there is a red bar above or The cooking compartment temperature you set using below a symbol, this means that the value being shown the temperature selector will be shown on the display. -
Page 10: Temperature
Accessories Descaling Descaling Ê your appliance keeps it working properly. Ê ~ "Cleaning function" on page 23 Remote start Start and operate the appliance via the Home Connect app. ~ "Home Connect" on page 20 -------- Temperature Interior lighting With most heating functions and other functions, the Use the temperature selector to set the temperature in interior lighting in the cooking compartment will remain the cooking compartment. -
Page 11: Inserting Accessories
Accessories You can buy accessories from the after-sales service, edge of the accessory ƒ must be facing towards the from specialist retailers or online. appliance door. Example in the picture: Universal pan The accessories may deform when they become Note: hot. -
Page 12: Before Using For The First Time
Before using for the first time KBefore using for the first Wire insert For meat, poultry and fish. time For inserting into the universal pan to catch dripping fat and meat juices. B efore you can use your new appliance, you must Universal pan, non-stick B e f o r e u s i n g f o r t h e f i r s t t i m e make some settings. -
Page 13: Cleaning The Cooking Compartment And Accessories
Operating the appliance Cleaning the cooking compartment and 1Operating the appliance accessories Before using the appliance to prepare food for the first Y ou have already learnt about the controls and how time, you must clean the cooking compartment and O p e r a t i n g t h e a p p l i a n c e they work. -
Page 14: Rapid Heating
Steam If you change the heating function, the temperature will high = * ■ be changed to the corresponding default value. Suitable types of heating Rapid heating You can switch on steam assistance for these types of heating: With Rapid heating, you can shorten the heat-up time. 3D hot air <... -
Page 15: After Every Steam Operation
Steam (explosion). The appliance door may spring open. Hot Place the water tank back in the opening and press steam and jets of flame may escape. it down until it clicks into place (Fig. & Warning – Risk of burns! The water tank may heat up while the appliance is in operation. -
Page 16: Time-Setting Options
Time-setting options Pull out the water tank. OTime-setting options Unscrew the lid on the water tank. Empty the water tank, clean it with detergent and then rinse it thoroughly with clean water. Y our appliance has different time-setting options. T i m e - s e t t i n g o p t i o n s Dry all parts with a soft cloth. -
Page 17: Setting The End Time
Time-setting options Use the A or @ button to set the cooking time. The end time { will be highlighted on the display. The appliance will start heating after a few seconds. The Use the @ or A button to delay the end time. remaining time will count down on the display. -
Page 18: Setting The Timer
Childproof lock Setting the timer Changing the time You can change the time again when you need to, e.g. The timer runs alongside other settings. You can set it from summer to winter time. at any time, even if the appliance has been switched off. It has its own audible signal so that you can tell whether To do this, when the appliance is switched off, touch the it is the timer or a cooking time that has elapsed. -
Page 19: Changing The Basic Settings
Sabbath mode Your changes to the basic settings will be Note: ™‹… Brightness of the display illu- ‚ = dark retained even after a power failure. mination ƒ = medium* „ = bright ™‹† Display time of day ‹ = hide the time ‚... -
Page 20: Home Connect
Home Connect Remote Start oHome Connect To start and operate your appliance via the Home Connect app, you must activate remote start. If remote T his appliance is Wi-Fi-capable and can be remotely start is not activated, you can only view the operating H o m e C o n n e c t controlled using a mobile device. -
Page 21: Remote Diagnostics
Setting Selection/display Remote control ‹ = Monitoring •’‹… Robert Bosch Hausgeräte GmbH hereby declares that behaviour the appliance which features Home Connect is in You can display the operating sta- accordance with the basic requirements and the other tuses of your appliance in the Home relevant provisions of the directive 2014/53/EU. -
Page 22: Surfaces In The Cooking Compartment
Cleaning agent Area Cleaning Rails Hot soapy water: Soak and clean with a dish cloth or brush. Appliance exterior Pull-out system Hot soapy water: Stainless steel Hot soapy water: Clean with a dish cloth or a brush. front Clean with a dish cloth and then dry with a soft Do not remove the lubricant while the pull-out rails cloth. -
Page 23: Keeping The Appliance Clean
Cleaning function Cleaning self-cleaning surfaces .Cleaning function The self-cleaning surfaces are coated with a porous, matte ceramic layer. This coating absorbs and dispels Y our appliance has the "Descaling" operating mode. splashes from baking and roasting while the appliance C l e a n i n g f u n c t i o n You can use the "Descaling"... -
Page 24: Rails
Rails Second step (2_4) pRails Fill the water tank with 150 ml water and insert it. After operation of the rinse cycle, "3_4" appears on W ith good care and cleaning, your appliance will retain the display. Remove the water tank and clean R a i l s its appearance and remain fully functional for a long thoroughly with water. -
Page 25: Appliance Door
Appliance door Then insert the rail into the front socket „, until the Detaching the appliance door rail also rests against the cooking compartment wall Open the appliance door fully. here, and press it downwards … (figure " Open the two locking levers on the left and right (fig. - Page 26 Appliance door Removing panels Fitting panels Open the appliance door slightly. Open the appliance door fully and refit the Press the left- and right-hand sides of the cover condensate trough. To do this, insert the trough from (fig.° above and rotate it at the bottom (fig. Remove the cover (fig.
-
Page 27: Trouble Shooting
Trouble shooting Push the outer panel in at the top (fig. 3Trouble shooting I f a fault occurs, there is often a simple explanation. T r o u b l e s h o o t i n g Before calling the after-sales service, please refer to the fault table and attempt to correct the fault yourself. -
Page 28: Maximum Operating Time
Trouble shooting Error messages on the display The settings on The child- Deactivate the childproof lock by If an error message with "“" appears on the display, the appliance proof lock is pressing and holding the button e.g. “‹†-„ƒ, touch the v button. This will reset the cannot be config- activated. -
Page 29: Replacing The Bulb In The Top Of The Cooking Compartment
Customer service Replacing the bulb in the top of the cooking 4Customer service compartment If the cooking compartment light bulb fails, it must be O ur after-sales service is there for you if your appliance replaced. Heat-resistant, 25 watt, 230 V halogen bulbs C u s t o m e r s e r v i c e needs to be repaired. -
Page 30: Programmes
Programmes The distance between the meat and the lid should be at PProgrammes least 3 cm. The meat may expand as it roasts. Y ou can prepare food very easily using the various Preparing food P r o g r a m m e s programmes. - Page 31 Programmes Programme /weight range Food Cookware Add liquid Shelf posi- Set weight Information tion White bread on a bak- Baking tray with Dough If you are baking two ing tray* greaseproof weight loaves at the same time, paper enter the weight of the (0.5–2.0 kg) heavier bread Multi-grain rye bread*...
-
Page 32: Setting A Programme
Programmes Programme /weight range Food Cookware Add liquid Shelf posi- Set weight Information tion Beef olives Stuffed with vege- Roaster with lid Add stock, water or Total The meat does not need tables or meat another liquid to the weight of to be seared beforehand. -
Page 33: Tested For You In Our Cooking Studio
Tested for you in our cooking studio If the food has been cooked to your liking, switch the the lower values to start with. A lower temperature will appliance off by turning the function selector to the "Off" result in more even browning. You can use a higher position. -
Page 34: Roasting, Braising And Grilling
Tested for you in our cooking studio The Gentle hot air heating function is used to measure steam-assisted cooking mode. The baked item does both the energy consumption in air recirculation mode not dry out as much. and the energy efficiency class. Steam-assisted baking is only possible on one level. - Page 35 Tested for you in our cooking studio The liquid in the cookware evaporates as the meat meat thermometer in the corresponding chapter. There, roasts. Carefully pour in more liquid if required. you can find notes on inserting the meat thermometer, the possible heating types and additional information.
- Page 36 Tested for you in our cooking studio Food Dish Shelf posi- Type of heat- Temperature in °C Time in minutes tion Pork, belly Cookware, uncovered 170-180*** 30+30 Pork, gammon joint Cookware, uncovered 160-170*** 30+30 Chicken, whole Wire rack****** 170-180 25+15 Chicken portion, bone-in, 200-250 g Cookware, uncovered 200-220...
- Page 37 Tested for you in our cooking studio Food Dish Shelf posi- Type of heat- Temperature Time in minutes tion in °C Beef, top side / top rump Cookware, uncovered 40+35 Lamb, leg (bone-in) Cookware, uncovered 160-170 25+15 Lamb, shoulder (bone-in) Cookware, uncovered 170-180 15+15...
-
Page 38: Baking
Tested for you in our cooking studio Food Dish Shelf posi- Type of heat- Tempera- Steam in- Time in minutes tion ture in °C tensity Chicken portion (each 200-250 g) Wire rack 200-220 20-25 Duck, 2-3 kg Wire rack 160-170 30-40 160-170 30-40... - Page 39 Tested for you in our cooking studio Baking Baking on one level Food Dish Shelf po- Type of Temperature Steam in- Time in minutes sition heating in °C tensity Victoria sponge cake 2x Ø20cm tins 150-160 20-35 Light fruit cake High Ø20cm tin 150-160 50-70...
- Page 40 Tested for you in our cooking studio Food Dish Shelf posi- Type of heat- Temperature Time in minutes tion in °C Jacket potatoes, 2 levels Universal pan + baking tray 150-170* 75-90 (White) Bread, 2 levels 4x loaf tins 170-190* 30-40 Pizza, homemade, 2 levels Universal pan + baking tray...
-
Page 41: Ready Meals
Tested for you in our cooking studio Ready meals Baking on one level Here, you will find the ideal settings for preparing chilled When baking on one level, use the following shelf and frozen meals. positions: Tall baked items: Position 2 ■... -
Page 42: Desserts
Tested for you in our cooking studio Desserts compartment. The cooking compartment must be empty. You can make your own soufflés and yogurt using your Heat 1 litre of milk (3.5 % fat) to 90 °C on the hob appliance. and then cool down to 40 °C. -
Page 43: Drying
Tested for you in our cooking studio Dish Accessories/cookware Shelf posi- Heating Searing time Tempera- Cooking tion function in mins ture in °C time in mins Duck breast, 300 g each Cookware, uncovered 60-70 Chicken breast fillet, 200 g each, well done Cookware, uncovered 120* 70-80... -
Page 44: Preserving
Tested for you in our cooking studio Preserving Wipe the rims of the jars, as they must be clean. Place a damp rubber ring and a lid on each jar. Seal the jars You can preserve fruit and vegetables using your with the clips. -
Page 45: Prove Dough
Tested for you in our cooking studio Prove dough Condensation builds up during the proving process, which steams up the door panel. Wipe out the cooking Your yeast dough will prove considerably more quickly compartment after dough proving.Remove any using this heating function than at room temperature limescale with a little vinegar and wipe with clean water. -
Page 46: Test Dishes
Tested for you in our cooking studio Test dishes These tables have been produced for test institutes to facilitate appliance testing. As per EN 60350-1. Baking Items that are placed in the oven on baking trays or in baking tins/dishes at the same time will not necessarily be ready at the same time. - Page 47 Tested for you in our cooking studio Grilling Dish Accessories Shelf posi- Heating Tempera- Cooking tion function ture in °C time in mins Toast Wire rack 5-6* Beefburgers, x 12 Wire rack 25-30** * Do not preheat ** Turn after 2/3 of the total time...
- Page 48 *9001462388* 9001462388 000226...
Need help?
Do you have a question about the HRS538B.6B and is the answer not in the manual?
Questions and answers