Table of Contents
Advertisement
Quick Links
Advertisement
Table of Contents

Related Manuals for Bosch HRS538B 6B Series


Summary of Contents for Bosch HRS538B 6B Series
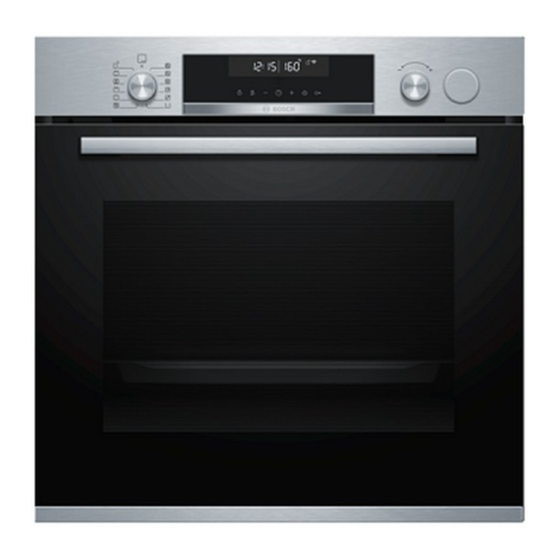
- Page 1 Oven HRS538B.6B User manual and installation instructions [en]...
-
Page 2: Table Of Contents
en Safety ¡ Keep the instruction manual and the Table of contents product information safe for future refer- ence or for the next owner. ¡ Do not connect the appliance if it has been INFORMATION FOR USE damaged in transit. Safety .............. 2 1.2 Intended use Preventing material damage ....... -
Page 3: Safety
Safety en Loose food remnants, fat and meat juices WARNING ‒ Risk of injury! may catch fire. Scratched glass in the appliance door may ▶ Before using the appliance, remove the develop into a crack. worst of the food residues and remnants ▶ Do not use any harsh or abrasive cleaners from the cooking compartment, heating ele- or sharp metal scrapers to clean the glass ments and accessories. - Page 4 en Safety If the appliance or the power cord is dam- WARNING ‒ Risk of electric shock! aged, this is dangerous. When changing the bulb, the bulb socket con- ▶ Never operate a damaged appliance. tacts are live. ▶ Never pull on the power cord to unplug the ▶...
-
Page 5: Environmental Protection And Saving En- Ergy
Preventing material damage en 2 Preventing material damage Fruit juice dripping from the baking tray leaves stains 2.1 General that cannot be removed. ATTENTION! When baking very juicy fruit flans, do not pack too ▶ Alcoholic vapours may catch fire in the hot cooking much on the baking tray. -
Page 6: Familiarising Yourself With Your Appliance
en Familiarising yourself with your appliance 3.2 Saving energy If the cooking time is relatively long, you can switch the appliance off 10 minutes before the cooking time If you follow these instructions, your appliance will use ends. less power. ¡ There will be enough residual heat to finish cooking Only preheat the appliance if the recipe or the recom- the dish. -
Page 7: Steam
Familiarising yourself with your appliance en Buttons and display Temperature selector The buttons are touch-sensitive surfaces. To se- Use the temperature selector to set the temper- lect a function, simply press lightly on the relev- ature for the type of heating and select settings ant field. -
Page 8: Programme
en Familiarising yourself with your appliance Symbol Type of heating and What it's used for/how it works temperature range 3D hot air Bake and roast on one or more levels. 30 - 275 °C The fan distributes the heat from the ring-shaped heating element in the back wall evenly around the cooking compartment. - Page 9 Accessories en Note: For grill setting 3, the appliance lowers the set- You can remove the shelf supports, e. g. for cleaning. ting to grill setting 1 after approx. 20 minutes. → "Shelf supports", Page 26 Heat-up indicator The appliance indicates when it is heating up. The line at the bottom of the display turns red from left to right as the cooking compartment heats up.
- Page 10 en Accessories Accessories Wire rack ¡ Cake tins ¡ Ovenproof dishes ¡ Cookware ¡ Meat, e.g. roasting joints or steak ¡ Frozen meals Universal pan ¡ Moist cakes ¡ Baked items ¡ Bread ¡ Large roasts ¡ Frozen meals ¡ Catching dripping liquids, e.g. fat when grilling food on the wire rack.
- Page 11 You will find a comprehensive range of products for your appliance in our brochures and online: You can combine the wire rack with the universal pan www.bosch-home.com to catch any liquid that drips down. Accessories vary from one appliance to another. When...
- Page 12 en Basic operation 7 Basic operation When your food is ready, switch off the appliance. 7.1 Switching on the appliance Tips Turn the function selector to any position other than ▶ ¡ The most suitable type of heating for your food can the "Off"...
- Page 13 Steam en Ending reheating Place the water tank back in the opening and press it down until it clicks into place . Switch off the appliance. Empty the water tank and dry the cooking compart- ment. → "After every steam operation", Page 13 8.3 Filling the water tank WARNING ‒ Risk of fire! Due to the hot surfaces, vapours from flammable li-...
- Page 14 en Time-setting options Requirement: The cooking compartment has cooled Drying the cooking compartment down. WARNING ‒ Risk of burns! Open the appliance door. The appliance becomes hot during operation. Note: Allow the appliance to cool down before cleaning. ▶ The drip trough is underneath the cooking com- partment.
- Page 15 Time-setting options en Press the button repeatedly until is highlighted a After a few seconds, the appliance applies the set- in the display. ting and the display shows the set end time. Use the or ...
- Page 16 en Programme 10 Programme The programmes help you to use your appliance to ¡ Unglazed clay prepare different dishes by selecting the optimum set- ¡ Plastic or plastic handles tings automatically. 10.2 Steam 10.1 Cookware for programmes For the steam function, the appliance provides you with You should therefore use heat-resistant cookware that programmes that allow you to prepare food easily and is suitable for temperatures up to 300 °C.
- Page 17 Programme en No. Food Cookware Weight range Add liquid Shelf Information posi- Weight setting tion Deep roasting dish 0.5–2.5 kg As per recipe 2 Place the meat at the 10 Goulash Diced beef or pork, with lid Total weight bottom and cover with vegetables with vegetables Do not sear the meat...
- Page 18 en Programme No. Food Cookware Weight range Add liquid Shelf Information posi- Weight setting tion Roasting dish with 0.5–2.5 kg Cover the Do not sear the meat 23 Leg of lamb, medium Boned, seasoned Weight of meat bottom of the beforehand roasting dish, and add up to 250 g ve- getables if...
-
Page 19: Childproof Lock
Childproof lock en For some programmes, the button can be 10.5 Setting a programme ‒ used to delay the end. The appliance selects the optimal type of heating, tem- → "Setting the end time", Page 15 perature and cooking time. All you need to do is set a After a few seconds, the programme starts and the the weight. -
Page 20: Sabbath Mode
en Basic settings Press the button repeatedly until is highlighted Once the time has elapsed, the display shows the on the display. time as zero. The appliance stops heating up and Use the or button to set the time. responds again as usual outside of Sabbath mode. -
Page 21: Home Connect
Home Connect en Use the temperature selector to change the setting. Use the or button to switch to the next basic Use the or button to switch to the next basic setting ... - Page 22 en Home Connect Follow the instructions in the Home Connect app. 15.2 Home Connect Settings You can adjust the settings and network settings for Home Connect in the basic settings for your appliance. Setting Selection or display Explanation Connection to the network ...
-
Page 23: Cleaning And Servicing
Cleaning and servicing en 15.4 Software update 15.5 Remote diagnostics Your appliance's software can be updated using the Customer Service can use Remote Diagnostics to ac- software update function, e.g. for the purposes of op- cess your appliance if you contact them, have your ap- timisation, troubleshooting or security updates. -
Page 24: Shelf Supports
en Cleaning and servicing Appliance front Surface Suitable cleaning agents Information Stainless steel ¡ Hot soapy water To prevent corrosion, remove any patches of limescale, grease, ¡ Special stainless steel starch or albumin (e.g. egg white) on stainless steel surfaces imme- diately. - Page 25 Descaling en faces no longer clean themselves adequately during 16.2 Cleaning the appliance operation, heat up the cooking compartment specific- In order to avoid damaging the appliance, you must ally to the right temperature. clean your appliance only as specified, and with suit- ATTENTION! able cleaning products.
- Page 26 en Shelf supports Note: Do not pour more than 150 ml of liquid into the 17.4 Fourth step ( ) water tank throughout the descaling process. Fill the water tank with 150 ml water and insert it. Mixing a descaling solution: a At the end of the rinse cycle, ...
- Page 27 Appliance door en First, push the rail into the middle of the rear Push the rail into the front socket until the rail socket until the rail rests against the cooking also rests against the cooking compartment wall, compartment wall, and then push this back ...
- Page 28 en Appliance door Close the appliance door fully . Grab hold of the Open the locking levers on the left- and right-hand appliance door with both hands (on the left and hinges . right) and pull it upwards and out . a The locking levers are open.
- Page 29 Appliance door en If necessary, you can remove the condensate Slide the intermediate pane into the left- and right- trough for cleaning. hand retainers . Open the appliance door. ‒ Tilt the condensate trough upwards and remove ‒ Push the intermediate pane upwards until it is in the left- and right-hand retainers ...
-
Page 30: Troubleshooting
en Troubleshooting Close the locking levers on the left- and right-hand Close the appliance door. hinges . Note: Do not use the cooking compartment again until the door panes have been correctly fitted. a The locking levers are closed. The appliance door is secured and cannot be detached. - Page 31 Troubleshooting en Fault Cause and troubleshooting The time does not ap- The basic setting has been changed. pear in the display Change the basic setting for the time display. ▶ when the appliance is → "Basic settings", Page 20 switched off. Childproof lock is activated. ...
-
Page 32: Disposal
en Disposal Fault Cause and troubleshooting During operation with Steam escapes for physical reasons. steam assistance, Wait until the cooking with steam assistance ends. ▶ steam escapes from After the end of cooking with steam assistance, no more steam will escape after a short the ventilation slots. -
Page 33: Customer Service
BSH Hausgeräte GmbH hereby declares that the appli- A detailed Declaration of Conformity can be found on- ance with Home Connect functionality conforms to the line at www.bosch-home.co.uk among the additional basic requirements and other relevant provisions of Dir- documents on the product page for your appliance. - Page 34 en How it works 24 How it works Here, you can find the ideal settings for various types 24.3 Notes on roasting and grilling of food as well as the best accessories and cookware. The setting values are based on the assumption that We have perfectly tailored these recommendations to unstuffed, chilled, ready-to-roast poultry, meat or fish is your appliance.
-
Page 35: How It Works
How it works en ¡ If you do not have any suitable cookware, use the WARNING ‒ Risk of injury! universal pan. If hot glass cookware is placed on a wet or cold sur- face, the glass may shatter. Cookware with lid Place hot glass ovenware on a dry mat after cook- ▶... - Page 36 en How it works Food Accessories/cook- Shelf pos- Heating Temperature in Steam intens- Cooking ware itions function °C/grill setting time in mins Lamb leg (on the bone) Cookware without 160-170 25+15 Pork belly Cookware without 1. 170-180 1.
- Page 37 How it works en Recommended settings for yoghurt Food Accessories/cookware Shelf position Type of Temperature in Cooking heating °C time in mins Yoghurt Individual moulds Cooking compartment 40–45 8–9 hrs floor Preheat the cooking compartment and cookware for 24.6 Slow cooking approx.
- Page 38 en Installation instructions Position baking tins/dishes either next to one another or offset on different shelves so that they are not dir- ectly one above the other in the cooking compartment. Recommended settings for baking Food Accessories/cook- Shelf pos- Type of Temperature in Cooking time in ware...
-
Page 39: Installation Instructions
Installation instructions en ¡ Wear protective gloves so that you do not cut yourself. Parts that are accessible dur- ing installation may have sharp edges. ¡ Dimensions of the figures in mm. WARNING ‒ Risk of fire! It is dangerous to use an extended power 25.1 General installation instructions cord and non-approved adapters. - Page 40 en Installation instructions ¡ To ventilate the appliance, the intermediate floor ¡ Ensure that air exchange is guaranteed in accord- must have a ventilation cut-out. ance with the diagram. ¡ In combination with induction hobs, the gap between the worktop and appliance must not be sealed using additional strips.
- Page 41 Installation instructions en ¡ Contact protection must be guaranteed by the in- Screw the appliance into place. stallation. Electrically connect the appliance with the protective contact plug Note: The appliance must only be connected to a pro- tective contact socket that has been correctly installed. Insert the plug into the protective contact socket.
- Page 44 Expert advice for your Bosch home appliances, help with problems or a repair from Bosch experts. Find out everything about the many ways Bosch can support you: www.bosch-home.com/service Contact data of all countries are listed in the attached service directory.
Need help?
Do you have a question about the HRS538B 6B Series and is the answer not in the manual?
Questions and answers