Table of Contents
Advertisement
Quick Links
Instructions-Parts
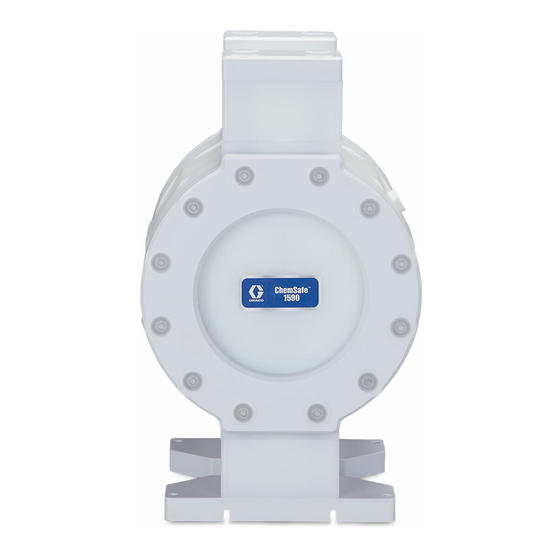
ChemSafe™ 1590
ChemSafe™
ChemSafe™
Air - - - Operated
Operated Diaphragm
Air
Air
Operated
1.5–inch high
high purity
purity pump
1.5–inch
1.5–inch
high
purity
Not approved
approved for
for use
use in in in European
Not
Not
approved
for
use
Important Safety
Safety Instructions
Important
Important
Safety
Read all warnings and instructions in this manual. Save
instructions.
instructions.
instructions.
100 psi (0.7 MPa, 7.0 bar) Maximum Air
Supply Pressure
100 psi (0.7 MPa, 7.0 bar) Maximum
Fluid Working Pressure
1590
1590
Diaphragm Pump
Diaphragm
pump for
for industrial
industrial applications.For
applications.For professional
pump
for
industrial
applications.For
European explosive
explosive atmosphere
European
explosive
Instructions
Instructions
PROVEN QUALITY. LEADING TECHNOLOGY.
Pump
Pump
professional use
professional
atmosphere locations.
locations.
atmosphere
locations.
Save these
these
Save
these
use only.
only.
use
only.
334796C
EN
Advertisement
Table of Contents

Subscribe to Our Youtube Channel
Related Manuals for Graco ChemSafe 1590


Summary of Contents for Graco ChemSafe 1590
- Page 1 Instructions-Parts ChemSafe™ 1590 1590 ChemSafe™ ChemSafe™ 1590 334796C Air - - - Operated Operated Diaphragm Diaphragm Pump Pump Operated Diaphragm Pump 1.5–inch high high purity purity pump pump for for industrial industrial applications.For applications.For professional professional use use only. only. 1.5–inch 1.5–inch high...
-
Page 2: Table Of Contents
Dimensions ............29 Start and Adjust the Pump ......13 Performance Charts..........30 Pressure Relief Procedure......14 Pump Shutdown .......... 14 Technical Data ........... 31 Maintenance ............15 Graco Standard ChemSafe Pump Maintenance Schedule ......... 15 Warranty..........32 Lubrication........... 15 334796C... -
Page 3: Warnings
Warnings Warnings Warnings Warnings The following warnings are for the setup, use, grounding, maintenance, and repair of this equipment. The exclamation point symbol alerts you to a general warning and the hazard symbols refer to procedure-specific risks. When these symbols appear in the body of this manual or on warning labels, refer back to these Warnings. - Page 4 Warnings WARNING WARNING WARNING EQUIPMENT EQUIPMENT EQUIPMENT MISUSE MISUSE HAZARD MISUSE HAZARD HAZARD Misuse can cause death or serious injury. • Do not operate the unit when fatigued or under the influence of drugs or alcohol. • Do not exceed the maximum working pressure or temperature rating of the lowest rated Technical Data Data in all equipment manuals.
- Page 5 Warnings WARNING WARNING WARNING TOXIC TOXIC TOXIC FLUID FLUID OR FLUID OR FUMES FUMES HAZARD FUMES HAZARD HAZARD Toxic fluids or fumes can cause serious injury or death if splashed in the eyes or on skin, inhaled, or swallowed. • Read MSDSs to know the specific hazards of the fluids you are using. •...
-
Page 6: Configuration Number Matrix
Configuration Number Matrix Configuration Number Number Configuration Configuration Number Matrix Matrix Matrix Check the identification plate (ID) for the Configuration Number of your pump. Use the following matrix to define the components of your pump. 1590PT 1590PT - - - P01APT3PTPTPOPT 1590PT P01APT3PTPTPOPT P01APT3PTPTPOPT... - Page 7 Configuration Number Matrix Models Models Models Model Pump Air & & & Fluid Fluid Fluid Covers Covers Balls Diaphragm Manifold Seal Seal Model Model Pump Pump Fluid Fluid Fluid Covers Balls Balls Diaphragm Diaphragm Manifold Manifold Seal Connection Connection Connection Threads Threads Threads...
-
Page 8: Installation
Cavitation in an AODD pump is the formation and selecting and installing system components. Contact collapse of bubbles in the pumped liquid. Frequent your Graco distributor for assistance in planning a or excessive cavitation can cause serious damage, system to suit your needs. Always use Genuine including pitting and early wear of fluid chambers, Graco Parts and accessories. -
Page 9: Mount The Pump
Installation Mount The The Pump Pump Mount Mount Pump 1. Be sure the mounting surface can support the weight of the pump, hoses, and accessories, as well as the stress caused during operation. 2. For all mountings, be sure the pump is secured To avoid serious injury from toxic fluid or fumes: with screws through the mounting feet. -
Page 10: Ground The System
Installation Ground The The System System Air Lines Lines Ground Ground System Lines 1. Install an air regulator and gauge (C) to control the fluid pressure. The fluid stall pressure will be the same as the setting of the air regulator. 2. -
Page 11: Air Exhaust Ventilation
Installation Air Exhaust Exhaust Ventilation Ventilation Exhaust Ventilation To provide provide a a a remote remote exhaust: exhaust: provide remote exhaust: 1. Use Kit 17F612 (NPT) or 17F613 (BSPT), sold separately. 2. Remove the muffler (U) from the pump air exhaust port (K). -
Page 12: Fluid Supply Line
Installation Fluid Supply Supply Line Line Fluid Fluid Supply Line install the pump as close as possible to the material source. Minimize suction requirements to maximize pump performance. 1. Use grounded, flexible fluid hoses (E). See Ground The System, page 2. -
Page 13: Operation
Operation Operation Start and and Adjust Adjust the the Pump Pump Operation Operation Start Start Adjust Pump NOTICE NOTICE NOTICE Tighten Bolts Bolts Tighten Tighten Bolts To avoid damage to your pump, be certain that all pumped fluids are compatible with wetted parts. Before mounting and using the pump for the Technical Data, page first time, check and retorque all external bolts. -
Page 14: Pressure Relief Procedure
Operation Pressure Relief Relief Procedure Procedure Pressure Pressure Relief Procedure 2. Open the dispensing valve, if used. 3. Open the fluid drain valve to relieve fluid Follow the Pressure Relief Procedure pressure. Have a container ready to catch the whenever you see this symbol. drainage. -
Page 15: Maintenance
See where they are clean, dry, and protected from Torque Instructions, page extreme temperatures, UV radiation, and vibration. Graco recommends an ambient temperature range of 60°F-80°F (15°C-25°C), with a humidity level below 65%. 334796C... -
Page 16: Troubleshooting
Troubleshooting Troubleshooting Troubleshooting Troubleshooting Problem Problem Problem Cause Cause Cause Solution Solution Solution Pump cycles but will not prime. Pump is running too fast, causing Lower inlet pressure. cavitation before prime. Check valve ball is severely warn Replace ball and seat. or wedged in seat or manifold. - Page 17 Troubleshooting Problem Cause Solution Problem Problem Cause Cause Solution Solution Moisture in exhaust air. Inlet air has high humidity. Use drier air supply. Pump exhausts excessive air at Spool valve seals are worn or Replace. stall. damaged. Pump leaks air externally. Fluid covers are loose.
-
Page 18: Repair
Repair Repair Repair Repair Disassemble the the Fluid Fluid Section Section Disassemble Disassemble Fluid Section 1. Carefully remove all cap plugs (37). Turn the pump upside-down. 2. Use a 13 mm socket to remove the base plates (12) and the inlet manifold (10). 3. -
Page 19: Replace The Anchor Strap
Repair 10. To remove the nuts (28) and bolts (24), use two 13 mm wrenches to hold on one side and turn the other. The nuts (28) will come off of one side only. Then remove the bolts (24). NOTE: NOTE: NOTE: The nuts are permanently affixed to one end of the bolts. -
Page 20: Replace The Air Motor
Repair Replace the the Air Air Motor Motor Replace Replace Motor 1. Use pin wrench (43) to remove the air motor assembly (2) to remove from the body (1). 2. Inspect o-rings (34), and replace if necessary. 3. Apply a thin film of lubricant (44) to air motor o-rings (34), and to the outside of the air motor assembly (2), and screw back into the body (1), small end first. -
Page 21: Reassemble The Center Section
Repair Reassemble the the Center Center Section Section Reassemble Reassemble Center Section c. Press each spool (3) individually to verify that the other spool (3) has a corresponding shift. 1. Carefully lubricate the spool assembly’s o-rings d. Plug the air holes on the air motor (2) to with a thin film of the appropriate lubricant (44). -
Page 22: Reassemble The Fluid Section
Repair 12. Lubricate the shaft, then install it in the air motor assembly. Turn the diaphragm as you push it in. Then, tighten the other diaphragm onto the 4. Slide the tie bolts (24) through the retainers shaft, hand tight only. (9), fluid covers (6), and body (1), all oriented as shown. - Page 23 Repair 8. Align the outlet manifold (8) on the assembly with the outlet port facing in the correct direction for your application. 9. Align the outlet manifold retainers (11) on the outlet manifold (8). 10. On each screw (29), place two belleville washers (27), with the rounded side of first washer toward the screw head and the rounded side of the second washer away, then a flat #12 washer...
-
Page 24: Torque Instructions
Torque Instructions Torque Instructions Instructions Torque Torque Instructions If fluid cover or manifold bolts have been loosened, 3. Turn each screw by 1/2 turn or less working in a it is important to torque them using the following crisscross pattern to specified torque. procedure to improve sealing. -
Page 25: Parts
Parts Parts Parts Parts Lubricate using PFPE grease (17G558); included in all Center and Fluid Section Rebuild kits. Follow Torque Instructions, page 334796C... - Page 26 Parts NOTE: Many parts are included in one or more kits. NOTE: NOTE: Please see Kits, page 28, for the complete list of available kits and their contents. Part Description Part Description Part Part Description Description Part Part Description Description —...
- Page 27 Parts Part Description Part Description Part Part Description Description Part Part Description Description 36† SEAT, wearable, bottom 41▲ 198382 LABEL, warning, multilingual — PTFE 17F796 TOOL, wrench, spool — UHMW removal; 4–pin 37† 17F308 CAP, plug; 44–pack 17F800 TOOL, wrench, air motor 17F078 SPACER, baffle;...
-
Page 28: Kits
Kits Kits Kits Kits Description Ref. Ref. Ref. Description Description Center Section Section Rebuild Rebuild Kit Kit 17F136 17F136 Center Center Section Rebuild 17F136 Kit Includes: D-ring Ref. Ref. Ref. Description Description Description PTFE, Kit 17F140 Modified PTFE, Kits 17G053, Sleeve Spool Assembly 17G054 Felt Muffler... -
Page 29: Dimensions
Dimensions Dimensions Dimensions Dimensions Ref. Ref. Ref. Ref. Ref. Ref. Metric Metric Metric Metric Metric Metric A A A 2.4 in. 6.1 cm F F F 20.0 in. 50.8 cm B B B G G G 15.2 in. 38.6 cm 9.8 in. -
Page 30: Performance Charts
Performance Charts Performance Charts Charts Performance Performance Charts Fluid Fluid Fluid Pressure Pressure Pressure Approximate Approximate Approximate Cycles Cycles per Cycles per Minute Minute Minute (0.69, 6.9) (0.62, 6.2) (0.55, 5.5) (0.49, 4.9) (0.42, 4.2) (0.35, 3.5) (MPa, bar) bar) (MPa, (MPa, bar) -
Page 31: Technical Data
Technical Data Technical Data Data Technical Technical Data ChemSafe ChemSafe 1590 ChemSafe 1590 1590 Diaphragm Diaphragm Diaphragm Pump Pump Pump Metric Metric Metric Maximum fluid working pressure 100 psi 0.69 MPa, 6.9 bar Minimum air startup pressure 30 psi 0.21 MPa, 2.1 bar Fluid inlet and outlet size 1 1/2 in. -
Page 32: Warranty
With the exception of any special, extended, or limited warranty published by Graco, Graco will, for a period of five years from the date of sale, repair or replace any part of the equipment determined by Graco to be defective. This warranty applies only when the equipment is installed, operated and maintained in accordance with Graco’s written recommendations.
Need help?
Do you have a question about the ChemSafe 1590 and is the answer not in the manual?
Questions and answers