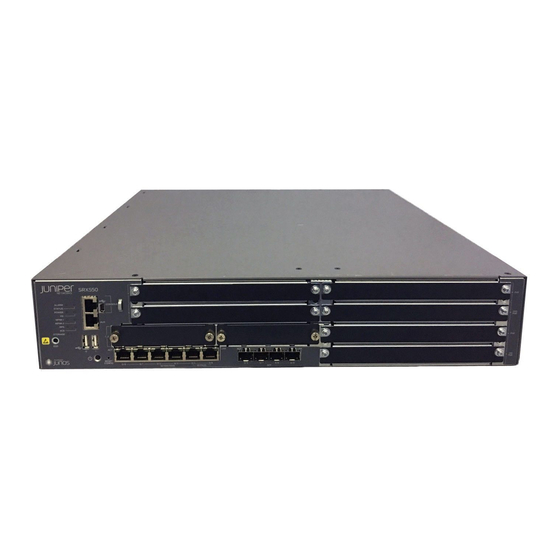
Juniper SRX550 Quick Start Manual
High memory services
Hide thumbs
Also See for SRX550:
- Hardware manual (246 pages) ,
- Manual (10 pages) ,
- Setup manual (6 pages)
Table of Contents
Advertisement
Quick Links
Quick Start Guide
SRX550 High Memory Services Gateway
IN THIS GUIDE
Plug and Play | 11
Next Steps | 13
Reference | 14
SRX550 High Memory Services Gateway Overview
The SRX550 High Memory Services Gateway is a large branch office gateway that combines security, routing, switching,
and WAN interfaces with next-generation firewall and advanced threat mitigation capabilities for cost-effective, secure
connectivity across distributed enterprise locations. The services gateway simplifies network complexity, protects and
prioritizes network resources, and improves user and application experience.
The SRX550 High Memory Services Gateway comes with 4 GB of DRAM memory and 8 GB of flash memory.
Package Contents
The SRX550 High Memory Services Gateway is shipped with the following parts:
Advertisement
Table of Contents

Summary of Contents for Juniper SRX550
-
Page 1: Table Of Contents
The services gateway simplifies network complexity, protects and prioritizes network resources, and improves user and application experience. The SRX550 High Memory Services Gateway comes with 4 GB of DRAM memory and 8 GB of flash memory. Package Contents... -
Page 2: Srx550 High Memory Front Panel And Rear Panel
Register product serial numbers on the Juniper Networks website and update the installation base data if there is any addition or change to the installation base or if the installation base is moved. Juniper Networks will not be held accountable for not meeting the hardware replacement service-level agreement for products that do not have registered serial numbers or accurate installation base data. -
Page 3: Factory-Default Settings
Average power consumption 85 W Average heat dissipation 238 BTU/hr Relative humidity 5% to 90%, noncondensing Factory-Default Settings The SRX550 High Memory device is shipped with the following factory-default settings: Table 1: Security Policies Source Zone Destination Zone Policy Action trust trust... - Page 4 (logical) untrust ISP assigned* Only if the LTE Mini-PIM is present The SRX550 High Memory device is shipped with the following services and protocols enabled by default: Table 5: Services, Protocols, and Startup Mode Services Protocols Device Startup Mode...
-
Page 5: Install The Device In A Rack
Install the Device in a Rack Before you begin the installation, review General Safety Guidelines and Warnings. Make sure you have someone available to help you do the installation. You will need to provide your own rack mount screws and a number two Phillips (+) screwdriver. -
Page 6: Connect The Grounding Cable
Figure 5: Securing the Chassis to the Rack 5. Check that the mounting brackets on each side of the rack are lined up with each other. Connect the Grounding Cable 1. Attach an ESD strap to an ESD point and place the other end of the strap around your bare wrist. 2. - Page 7 Figure 6: Connecting the Grounding Cable...
-
Page 8: Power On The Device
Power On the Device NOTE: Before connecting the device to the power supply, attach an ESD strap to an ESD point and place the other end of the strap around your bare wrist. 1. If you are using the AC model, perform the following steps: a. - Page 9 The cable with very low resistance (indicating a closed circuit) to chassis ground will be connected to the V+ (return) DC power input terminal. c. Remove the clear plastic cover from the terminal studs on the faceplate. d. Remove the screws on the terminals by using a Phillips (+) screwdriver, number 2. e.
-
Page 10: Configure Root Authentication
Configure Root Authentication To configure root authentication: 1. Connect any of the network ports numbered 0/1 through 0/5 on the services gateway to the Ethernet port on the management device, using an RJ-45 cable. Figure 8: Connecting the Management Device 2. -
Page 11: Plug And Play
Plug and Play The SRX550 HM already has factory-default settings configured to make it a plug and play device. So all you have to do to get the SRX550 HM up and running is connect it to your LAN and WAN networks. -
Page 12: Configure Using J-Web
Configure Using J-Web You can modify the configuration using J-Web. Have the following information ready before you start the configuration process: Hostname Root authentication password IP address for the NTP server IP address for the DNS server IP address for the management interface 1. -
Page 13: Next Steps
a. Set the time manually or configure an NTP server. b. Select the time zone from the drop-down box. c. Type the IP address for the DNS server. d. Click Next. 5. Configure the management interface: a. Select the management port. b. -
Page 14: Reference
SRX550 High Memory Services Gateway Hardware Guide Supported Transceivers Juniper Networks, the Juniper Networks logo, Juniper, and Junos are registered trademarks of Juniper Networks, Inc. in the United States and other countries. All other trademarks, service marks, registered marks, or registered service marks are the property of their respective owners.


Need help?
Do you have a question about the SRX550 and is the answer not in the manual?
Questions and answers