Table of Contents
Advertisement
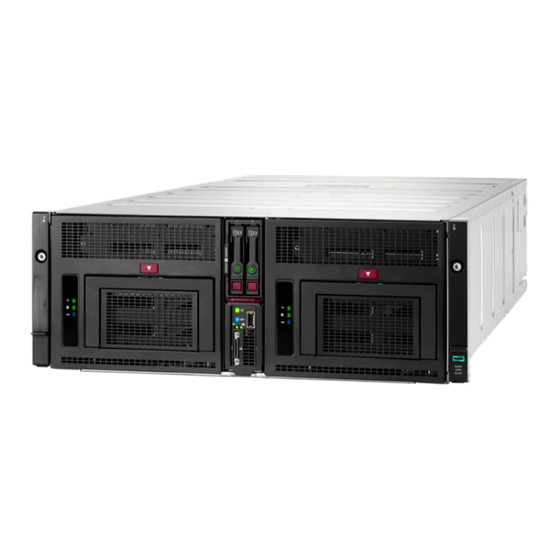
HPE ProLiant XL450 Gen10 Server User
Guide
Abstract
This document is for the person who installs, administers, and troubleshoots servers and
storage systems. Hewlett Packard Enterprise assumes you are qualified in the servicing of
computer equipment and trained in recognizing hazards in products with hazardous energy
levels.
Part Number: 881306-002
Published: April 2019
Edition: 1
Advertisement
Table of Contents

Related Manuals for HPE ProLiant XL450 Gen10


Summary of Contents for HPE ProLiant XL450 Gen10
- Page 1 HPE ProLiant XL450 Gen10 Server User Guide Abstract This document is for the person who installs, administers, and troubleshoots servers and storage systems. Hewlett Packard Enterprise assumes you are qualified in the servicing of computer equipment and trained in recognizing hazards in products with hazardous energy levels.
- Page 2 © Copyright 2019 Hewlett Packard Enterprise Development LP Notices The information contained herein is subject to change without notice. The only warranties for Hewlett Packard Enterprise products and services are set forth in the express warranty statements accompanying such products and services. Nothing herein should be construed as constituting an additional warranty. Hewlett Packard Enterprise shall not be liable for technical or editorial errors or omissions contained herein.
-
Page 3: Table Of Contents
Hardware options installation..............21 Introduction..........................21 Installing a processor........................21 Memory options...........................24 DIMM population information................... 24 DIMM-processor compatibility..................24 HPE SmartMemory speed information................24 DIMM label identification....................24 Installing a DIMM......................25 Hot-plug hard drive guidelines....................26 Removing a drive blank....................26 Installing an SFF drive......................27 Installing an NVMe drive.................... - Page 4 HPE Trusted Platform Module 2.0 Gen10 option................30 Overview.......................... 30 HPE Trusted Platform Module 2.0 Guidelines..............31 Installing and enabling the HPE TPM 2.0 Gen10 Kit............31 Installing the Trusted Platform Module board............31 Enabling the Trusted Platform Module................33 Enabling the Trusted Platform Module as TPM 2.0..........34 Enabling the Trusted Platform Module as TPM 1.2..........34...
- Page 5 HPE Pointnext Portfolio....................51 Proactive notifications...................... 52 Troubleshooting..................53 Troubleshooting resources......................53 Removing and replacing the system battery........54 Electrostatic discharge.................55 Preventing electrostatic discharge....................55 Grounding methods to prevent electrostatic discharge...............55 Specifications..................56 Environmental specifications ..................... 56 Server specifications........................56 Websites....................57 Support and other resources...............58 Accessing Hewlett Packard Enterprise Support.................
-
Page 6: Component Identification
Component identification Front panel components Item Description Drive bay 1 Drive bay 2 Server ejector button iLO Service port Server release lever SUV cable connector Serial label pull tab Component identification... -
Page 7: Front Panel Leds And Buttons
Front panel LEDs and buttons Item Description Status Power On/Standby Solid green = System on button and system Flashing green (1 Hz/cycle per sec) = Performing power on power LED sequence Solid amber = System in standby Off = No power present UID LED/button Solid blue = Activated Flashing blue:... -
Page 8: Hot-Plug Drive Led Definitions
Item Description Status Server health LED Solid green = Normal Flashing green (1 Hz/cycle per sec) = iLO is rebooting Flashing amber = System degraded Flashing red (1 Hz/cycle per sec) = System critical Server backup LED Off = Normal operations. No backup in progress. Flashing white = Backup in progress. -
Page 9: Nvme Ssd Led Definitions
Item LED Status Definition The drive is doing one of the following: Flashing green • Rebuilding • Performing a RAID migration • Performing a strip size migration • Performing a capacity expansion • Performing a logical drive extension • Erasing •... -
Page 10: Sff Flash Adapter Components And Led Definitions
Item LED Status Definition The drive is doing one of the following: Flashing green • Rebuilding • Performing a RAID migration • Performing a stripe size migration • Performing a capacity expansion • Performing a logical drive extension • Erasing Flashing amber/ The drive is a member of one or more logical drives and predicts the green... -
Page 11: Server Components
Item Component Description Locate • Off—Normal • Solid blue—The drive is being identified by a host application. • Flashing blue—The drive firmware is being updated or requires an update. uFF drive ejection latch Removes the uFF drive when released. Do not remove LED •... -
Page 12: Dimm Slot Locations
Item Description Drive cage Drive backplane TPM 2.0 connector Controller connector System maintenance switch Processor 1 Processor 1 DIMMs (8) Processor 2 Processor 2 DIMMs (8) System battery SFF drive cage data cable connector M.2 riser board Front panel I/O board cable connector microSD card slot Front panel I/O board iLO Service Port board... -
Page 13: System Maintenance Switch
System maintenance switch Position Default Function Off = iLO security is enabled. On = iLO security is disabled. Reserved Reserved Reserved Off = Power-on password is enabled. On = Power-on password is disabled. Off = No function On = ROM reads system configuration as invalid. Reserved —... -
Page 14: Operations
Operations Powering down the server Before powering down the server for any upgrade or maintenance procedures, perform a backup of critical server data and programs. IMPORTANT: When the server is in standby mode, auxiliary power is still being provided to the system. - Page 15 NOTE: To avoid damage to the device, do not use the removal handle to carry it. 3. Place the server on a flat, level work surface. Operations...
-
Page 16: Setup
For more information on Hewlett Packard Enterprise support services, see the Hewlett Packard Enterprise website. Rack planning resources The rack resource kit ships with all HPE Intelligent Series racks. For more information on the content of each resource, see the rack resource kit documentation. Optimum environment When installing the server in a rack, select a location that meets the environmental standards described in this section. -
Page 17: Temperature Requirements
• Leave a minimum clearance of 121.9 cm (48.0 in) in front of the rack and between rows of racks. • Leave a minimum clearance of 76.2 cm (30.0 in) in back of the rack for a single row of racks or after the final row of racks. -
Page 18: Electrical Grounding Requirements
The server is installed in the chassis. If the chassis is not already installed in a rack, install the chassis in a rack. For more information, see the HPE Apollo 4510 Gen10 chassis Setup and Installation Guide and the HPE Apollo 4500 4U Rail Installation Instructions that ship with the rack hardware kit. -
Page 19: Installing Hardware Options
2. Install the server. When seated properly, the server will be flush with the front of the chassis and the release lever will close completely without resistance. Installing hardware options Install any hardware options before initializing the server. For options installation information, see the option documentation. -
Page 20: Installing The Operating System
Hewlett Packard Enterprise website (http:// www.hpe.com/info/supportos). IMPORTANT: HPE ProLiant XL servers do not support operating system installation with Intelligent Provisioning, but they do support the maintenance features. For more information, see "Performing Maintenance" in the HPE Intelligent Provisioning User Guide and online help. -
Page 21: Hardware Options Installation
CAUTION: To prevent possible server malfunction and damage to the equipment, multiprocessor configurations must contain processors with the same part number. IMPORTANT: Existing HPE ProLiant and HPE Synergy Gen10 server products containing First Generation Intel Xeon Scalable Processors may not be upgraded to Second Generation Intel Xeon Scalable Processors at this time. - Page 22 2. Update the system ROM. Locate and download the latest ROM version from the Hewlett Packard Enterprise Support Center website (http://www.hpe.com/support/hpesc). Follow the instructions on the website to update the system ROM. 3. Powering down the server on page 14.
- Page 23 CAUTION: Be sure to tighten each heatsink nut fully in the order indicated. Otherwise, boot failure or intermittent shutdowns might occur. c. Using a T-30 Torx screwdriver, fully tighten each heatsink screw in the order indicated on the heatsink label (1 -2 -3 -4) until it no longer turns. 8.
-
Page 24: Memory Options
Second Generation Intel Xeon Scalable Processors support DDR4-2933 DIMMs. Mixing DIMM types is not supported. Install only the supported DDR4-2666 or DDR4-2933 DIMMs in the server. HPE SmartMemory speed information For more information about memory speed information, see the Hewlett Packard Enterprise website (https://www.hpe.com/docs/memory-speed-table). -
Page 25: Installing A Dimm
L = LRDIMM (load reduced) E = Unbuffered ECC (UDIMM) For more information about product features, specifications, options, configurations, and compatibility, see the HPE DDR4 SmartMemory QuickSpecs on the Hewlett Packard Enterprise website (http:// www.hpe.com/support/DDR4SmartMemoryQS). Installing a DIMM CAUTION: To avoid damage to the hard drives, memory, and other system components, the air baffle, and drive blanks must be installed when the server is powered up. -
Page 26: Hot-Plug Hard Drive Guidelines
Procedure 1. Powering down the server on page 14. 2. Remove the server from the chassis on page 14. 3. Open the DIMM slot latches. 4. Install the DIMM. 5. Install the server into the chassis (Install a server on page 18). 6. -
Page 27: Installing An Sff Drive
CAUTION: To prevent improper cooling and thermal damage, do not operate the server unless all bays are populated with either a component or a blank. Installing an SFF drive Procedure 1. Remove a drive blank (Removing a drive blank on page 26). 2. -
Page 28: Installing An Nvme Drive
4. Determine the status of the drive from the drive LED definitions (Hot-plug drive LED definitions on page 8). Installing an NVMe drive CAUTION: To prevent improper cooling and thermal damage, do not operate the chassis unless all device bays are populated with either a component or a blank. Procedure 1. -
Page 29: Installing The Sff Flash Adapter Option
4. Determine the status of the drive from the drive LED definitions (Hot-plug drive LED definitions on page 8). Installing the SFF flash adapter option CAUTION: To prevent improper cooling and thermal damage, do not operate the server or the enclosure unless all drive and device bays are populated with either a component or a blank. -
Page 30: Hpe Trusted Platform Module 2.0 Gen10 Option
HPE Trusted Platform Module 2.0 Gen10 option Overview Use these instructions to install and enable an HPE TPM 2.0 Gen10 Kit in a supported server. This option is not supported on Gen9 and earlier servers. This procedure includes three sections: 1. -
Page 31: Hpe Trusted Platform Module 2.0 Guidelines
TPM including keys will be erased. IMPORTANT: In UEFI Boot Mode, the HPE TPM 2.0 Gen10 Kit can be configured to operate as TPM 2.0 (default) or TPM 1.2 on a supported server. In Legacy Boot Mode, the configuration can be changed between TPM 1.2 and TPM 2.0, but only TPM 1.2 operation is supported. - Page 32 WARNING: The front panel Power On/Standby button does not shut off system power. Portions of the power supply and some internal circuitry remain active until AC power is removed. To reduce the risk of personal injury, electric shock, or damage to the equipment, remove power from the server: For rack and tower servers, remove the power cord.
-
Page 33: Enabling The Trusted Platform Module
3. Install the TPM cover: a. Line up the tabs on the cover with the openings on either side of the TPM connector. b. To snap the cover into place, firmly press straight down on the middle of the cover. 4. -
Page 34: Enabling The Trusted Platform Module As Tpm 2.0
• By default, the Trusted Platform Module is enabled as TPM 2.0 when the server is powered on after installing it. • In UEFI Boot Mode, the Trusted Platform Module can be configured to operate as TPM 2.0 or TPM 1.2. -
Page 35: Retaining The Recovery Key/Password
Procedure 1. During the server startup sequence, press the F9 key to access System Utilities. 2. From the System Utilities screen select System Configuration > BIOS/Platform Configuration (RBSU) > Server Security > Trusted Platform Module options. 3. Change the "TPM Mode Switch Operation" to TPM 1.2. 4. -
Page 36: Cabling
Cabling SUV cable connectors CAUTION: Before disconnecting the SUV cable from the connector, always squeeze the release buttons on the sides of the connector. Failure to do so can result in damage to the equipment. Item Connector Description Serial For trained personnel to connect a null modem serial cable and perform advanced diagnostic procedures For connecting up to two USB 2.0 devices Video... -
Page 37: Controller Cabling
Controller cabling For more information about controller cabling, see the HPE Apollo 4510 Gen10 Chassis Maintenance and Service Guide in the Hewlett Packard Enterprise Information Library. Cabling... -
Page 38: Software And Configuration Utilities
Product QuickSpecs For more information about product features, specifications, options, configurations, and compatibility, see the product QuickSpecs on the Hewlett Packard Enterprise website (http://www.hpe.com/info/qs). Active Health System Viewer Active Health System Viewer (AHSV) is an online tool used to read, diagnose, and resolve server issues quickly using AHS uploaded data. -
Page 39: Active Health System
Health System Viewer documentation at the following website: http://www.hpe.com/support/ahsv-docs. HPE iLO 5 iLO 5 is a remote server management processor embedded on the system boards of HPE ProLiant servers and Synergy compute modules. iLO enables the monitoring and controlling of servers from remote locations. -
Page 40: Ilo Federation
Features that enhance server administrator productivity and additional new security features are licensed. For more information, see the iLO licensing guide at the following website: http://www.hpe.com/support/ ilo-docs. For more information about iLO, see the iLO user guide at the following website: http://www.hpe.com/ support/ilo-docs. iLO Federation iLO Federation enables you to manage multiple servers from one system using the iLO web interface. -
Page 41: Ilo Restful Api
For more information, watch the Redfish & How it works with HPE Server Management video. RESTful Interface Tool The RESTful Interface Tool (iLOREST) is a scripting tool that allows you to automate HPE server management tasks. It provides a set of simplified commands that take advantage of the iLO RESTful API. -
Page 42: Intelligent Provisioning
Intelligent Provisioning 3.30 and later includes HPE SMB Setup. When you launch F10 mode from the POST screen, you are prompted to select whether you want to enter the Intelligent Provisioning or HPE SMB Setup mode. -
Page 43: Management Security
Management Security HPE ProLiant Gen10 servers are built with some of the industry's most advanced security capabilities, out of the box, with a foundation of secure embedded management applications and firmware. The management security provided by HPE embedded management products enables secure support of modern workloads, protecting your components from unauthorized access and unapproved use. -
Page 44: Uefi System Utilities
Selecting the primary boot controller or partition. • Configuring memory options. • Launching other preboot environments. HPE servers with UEFI can provide: • Support for boot partitions larger than 2.2 TB. Such configurations could previously only be used for boot drives when using RAID solutions. •... -
Page 45: Secure Boot
Using the System Utilities options described in the following sections. • Using the iLO RESTful API to clear and restore certificates. For more information, see the Hewlett Packard Enterprise website (http://www.hpe.com/info/redfish). • Using the secboot command in the Embedded UEFI Shell to display Secure Boot databases, keys, and security reports. -
Page 46: Hpe Smart Storage Administrator
HPE Smart Storage Administrator HPE SSA is the main tool for configuring arrays on HPE Smart Array SR controllers. It exists in three interface formats: the HPE SSA GUI, the HPE SSA CLI, and HPE SSA Scripting. All formats provide support for configuration tasks. -
Page 47: Hpe Mr Storage Administrator
The Storage Command Line Interface (StorCLI) tool is the command line management software designed for the HPE Smart Array MR controller. StorCLI is a command line interface that is designed to be easy to use, consistent, and easy to script. -
Page 48: Usb Support
SPP is a systems software and firmware solution delivered as a single ISO file download. This solution uses SUM as the deployment tool and is tested and supports HPE ProLiant, HPE BladeSystem, HPE Synergy, and HPE Apollo servers and infrastructure. - Page 49 The SPP is also available for download from the SPP download page at https://www.hpe.com/ servers/spp/download. Smart Update Manager SUM is an innovative tool for maintaining and updating the firmware, drivers, and system software of HPE ProLiant, HPE BladeSystem, HPE Synergy, and HPE Apollo servers, infrastructure, and associated options.
-
Page 50: Updating Firmware From The System Utilities
Procedure 1. Access the System ROM Flash Binary component for your server from the Hewlett Packard Enterprise Support Center (http://www.hpe.com/support/hpesc). 2. Copy the binary file to a USB media or iLO virtual media. 3. Attach the media to the server. -
Page 51: Drivers
HPE Pointnext Portfolio HPE Pointnext delivers confidence, reduces risk, and helps customers realize agility and stability. Hewlett Packard Enterprise helps customers succeed through Hybrid IT by simplifying and enriching the on- premise experience, informed by public cloud qualities and attributes. -
Page 52: Proactive Notifications
Improving data center infrastructure • Better use of server, storage, and networking technology For more information, see the Hewlett Packard Enterprise website: http://www.hpe.com/services/consulting Proactive notifications 30 to 60 days in advance, Hewlett Packard Enterprise sends notifications to subscribed customers on upcoming: •... -
Page 53: Troubleshooting
• Error Message Guide for HPE ProLiant Gen10 servers and HPE Synergy provides a list of error messages and information to assist with interpreting and resolving error messages. •... -
Page 54: Removing And Replacing The System Battery
Removing and replacing the system battery If the server no longer automatically displays the correct date and time, then replace the battery that provides power to the real-time clock. Under normal use, battery life is 5 to 10 years. WARNING: The computer contains an internal lithium manganese dioxide, a vanadium pentoxide, or an alkaline battery pack. -
Page 55: Electrostatic Discharge
Electrostatic discharge Preventing electrostatic discharge To prevent damaging the system, be aware of the precautions you must follow when setting up the system or handling parts. A discharge of static electricity from a finger or other conductor may damage system boards or other static-sensitive devices. This type of damage may reduce the life expectancy of the device. -
Page 56: Specifications
Specifications Environmental specifications Specification Value Temperature range Operating 10°C to 35°C (50°F to 95°F) Shipping -40°C to 70°C (-40°F to 158°F) Maximum wet bulb temperature 28°C (82.4°F) Relative humidity (noncondensing) Operating 10% to 90% Nonoperating 5% to 95% All temperature ratings shown are for sea level. An altitude derating of 1°C per 300 m (1.8°F per 1,000 ft) to 3,048 m (10,000 ft) is applicable. -
Page 57: Websites
Websites General websites Hewlett Packard Enterprise Information Library www.hpe.com/info/EIL Subscription Service/Support Alerts www.hpe.com/support/e-updates Insight Remote Support www.hpe.com/info/insightremotesupport/docs For additional websites, see Support and other resources. Websites... -
Page 58: Support And Other Resources
Support and other resources Accessing Hewlett Packard Enterprise Support • For live assistance, go to the Contact Hewlett Packard Enterprise Worldwide website: http://www.hpe.com/info/assistance • To access documentation and support services, go to the Hewlett Packard Enterprise Support Center website: http://www.hpe.com/support/hpesc Information to collect •... -
Page 59: Customer Self Repair
IMPORTANT: Access to some updates might require product entitlement when accessed through the Hewlett Packard Enterprise Support Center. You must have an HPE Passport set up with relevant entitlements. Customer self repair Hewlett Packard Enterprise customer self repair (CSR) programs allow you to repair your product. If a CSR part needs to be replaced, it will be shipped directly to you so that you can install it at your convenience. -
Page 60: Regulatory Information
Documentation Feedback (docsfeedback@hpe.com). When submitting your feedback, include the document title, part number, edition, and publication date located on the front cover of the document. For online help content, include the product name, product version, help edition, and publication date located on the legal notices page.
Need help?
Do you have a question about the ProLiant XL450 Gen10 and is the answer not in the manual?
Questions and answers