Table of Contents
Advertisement
Quick Links
Advertisement
Table of Contents

Summary of Contents for 4IPNET EAP706
- Page 1 EAP706 Enterprise Access Point...
-
Page 2: Copyright Notice
4IPNET, INC. You may not alter or remove any copyright or other notice from copies of the content. All other brand and product names are claimed or registered marks of their respective companies or organizations. -
Page 3: Fcc Caution
FCC Radiation Exposure Statement: This equipment complies with FCC radiation exposure limits set forth for an uncontrolled environment. This equipment should be installed and operated with minimum distance 20cm between the radiator & your body. Copyright © 4IPNET, INC. All rights reserved. - Page 4 This declaration is only valid for configurations (combinations of software, firmware, and hardware) provided and supported by 4ipnet Inc. The use of software or firmware not provided and supported by 4ipnet Inc. may result in the equipment no longer being compliant with the regulatory requirements.
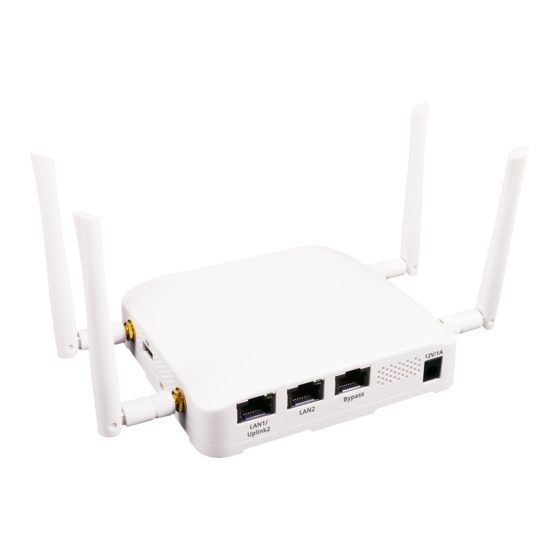
- Page 5 6. Mounting Plate Lock Tool x 1 7. Detachable Antenna x 4 The compact EAP706 in a small form factor lays snug in a standard wall outlet box. Its side panel features LED status indicators and two RJ45 ports.
-
Page 6: System Overview
2 LED Indicators 4 LED lights. Representation is listed at the top of the panel. 3 WES Button WDS Easy Setup. Press the button to build up a WDS link with another peer. Copyright © 4IPNET, INC. All rights reserved. - Page 7 4a SMA Connectors (2.4GHz) Connect external antennas for RF Card A here. (1) is the primary antenna connector while (2) is the secondary connector. 4b SMA Connectors (5GHz) Connect external antennas for RF Card B here. (1) is the primary antenna connector while (2) is the secondary connector. Copyright © 4IPNET, INC. All rights reserved.
-
Page 8: Hardware Installation
Please follow the steps mentioned below to install the hardware of EAP706: Step 1. Place the EAP706 at the best location. The best location is usually at the center of your intended wireless network. The EAP706 can be mounted on any wall outlets or on any flat surface;... - Page 9 The Uplink port is capable of receiving PoE. Connect an IEEE 802.3af-compliant PSE device (e.g. a PoE-switch) to the Uplink port of EAP706 with the Ethernet cable. c) Use a standard 110 punchdown tool to punch copper wires onto the punchdown block (uplink) Step 4.
- Page 10 To lock Access Point to the mounting plate, insert the tool provided and turn clockwise. Now, the Hardware Installation is complete. Punch down tools may vary by country. Please contact the 4ipnet Support Team for recommendations if needed.
-
Page 11: Getting Started
1. To access the Web Management Interface, connect the administrator PC to the LAN port of EAP706 via an Ethernet cable. Then, set a static IP address on the same subnet mask as EAP706 in TCP/IP of your PC, such as the following example: IP Address: 192.168.1.100... - Page 12 EAP706 Enterprise Access Point ENGLISH 4. After a successful login to EAP706, a System Overview page of the Web Management Interface will appear, as depicted below. The Radio Status and AP Status will be shown. The Web Management Interface - System Overview Page 5.
-
Page 13: Common Settings
Click on the Utilities icon on the main menu, and select the Change Password tab. Enter a new password with a length of up to 32 characters, and retype it in the Re-enter New Password field. Click SAVE to save the changes. Copyright © 4IPNET, INC. All rights reserved. - Page 14 DFS Channels: 52 56 60 64 100 104 108 112 116 132 136 140 149 153 157 161 165 2) Country Code: 250 (EU) DFS Channels: 52 56 60 64 100 104 108 112 116 120 124 128 132 136 140 Copyright © 4IPNET, INC. All rights reserved.
- Page 15 (b) Enable a selected VAP from the drop-down menu of Profile Name and configure related settings below. Check VAP status: After finishing VAP configuration, the status of the enabled Virtual APs shall be reflected on the VAP Overview page. Copyright © 4IPNET, INC. All rights reserved.
- Page 16 Quick Installation Guide EAP706 Enterprise Access Point ENGLISH Virtual AP Overview Page Copyright © 4IPNET, INC. All rights reserved.
- Page 17 After clicking SAVE, the Note: following message will appear: “Some modifications have been saved and will take effect after REBOOT.” Copyright © 4IPNET, INC. All rights reserved.
- Page 18 Congratulations! Now, 4ipnet EAP706 is installed and configured successfully. After EAP706's network configuration is completed, please remember to change the IP Address of your PC Connection Properties back to its original settings in order to ensure that your PC functions properly in its real network environments.


Need help?
Do you have a question about the EAP706 and is the answer not in the manual?
Questions and answers