
Related Manuals for Citronic CSX-18


Summary of Contents for Citronic CSX-18
- Page 1 CSX-18 MIXING CONSOLE Item ref: 170.885UK User Manual Version 1.0 Caution: Please read this manual carefully before operating Damage caused by misuse is not covered by the warranty...
-
Page 2: Package Contents
Introduction Thank you for choosing the CSX-18 mixing console as part of your professional sound system. This product has been developed to provide comprehensive range of audio requirements with high quality, reliable results. Please read and keep this manual to achieve the best results from your purchase and avoid damage through misuse. -
Page 3: Console Layout
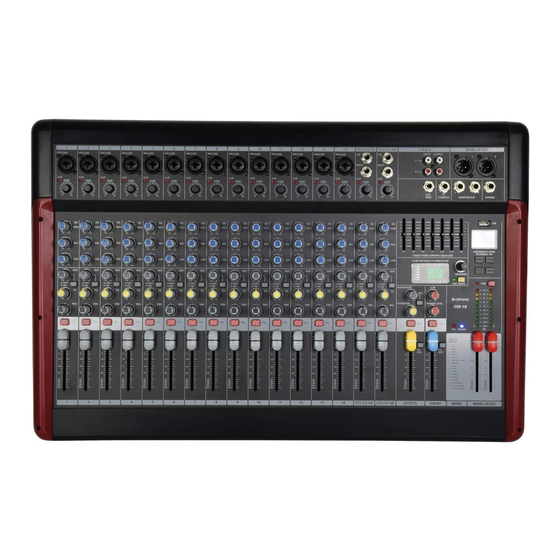
Console layout The CSX-18 has comprehensive input and output sections which can be split further into various stages of processing and routing. All preamps have studio grade, low noise architecture for the cleanest possible path throughout the signal chain. The input stages are repeated across each channel of the console, which simplifies operation and enables quick and easy location of various controls. -
Page 4: Channel Functions
Channel Functions MIC / Line input Connect a balanced microphone or line input to this XLRF input. An unbalanced microphone or line signal can be connected by XLR provided that +48V phantom power is not used. Wired as follows. Balanced Pin 1 = Ground Pin 2 = Signal + Pin 3 = Signal –... -
Page 5: Monitor Out
Channel Routing This control governs the amount of signal from the channel routed to the AUX SEND or auxiliary output to external equipment. POST / PRE Pressing this button in changes the AUX output from POST to PRE. POST is post-fader, meaning the signals to the AUX output are also affected by the channel fader level. - Page 6 BT (Bluetooth) and press/to select. The display (22) will show Bluetooth mode. Enable Bluetooth on the sending device and select to pair with a device called “Citronic”. Once paired and connected, the display will state “BLUETOOTH CONNECT” and “BT PAUSE” if a track is stopped or “BT PLAY”...
-
Page 7: Phones Level
REC - Record Function Insert a USB pen drive which is formatted to FAT32 in order to record the main output onto it. If there are any audio files already stored on the USB device, they will begin to play automatically. Press and hold the MENU button and this will enter the recording mode in a paused state. -
Page 8: Aux Master
29. PROGRAM Rotate to select a preset and push to select. Push again to select parameter 1. A single red dot will flash in the display. Rotate to set value and push to accept value. Display LED numeric display to show effect status Includes an LED VU meter to show effects bus level. - Page 9 170.885UK User Manual...
-
Page 10: Specifications
Specifications Power supply 100-240Vac, 50/60Hz (IEC) Fuse T3AL @ 230V / T6AL @ 115V Power consumption max. Input level +24dBu (mic/line), +20dBu (stereo line) max. Phantom power +48V globally switched to XLR inputs EQ: high 12kHz ±15dB (shelving) EQ: mid 2.5kHz ±15dB (band pass) EQ: low 80Hz ±15dB (shelving)
Need help?
Do you have a question about the CSX-18 and is the answer not in the manual?
Questions and answers