Advertisement
Quick Links
Advertisement

Subscribe to Our Youtube Channel
Related Manuals for 4IPNET OWL500


Summary of Contents for 4IPNET OWL500
- Page 1 OWL500/510 V1 . 00...
- Page 2 Quick Installation Guide L o n g R a n g e O u t d o o r C P E / A P / B r i d g e ENGLISH O W L 5 0 0 / 5 1 0 Copyright N otic e This document is protected by U S A copyrig ht l a w s a nd other l a w s a nd is the property of 4 I P N E T, I N C .
- Page 3 Quick Installation Guide L o n g R a n g e O u t d o o r C P E / A P / B r i d g e ENGLISH O W L 5 0 0 / 5 1 0 N o t e The respective FCC ID for This document serves only as a sample manual and QIG for this sample unit.
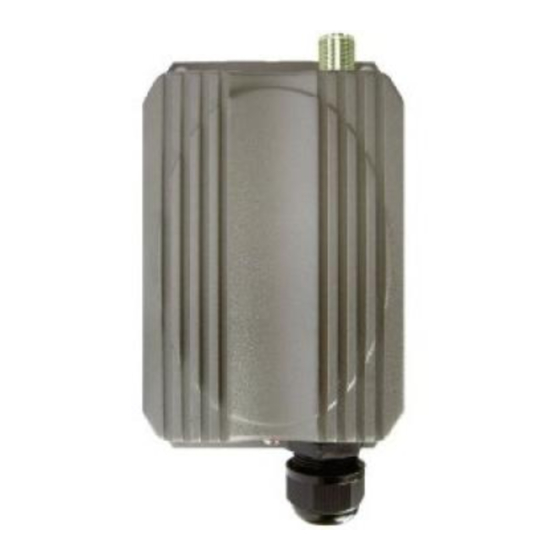
- Page 4 O W L 5 0 0 / 5 1 0 Preface Pack ag e C o n t en t s 1. OWL500/510 x 1 The 802.11 b/g compliant OWL500/510 is a Long 2. Quick Installation Guide (QIG) x 1 Range Outdoor CPE/AP/Bridge device that can be 3. CD-ROM (with User’s Manual and QIG)
-
Page 5: System Overview
L o n g R a n g e O u t d o o r C P E / A P / B r i d g e ENGLISH O W L 5 0 0 / 5 1 0 System Overview OWL500 WLAN Green LED ON indicates system ready... - Page 6 The following diagram is a basic network topology which can be used for testing and configuring the OWL500/510. Installation Steps: Step 1. Connect an N-type antenna to the N-type connector (applicable for OWL500/510 only). Step 2. Connect the PSE (POWER & DATA OUT) to the PSE 1 connector on the lower panel. Step 3.
-
Page 7: Getting Started
O W L 5 0 0 / 5 1 0 G ettin g Sta rted 4ipnet OWL500/510 supports web-based configuration. OWL500/510 is a dual-mode system, AP Mode as the default mode for the first time entering the system, which also can be configured as either an access point (AP Mode) or a gateway (CPE Mode) based on your needs. - Page 8 >> Example of IP Segment: The valid range of IP address is 1 ~ 254. However, 1 must be avoided as it is already used by OWL500/510. Below depicts an example of using 100 (the underlined value can be changed as desired).
- Page 9 Step 4: Login Success After a successful login to OWL500/510, a System Overview page of web management interface will appear, To logout, simply click on the Logout button at the upper right hand corner of the interface. By default, AP mode is enabled. Therefore, the...
- Page 10 Quick Installation Guide L o n g R a n g e O u t d o o r C P E / A P / B r i d g e ENGLISH O W L 5 0 0 / 5 1 0 <CPE Mode>...
- Page 11 Step 3: Login Success After a successful login to OWL500/510, a System Overview page of web management interface will appear. To logout, simply click on the Logout button at the upper right hand corner of the interface. - 8 -...
- Page 12 Quick Installation Guide L o n g R a n g e O u t d o o r C P E / A P / B r i d g e ENGLISH O W L 5 0 0 / 5 1 0 C o mmo n Settin g s <AP Mode –...
- Page 13 Quick Installation Guide L o n g R a n g e O u t d o o r C P E / A P / B r i d g e ENGLISH O W L 5 0 0 / 5 1 0 Step 2: Change Password Click on the Utilities button and then select the Password tab.
- Page 14 Quick Installation Guide L o n g R a n g e O u t d o o r C P E / A P / B r i d g e ENGLISH O W L 5 0 0 / 5 1 0 Step 3: Network Settings Settings here are for example only...
- Page 15 Band: Select an appropriate band from the drop-down list box. SSID: Enter a SSID for the system in the SSID field or use the default. SSID (Service Set Identifier) is a unique identifier used for networking devices to get associated with OWL500/510. - 1 2 -...
- Page 16 VAP-1 and WEP. Enter the information required in the blank fields. You must use the same information provided here to configure the network devices that are to be associated with OWL500/510. Click Apply to activate all settings configured so far. Congratulations! The AP mode is now successfully configured.
- Page 17 Quick Installation Guide L o n g R a n g e O u t d o o r C P E / A P / B r i d g e ENGLISH O W L 5 0 0 / 5 1 0 <CPE Mode>...
- Page 18 Quick Installation Guide L o n g R a n g e O u t d o o r C P E / A P / B r i d g e ENGLISH O W L 5 0 0 / 5 1 0 Step 2: Change Password Click on the Utilities button and then select the Password tab.
- Page 19 Quick Installation Guide L o n g R a n g e O u t d o o r C P E / A P / B r i d g e ENGLISH O W L 5 0 0 / 5 1 0 Step 3: Site Survey The scan result displayed here is an example only.
- Page 20 Quick Installation Guide L o n g R a n g e O u t d o o r C P E / A P / B r i d g e ENGLISH O W L 5 0 0 / 5 1 0 Step 5: Security Settings The above figure depicts an example of selecting AP2 (encrypted via WEP security type).
- Page 21 Quick Installation Guide L o n g R a n g e O u t d o o r C P E / A P / B r i d g e ENGLISH O W L 5 0 0 / 5 1 0 Step 6: Network Interface Configuration Settings here are for example only...
- Page 22 O W L 5 0 0 / 5 1 0 After OWL500/510's network configuration completes, please remember to change the IP Address of your PC Connection Properties back to its original settings in order to ensure that your PC functions properly in its real network environments.
Need help?
Do you have a question about the OWL500 and is the answer not in the manual?
Questions and answers