Easymount EM-1600SH Product Instruction Manual
Wide format laminators
Hide thumbs
Also See for EM-1600SH:
- Product instruction manual (16 pages) ,
- Instruction manual (30 pages)
Advertisement
Advertisement
Table of Contents

Related Manuals for Easymount EM-1600SH


Summary of Contents for Easymount EM-1600SH
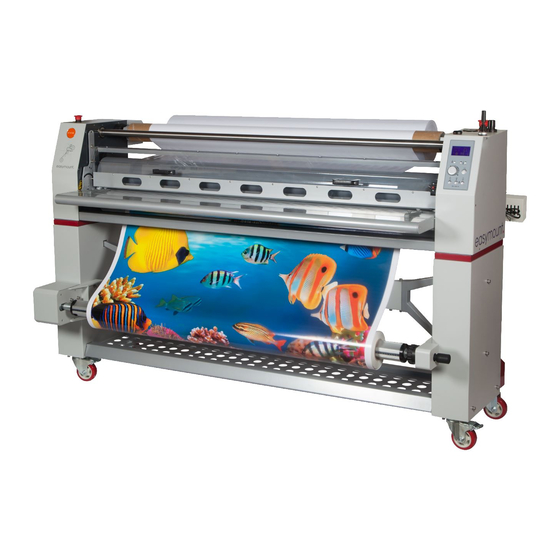
- Page 2 Easymount is a high performance wide format mounting and laminating system with a solid construction built to last. The Easymount is great for mounting prints to boards and applying pressure sensitive laminates as well as applying application tapes, double sided adhesives and vinyl’s.
-
Page 3: Safety Instructions
Safety Instructions • Please ensure that the voltages of power supply you are using match with rated working voltages before operating the machine • The power supply should be close to the machine for convenient use • The power supply should provide reliable protective earthing connection •... -
Page 4: Specifications
Specifications EM-1600SH Max Laminating Width 1600mm Max Laminating Thickness 25mm Temperature of Rubber Roller Ambient temperature to 60°C Approx Highest Line Speed 6m/min Approx Lowest Line Speed 0.7m/min Rated Working Voltage/Frequency 220V, 50Hz (110V, 60Hz) Rate Input Power 1500W 1790 x 740 x 1255... - Page 5 Should be included... Box with media support brackets Easymount Tool Box • Manual • Mandrel Allen key 5mm • Pack of Allen keys • Safety cutter • Dust cover • Foot pedal • Spirit level • O rings • Spare fuses...
- Page 6 Connect the foot pedal into the relevant socket at the rear of the system and lock the wheel brakes in place. The single heated Easymount can be run either cold or warm to switch between the two modes press the hot roller button on the control panel, The display will then show HOT next to the top roller icon.
- Page 7 Installation of Laminating Films Set-up To drive the machine press either the forward drive button (left hand arrow) for continuous drive or step button (middle arrow) for the foot switch. The foot switch over rides the magic eye, it is advisable to start the machine with the foot pedal &...
- Page 8 Open Mandrel locking sleeve. Pull out the Swing out arm and slide the laminate in place.
-
Page 9: Installation Of Laminating Films
Installation of Laminating Films Locate the swing out arm back into its home position & centralize the laminate on the mandrel using the measurement guide. Remove the take up mandrel [waste mandrel] by opening both locking sleeves and slide on a 3 inch core, then lock the mandrel back into place. -
Page 10: Film Loading
Film Loading Remove Safety Guard & Media support plate. Higher the roller and pull the laminate through the machine. Put tension on the laminate. - Page 11 Installation of Laminating Films Pull the laminate from the back of the machine in the centre of the laminate with one hand while lowering the top roller with the other hand. Please ensure you do not over tighten the roller pressure as it can cause a creasing effect in the centre of the media.
- Page 12 Pull the backing paper up towards the take up mandrel from the centre and secure it to the core using packing tape in 3 places, the centre, left and right. Pull the remaining backing paper of the laminate down to the feed table and roll your vinyl and place in the hooks provided.
- Page 13 Installation of Laminating Films The Laminate should be tensioned enough to prevent creases on the media, if the laminate is following the backing paper either reduce the tension on the backing paper or increase the tension on the laminate. Loading Roll to Roll Open bottom mandrel locking sleeve and slide the vinyl in the centre of the mandrel.
- Page 14 Please Note: When the Easymount is not in use lift the rollers to prevent flat spots, which could cause a line in future work on every revolution of the roller.
-
Page 15: Optional Extras
Plug in the take up unit. Select full speed, forward & combine. Fit the take up mandrel (note the bracket is sprung loaded on the motorised unit). Then using double sided tape attach media/laminate to the core, the Easymount laminator is now ready to run prints reel to reel. -
Page 16: Laminating Adjustments
Laminating Adjustments Temperature Most pressure sensitive films benefit from around 40°C / 104°F of heat being applied to help eliminate ‘silvering’. If you don’t get the desired result with 40°C / 104°F continue adding 5°C / 41°F of heat until you get the finish required. -
Page 17: General Maintenance
General Maintenance The most expensive part of a laminator is usually the rollers. If these become damaged they are costly to repair. Always ensure you look after the rollers and clean them regularly to avoid a build up of glue (see advice below). Never hold a sharp object such as a knife close to the rollers in case of catching the rubber as this could cause permanent damage that will effect the result of your work. -
Page 18: Troubleshooting
Trouble Shooting Problem Media lifting in centre and wrinkling going through the rollers. This is caused by adding too much roller pressure. Solution Take pressure off rollers and drop down loosely into the neutral position. The media will then correct itself and run through smoothly. Film running loose and climbing up onto the take up core. - Page 19 Trouble Shooting Problem Laminate or media lifting at edges. Solution Firstly, ensure the laminate and vinyl have sufficient tension. Add tension to the film by turning the tension handles in a clockwise direction. This must be done tightly for the film. The film will now ‘tension’...
-
Page 20: Warranty & Incorrect Use
Warranty & Incorrect Use IMPORTANT INFORMATION Your laminator should reach you in perfect condition, however please retain all original packaging once you have unpacked your laminator in case you need to return it to us. If your laminator arrives damaged or faulty in anyway, this must be reported to your supplier immediately.
Need help?
Do you have a question about the EM-1600SH and is the answer not in the manual?
Questions and answers