Advertisement
Quick Links
Advertisement

Related Manuals for Easymount SIGN


Summary of Contents for Easymount SIGN
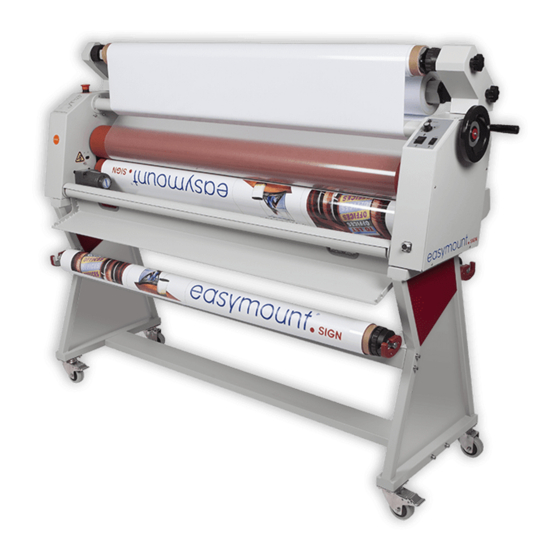
- Page 1 ASSEMBLY INSTRUCTIONS...
- Page 2 In your stand box you should have the below parts: The Middle Support Beam is Slightly Longer than the Top.
- Page 3 Using 4 x longer bolts, attach the bottom support beam to the left and right stand frames. Using 4 x smaller bolts, attach the middle support beam [this is the longest support bar].
- Page 4 Using the Last 4 x Longer bolts attach the top support beam. Ensure all bolts are tightened fully and place the 2 x mandrels in the holders.
- Page 5 Place the Laminator on the stand. The Parts left in your Machine Crate are Below [excluding the lifting handle bag and Elements].
- Page 6 Attach the Left and Right Mandrel Support holders to the machine using the bolts supplied and place the mandrels in the supports as shown in the pictures below.
- Page 7 Remove Left and Right side covers off the laminator. Remove the rubber sport below and Insert the Quartz Heating Element. Once Element is fitted please return the element support back into position.
- Page 8 Remove the Green Rubber sleeve on the left and right and attach the wire to each end of the element, ensuring there is a washer either side of the terminal as shown in the pictures below. Place end caps back on to the element.
- Page 9 Move the laminator to where the machine will be situated, please note all 4 wheels must be on a level floor for the roller pressure to be level. To check the roller pressure, place a small piece of card in the centre of the roller and lower the roller down.
- Page 10 Easymount Sign: Adjustment of Roller Gap & Pressure Using a 2.5mm Allan-key undo the 6 screws to take the left side panel of the machine. Take off the emergency stop button by unscrewing the screw above. Take off the screw and large washer above.
- Page 11 Untighten the screw above to loosen the bevelled gear. Take off the bevelled gear. Rotate the pressure regulating shaft to make the upper roller rise slightly. Conduct visual observation and measure the gap between left and right sides of upper and lower rollers. If the left gap is larger, rotate the gear in the below picture (when rotating clockwise, the roller rises;...
Need help?
Do you have a question about the SIGN and is the answer not in the manual?
Questions and answers