
Related Manuals for Toa IP-A1SC15


Summary of Contents for Toa IP-A1SC15
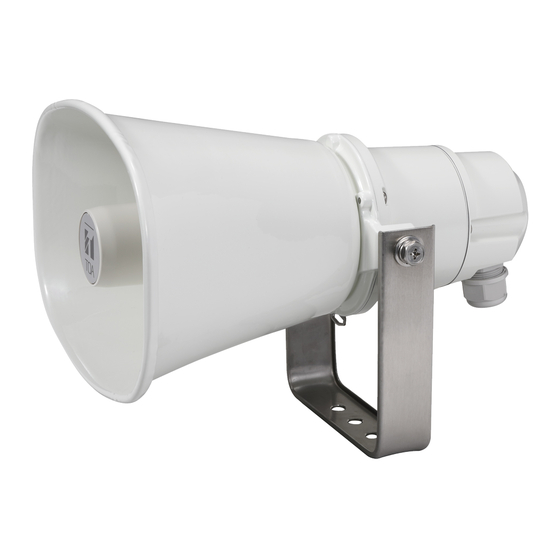
- Page 1 SETUP MANUAL IP HORN SPEAKER IP-A1SC15 Thank you for purchasing TOA's IP Horn Speaker. Please carefully follow the instructions in this manual to ensure long, trouble-free use of your equipment.
-
Page 2: Table Of Contents
TABLE OF CONTENTS 1. SETUP SUMMARY ................... 4 2. SYSTEM REQUIREMENTS ................ 4 3. CONNECTION ..................... 5 3.1. Connection Presets ....................5 3.2. Making Connection ....................5 4. SWITCHING SETUP SCREENS ............6 4.1. Screen Contents ....................6 4.2. Logging Out ...................... - Page 3 14. PRIORITY BROADCAST SETTINGS ..........27 14.1. Display Contents ....................27 14.2. Saving Settings & Changes ................28 15. USER SETTINGS SCREEN ..............29 15.1. Display Contents ....................29 15.2. Saving Settings & Changes ................30 16. MAINTENANCE SCREEN ..............31 16.1.
-
Page 4: Setup Summary
1. SETUP SUMMARY Connecting a PC to the IP-A1SC15 IP Horn Speaker (hereinafter referred to as the "unit") by way of a browser* allows the following settings, displays and the like to be made via a network. * For recommended browsers, please refer to "SYSTEM REQUIREMENTS" below. -
Page 5: Connection
3. CONNECTION 3.1. Connection Presets The unit is factory-preset as follows: Username: admin Password: guest IP address: 192.168.14.1 Subnet mask: 255.255.255.0 Default gateway: 192.168.14.254 Before connecting a PC to the IP horn speaker and changing its setting, it will be necessary to set the PC's network settings so that it can operate on the same network as the IP horn speaker. -
Page 6: Switching Setup Screens
4. SWITCHING SETUP SCREENS Click on the individual function names arranged on the left side of the screen to switch screens and perform the required settings for each selected screen. 4.1. Screen Contents Setting Name Setting Item Page (1) Status screen Confirmation of current firmware version, network settings, p. -
Page 7: Logging Out
on the NO button, then the SAVE button, before switching screens. • If not saving changes made to the setting contents, click on the YES button. The display will switch to another screen without saving the contents. 4.2. Logging Out To terminate the network connection after completing confirmation or changes to the unit's settings, click on the LOGOUT button. -
Page 8: Status Screen Display
5. STATUS SCREEN DISPLAY This screen displays the unit's current main setting contents, etc. Since this page only displays the current settings, the contents cannot be changed on this page. Item Contents (1) Terminal Name Displays the device name set on the Network settings screen (2) Firmware Version Displays the unit's current firmware version. -
Page 9: Network Settings Screen
The unit's network-related settings are performed on this screen. 6.1. Display Contents Item Contents (1) Terminal Name Set the unit's terminal name. Initial setting: IP-A1SC15 Tips • For usable characters, please refer to "USABLE CHARACTERS" on p. • Max: 31 characters (2) IP Address Set the unit's IP address. -
Page 10: Saving Settings & Changes
6.2. Saving Settings & Changes When all settings or changes are completed, save their contents. Step 1. Click on the SAVE button. The dialog box, "Do you want to discard the changes?" is displayed. Step 2. Click on the OK button. Note The set or changed contents on this screen will not be in effect until the unit has restarted. -
Page 11: Sip Settings Screen
Initial setting: Blank (5) Display Name* Set the name to be displayed on the destination terminal when the unit establishes an SIP connection to that terminal. The display name may be the same as the User ID (4). Initial setting: IP-A1SC15... -
Page 12: Saving Settings & Changes
Item Contents (6) Password* Set the password needed to register the unit on the SIP server. Initial setting: Blank (7) Authentication ID* Enter the authentication ID needed when registering the unit on an SIP server. Place a checkmark in the checkbox when using. Initial settings: Checkbox: Blank Authentication ID: Blank... -
Page 13: Vms Broadcasting Settings Screen
8. VMS BROADCASTING SETTINGS SCREEN Perform all settings related to VMS connections. 8.1. Display Contents Item Contents (1) VMS Connection Click on the switch to select whether or not to use the VMS broadcast function. If using: If not using: OFF (2) Username* Enter the unit's username, which will be needed for other equipment to make a VMS connection to the unit. -
Page 14: Saving Settings & Changes
8.2. Saving Settings & Changes When all settings or changes are completed, save their contents. Step 1. Click on the SAVE button. The dialog box, "Changed contents enabled after restart." is displayed. Step 2. Click on the OK button. Note The set or changed contents on this screen will not be in effect until the unit has restarted. -
Page 15: Multicast Settings Screen
9. MULTICAST SETTINGS SCREEN The unit's Multicast-related settings are performed on this screen. Note The unit is incompatible with IGMP. When a multicast broadcast cannot be executed, even if settings are correct, it may be possible that the switching hub’s IGMP snooping function is enabled. In such cases, disable the IGMP snooping function. 9.1. -
Page 16: Saving Settings & Changes
9.2. Saving Settings & Changes When all settings or changes are completed, save their contents. Step 1. Click on the SAVE button. The dialog box, "Changed contents enabled after restart." is displayed. Step 2. Click on the OK button. Note: The set or changed contents on this screen will not be in effect until the unit has restarted. -
Page 17: Audio Settings Screen
10. AUDIO SETTINGS SCREEN The speaker's master volume and correction volume are set for each broadcast using this screen. 10.1. Display Contents (1) Speaker Volume Adjust the speaker's broadcasting volume. Item Contents Speaker Mute Mark the checkbox to mute speaker sound output. Uncheck the checkbox to disable muting. -
Page 18: Saving Settings & Changes
(2) Input Volume Set the correction volume for each broadcast. Item Contents SIP Broadcasting Click on the [ ] mark and select the desired correction volume for SIP Volume (SIP) broadcasts from the pull-down menu. Setting range: −20 to +20 dB Initial setting: 0 dB VMS Broadcasting Click on the [ ] mark and select the desired correction volume for VMS... -
Page 19: Media Setting Screen
11. MEDIA SETTING SCREEN This screen is used to upload, download or delete the internal sound source files. 11.1. Display Contents B C D (1) Internal Sound Source List (Media List) This list shows the names of the sound source files currently stored in the unit. Sound source files can be registered to media numbers 1 –... -
Page 20: Uploading Sound Source Files
11.2. Uploading Sound Source Files Follow the procedure below to upload sound source files to the unit: Max. sound source file storage capacity is 30 MB per file and 80 MB total. Supported file formats are as follows: WAV file: 8/16/44.1/48 kHz sampling frequency, 8/16 bit, monaural/stereo MP3 file: 32/44.1/48 kHz sampling frequency, 64 to 320 kbps, CBR/VBR, monaural/stereo Notes •... -
Page 21: Deleting Sound Source Files
The selected sound source file is downloaded. 11.4. Deleting Sound Source Files Follow the procedure below to delete sound source files: Note If sound source files are deleted while an internal sound source broadcast is in progress, the broadcast will stop. -
Page 22: Pattern Registration Screen
12. PATTERN REGISTRATION SCREEN Up to 20 internal sound source files can be registered as a broadcast pattern for broadcast in synchronization with specific events. 12.1. Display Contents Item Contents (1) Pattern List Up to 20 internal sound source files can be registered to each broadcast pattern. -
Page 23: Performing Broadcast Tests
Item Contents (6) Offset Volume The offset volume can be set to equalize the sound output of individual patterns or change the output level for each pattern. Changes to the offset volume settings are enabled from the next broadcast after such changes are saved. Setting range: −20 to +20 dB Initial setting: 0 dB (7) Control-out... -
Page 24: Saving Settings & Changes
12.3. Saving Settings & Changes When all settings or changes are completed, save their contents. Step 1. Click on the SAVE button. The dialog box is displayed. Step 2. Click on the OK button. Note Settings and changes performed on this screen are enabled immediately after being saved. However, any changes to the offset volume settings are only reflected beginning with the next broadcast after they are saved. -
Page 25: Event Settings Screen
13. EVENT SETTINGS SCREEN Perform all settings related to contact control input and output. 13.1. Display Contents (1) Control-in Broadcasts can be initiated by control signals received from connected external equipment. Each of the 2 control inputs can be independently assigned which broadcast to execute. Item Contents Action... -
Page 26: Saving Settings & Changes
Item Contents Target Enter the IP address or SIP user ID of the destination terminal to which the unit will be making SIP calls. For valid characters that can be used in the creation of the SIP user ID, please refer to "USABLE CHARACTERS"... -
Page 27: Priority Broadcast Settings
14. PRIORITY BROADCAST SETTINGS The priority order of each broadcast function can be set or modified. 14.1. Display Contents Item Contents (1) Priority Broadcast Set the order of priority for the following broadcast functions: • SIP broadcast • VMS broadcasting •... -
Page 28: Saving Settings & Changes
[Broadcast switchover performed by broadcast priority settings] Shown below are examples with the signal mode 25) set to Edge. Example of higher priority broadcast being input later Higher priority input Control input Lower priority input Higher priority input Higher priority input Broadcasting state Lower priority input Lower priority input... -
Page 29: User Settings Screen
15. USER SETTINGS SCREEN The username and password required to make a connection to the unit from a PC can be set on this screen. 15.1. Display Contents Item Contents (1) Username* Enter the current user account name. Initial setting: admin (2) Password* Enter the current user account password. -
Page 30: Saving Settings & Changes
15.2. Saving Settings & Changes When all settings or changes are completed, save their contents. Step 1. Click on the CHANGE button. The dialog box is displayed. Step 2. Click on the OK button. Note Settings and changes performed on this screen are enabled immediately after being saved. -
Page 31: Maintenance Screen
The unit's setting contents and sound source files can all be saved to the PC or restored to the unit from backup data saved on the PC. The same setting contents can also be duplicated onto other IP-A1SC15 Horn Speakers. Item Contents Config &... -
Page 32: Downloading Settings Data
(2) Firmware Update Firmware can be updated by uploading new firmware to the unit from the PC. Item Contents Current Version Displays the version of the current firmware. Firmware Update The unit's firmware can be updated. (See "Firmware Update" on p. 35.) (3) Hardware Reboot Item... -
Page 33: Uploading Settings Data
16.3. Uploading Settings Data Follow the procedure below to restore setting contents and sound source files to the unit from the backup data saved on the PC. Note Performing uploads during a broadcast will stop all current broadcasts. Step 1. Click on the UPLOAD button. The settings upload screen opens. -
Page 34: Initialization Of Settings
16.4. Initialization of Settings Follow the procedure below to return all the unit's setting contents to their initial settings. Notes • Unlike the factory default settings procedure described on the following page, the unit's saved sound source files are not deleted. •... -
Page 35: Factory Default Settings
All the unit's setting contents are returned to factory default settings after restart completion. 16.6. Firmware Update The procedure for updating the unit's firmware is as follows: Download the latest firmware after performing a search of the TOA DATA Library (https://www.toa-products. com/international/) for the product number "IP-A1SC15". Note Do not change the filename of the downloaded firmware. -
Page 36: Restarting The Unit
Step 3. Select the new firmware file. The firmware filename is displayed in the format "IP-A1SC15_vxxxx.bin," where "xxxx" is the version number. Step 4. Click on the OPEN button. Step 5. Confirm the firmware filename displayed on the screen, then click on the UPLOAD button. The dialog box is displayed. -
Page 37: Status Indicator Operation
Flashing (continuously*) * If the indicator flashes continuously in any other mode than initialization or firmware update, restart the unit by disconnecting and reconnecting the LAN cable. Note Please contact your nearest TOA dealer if irregularities continue even after restart. -
Page 38: Ip Setting Tool
"CONNECTION" on p. 18.1. Before Using: On the TOA DATA Library (https://www.toa-products.com/international/), perform a search for the product number "IP-A1SC15" and download the "IPSettingTool.exe" IP Setting Tool. The following shortcut icon appears on the desktop: 18.2. Starting the IP Setting Tool Double-click on the "IPSettingTool.exe"... -
Page 39: Setting Method
Selecting any unit in the list by marking its corresponding checkbox activates its right-side button, thus making it possible to click on. 18.3. Setting Method 18.3.1. Display Contents Notes • Perform Steps (4) and (10) after selecting the unit by marking the checkbox in the Detection Results list. •... - Page 40 (3) Detection Results list Displays a list of detected units. (4) Network Setting button Clicking on this button displays the Network Settings screen of the selected IP-A1SC15. (See "Network Settings" on p. 41.) (5) Open Window button Clicking on this button causes the browser to start up, displaying the Login screen for the selected IP- A1SC15.
-
Page 41: User Authentication
18.4. User Authentication Step 1. Enter the username and password. Enter the username and password set for the detected unit. When setting up an unconfigured or initialized unit, enter the following username and password: Username: admin Password: guest To change the setting contents of the unit(s) detected by the IP Setting Tool, the user authentication requirements of each unit must be met. - Page 42 [Network settings screen for Multiple Setting] Item Contents Name Set the terminal name. Initial setting: IP-A1SC15 Note Names cannot be set in Multiple Setting. After all other Multiple Setting items have been set, go back and set only the name individually. Tips •...
- Page 43 Item Contents Confirm IP address Mark the checkbox to confirm whether there are any conflicting IP conflict addresses. Tips • Even if the checkbox for the item "Confirm IP address conflict" is marked, certain conflicts related to network IP addresses that are different from the network adapter in use cannot be confirmed.
-
Page 44: Uploading Settings Files
18.6. Uploading Settings Files Note Performing uploads during a broadcast will stop all current broadcasts. Step 1. Select the units and click on the Configuration file upload button. The file selection screen is displayed. Step 2. Click on the Select button and select the settings file (extension ".spconf") to be uploaded to the units. -
Page 45: Downloading Settings Files
18.7. Downloading Settings Files Step 1. Select the units and click on the Configuration file download button. The screen for selecting the download destination folder is displayed. Step 2. Click on the Select button to select the download destination folder. Step 3. -
Page 46: Firmware Update
18.8. Firmware Update Download the latest firmware after performing a search of the TOA DATA Library (https://www.toa-products. com/international/) for the product number "IP-A1SC15". Note Do not change the filename of the downloaded firmware. Step 1. Select the units that will have its firmware updated, and click on the Firmware update button. -
Page 47: Restarting The Unit
18.9. Restarting the Unit Step 1. Select the units to be restarted and click on the Restart button. The confirmation screen is displayed. Multiple units can also be selected for restart. Step 2. Unit restart begins when the OK button is clicked. -
Page 48: Usable Characters
19. USABLE CHARACTERS 19.1. Characters That Can Be Used for Names, Authentication ID and Passwords Alphabetical Alphabetical Numerical Symbols [“-” (hyphen)] Other Target Upper case Lower case 0 – 9 and [“_” (underscore)] symbols* letters A – Z letters a – z Login screen Username ×... - Page 49 7-2-1, Minatojima-Nakamachi, Chuo-ku, Kobe, Hyogo, 400 Oyster Point Boulevard, Suite 301, Japan South San Francisco, California 94080, Traceability Information for Europe Manufacturer: Authorized representative: TOA Corporation TOA Electronics Europe GmbH 7-2-1, Minatojima-Nakamachi, Chuo-ku, Kobe, Hyogo, Suederstrasse 282, 20537 Hamburg, Japan Germany URL: https://www.toa.jp/ 202007...
Need help?
Do you have a question about the IP-A1SC15 and is the answer not in the manual?
Questions and answers