Advertisement
Quick Links
EN/CN-A01
Quick Start Guide
快速启动指南
1.
WARNING
2.
Please refer to FlashForge official website www.flashforge.com to
DOWNLOAD
download the newest User's Guide, Software and Instruction
Videos. (Support-Support Center-Select a Product)
1.
注 意 事 项
2.
前往闪铸科技官方网站 www.sz3dp.com ,可以在[ 技术支持 ] 页面下载
资 料 下 载
用户使用手册、切片软件等资料,或查看相关操作视频。
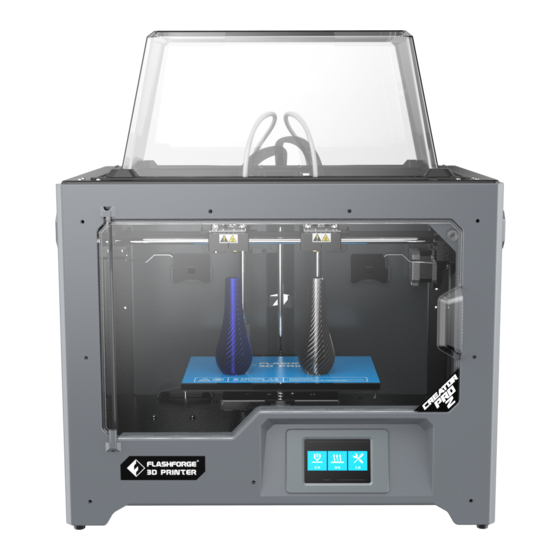
This guide is only applicable to Creator Pro 2 3D printer
中文P14
Hot! Avoid touching the heating nozzle and heating build plate
in operation.
Moving parts in printer may cause injury. Do not wear gloves or
other sources of entanglement in operation.
高温危险!打印机喷嘴和打印平台在工作时会被加热,请避免接触!
可动部件可能造成卷入挤压和切割伤害。操作机器时请不要佩戴手套
或缠绕物。
本手册仅适用于金刚狼2 3D打印机
Creator Pro 2 / 金刚狼2
Advertisement

Subscribe to Our Youtube Channel
Related Manuals for Flashforge Creator Pro 2


Summary of Contents for Flashforge Creator Pro 2
- Page 1 User's Guide, Software and Instruction Videos. (Support-Support Center-Select a Product) 高温危险!打印机喷嘴和打印平台在工作时会被加热,请避免接触! 注 意 事 项 可动部件可能造成卷入挤压和切割伤害。操作机器时请不要佩戴手套 或缠绕物。 前往闪铸科技官方网站 www.sz3dp.com ,可以在[ 技术支持 ] 页面下载 资 料 下 载 用户使用手册、切片软件等资料,或查看相关操作视频。 This guide is only applicable to Creator Pro 2 3D printer 本手册仅适用于金刚狼2 3D打印机...
- Page 2 Unboxing The Creator Pro 2 was carefully packaged at FlashForge manufacturing facility. Please follow the unpacking steps laid out below. CAUTION 1. Remove the package and take out accessories carefully. Do not use force. 2. Do not tear the yellow high temperature resistant adhesive tape around the nozzle, it has thermal insulation and high temperature resistance characteristics.
- Page 3 Take the extruder out and place the Take out the foam with accessories. extruder carefully. Avoid the nozzle to Shear two ties on the both sides of touch the desk, which prevent the nozzle X-axis guide rod. damage from scratch. 7.
-
Page 4: About Your Creator Pro
About Your Creator Pro 2 10 11 1. Platform 2. Platform support 3. Leveling nut 4. LCD panel 5. Z-axis guide rod 6. Extruder cable bunch 7. X-axis guide rod 8. Slot 9. Nozzle cooling fan 10. Spring presser 11. Cooling fan 12. - Page 5 Accessories CREATOR PRO 2 金刚狼 PRO 2 Creator Pro 2 Filament Top cover After-sales Quick Start Service Card Guide Power Cable USB Cable SD Card Spool Holder Build Tape Screw Driver Stamping Allen Unclogging Scraper Wrench Wrench Pin Tool Anti- oozing...
-
Page 6: Installation
Installation 1.Extruder Assembly Lower the platform first and place the dual extruder on the extruder seat. Take the M2.5 Allen Wrench from the tool bag and four M3 bolts from the accessory kit. Adjust the extruder location to align the bolt holes. - Page 7 2.Filament Guide Tube and Filament Installation 1.To install a spool holder, level it and insert the end into the corresponding opening. 2.Turn down the spool holder to make the holder bottom cleave to the printer back. Please refer to the next page for the right method of filament mounting.
- Page 8 Tips The filament spool must be oriented Filament Guide correctly (see below). Tube Buckle After filament guide tube fixation completed, press the left spring presser limited seat of extruder, put filament vertically into the left filament intake from the other Lock the filament guide tube with R-shape end of filament guide tube.
-
Page 9: Loading And Unloading
The First Setting Loading and Unloading Filament Level Home Manual Print Preheat Tools Setting Status About Tap [Tools]-[Filament] L Extruder R Extruder Heating... Load Load L Extruder 75℃ / 220℃ Unload Unload Tap [load], the extruder will start to heat up. After heating to the target temperature, please manually insert the filament into the filament feeding wheel. - Page 10 Leveling Clearing the remaining materials on the nozzle first to avoid leveling fails. Filament Level Home Manual Please wait, device is homing. Setting Status About Next Tap [Tools]-[Leveling] to start leveling. The machine will finish homing first. Screw the three nuts tnder the platform counterclockwise until they are tight, then tap the [Next].
- Page 11 Status About Tap [Tools]-[Setting]-[Z calibration]. Creator Pro 2 uses a compensation layer mecha- nism. Instead of manually adjusting the installation positions of the left and right nozzles, a program is used to calculate the height difference between the two nozzles.
- Page 12 X Axis Calibration X-axis calibration: Used to adjust the consistency of the two extruders in the X-axis direction to prevent misalignment during printing. Calibration Calibration Calibration X Calibration Expert L: 152/200 Language FactoryReset Mode R: 164/200 B: 45/50 Tap [Setting]-[X Calibration], or continue the X-axis calibration after the Z-axis calibra- tion is completed.
- Page 13 Y Axis Calibration Y-axis calibration: Used to adjust the consistency of the two extruders in the Y-axis direction to prevent misalignment during printing. Calibration Calibration Calibration Y Calibration Expert L: 152/200 Language FactoryReset Mode R: 164/200 B: 45/50 1. Tap [Setting]-[Y Calibration], or continue the Y-axis calibration after the X-axis calibra- tion is completed.
-
Page 14: First Print
First Print After installing, loading filament and calibrating, it start your first print. Insert the SD card to the side of machine. 25MB Print Preheat Tools 1519MB Test flashforge Tap [Print]-[SD card]; choose the test file to print. - Page 15 开箱 闪铸对Creator Pro 2进行了仔细的包装,请您按照以下的开箱步骤拆除包装箱。 注意事项 1.请小心拆除包装,拿出配件,切勿使用蛮力。 2.请勿撕毁围绕在喷嘴周围的黄色耐高温胶带,它具有保温及耐高温特性。 打开纸箱取出顶部泡沫。 抓住机身两侧的把手,将打印机从纸箱中提 出。 撕除胶带,去除塑料袋。随后撕去固定前门 4. 移除塑料袋后,您可以看到打印机内部的包 的胶带。 装以及配件,我们从上至下逐一来解除包 装,拿出配件。...
- Page 16 首先将喷头从泡沫中取出,放置在台面上。 取出装有配件的泡沫盒。剪断左右两边固定X 喷头的线束较短,在摆放时请注意喷嘴不能 轴的扎带。 接触台面,避免划伤喷嘴影响打印精度。 7. 从打印机中取出顶罩及耗材包装,取出耗材。 8. 托住打印平台两侧,缓缓将平台从底部抬 起,便于取出下方的泡沫盒。 9. 取出平台底部的泡沫,然后缓慢将打印平台 10. 开箱完成。建议您保留包装材料,以便于以 向下压回较低的位置,便于后续安装。 后的搬运或保存...
- Page 17 设备介绍 10 11 1.打印平台 2.平台支架 3.调平螺母 4.液晶屏 5.Z轴导轨 6.喷头线束 7.X轴导轨 8.顶罩卡槽(四个角) 9.喷头散热风扇 10.进丝压板 11.冷却风扇 12.喷头喷嘴 13.导风嘴 14.喷头支架 15.SD卡插槽 16.USB线接口 17.导丝管卡扣 18.丝盘轴插口 19.耗材丝盘轴 20.电源线接口 21.电源开关...
- Page 18 装箱清单 CREATOR PRO 2 金刚狼 PRO 2 3D打印机 3D打印耗材 顶 罩 售后服务卡 快速启动指南 丝盘轴 平台贴纸 电源线 USB线 SD卡 十字螺丝刀 冲压扳手 内六角扳手 通 针 铲 刀 防溢丝板 聚四氟乙烯管 耗材导丝管 润滑脂 固体胶 调平卡 调平螺母...
- Page 19 硬件安装 1.安装喷头 首先将平台下降到最低位置,然后如下图所 示,将喷头放置于喷头支架(中塑料)上。 从配件包中取出内六角扳手(M2.5);从 喷头安装包中取出4颗M3螺丝。 适当调整喷头位置,使喷头与喷头支架的螺 丝孔对齐。 用内六角扳手从喷头支架下方旋入螺丝以固 螺丝孔位 螺丝孔位 定喷头。...
- Page 20 2.安装耗材和导丝管 丝盘轴插入端 1.将丝盘轴插入端插入打印机背部的丝盘轴插口中。 2.将丝盘轴向下翻转,最终使得丝盘轴贴住打印机背板。 耗材安装方向有要求,详情见下一页 3.取出耗材,轻按丝盘轴顶端两侧,然后将耗材装入丝盘轴。...
- Page 21 耗材安装提示 安装耗材时请注意耗材丝盘轴的安装方向。 导丝管固定卡扣 如下图所示,请保证耗材从内测出丝。 耗材及导丝管安装完毕后,将耗材穿过导丝 管导入左喷头进丝孔中。当您准备将耗材插 导丝管限位卡座 入喷头前,请按下喷头一侧的进丝压板。 将导丝管卡入机身背部的导丝管固定卡扣中。 安装正确:内侧出丝 安装错误:外侧出丝 注意:请注意将导丝管延伸到丝盘轴内部,以防止丝料脱开被缠绕在丝盘外部。 3.安装顶盖 4.防溢丝板安装 可手动调节防溢丝板 与喷嘴的距离,请确 保安装后喷嘴可触碰 到防溢丝板表面。经 过一段时间的打印, 防溢丝板表面出现划 M3x8 痕为正常现象。 当打印 ABS 材料时建议安装此顶盖; 安装防溢丝板,使用2颗螺丝固定。 当打印 PLA 材料时无需安装此顶盖。...
- Page 22 设备首次设置操作 进丝与退丝 丝料 调平 回零 手动 打印 预热 工具 设置 状态 关于 点击【工具】-【丝料】 左喷头 右喷头 正在加热... 进丝 进丝 左喷头 75℃ / 220℃ 退丝 退丝 点击【进丝】,喷头开始加温,待加热到目标温度,请手动插入丝料到进丝轮中。当丝料从喷嘴 吐出,说明进丝完成。 3. 点击【退丝】,喷头开始加温,待加热到目标温度,手动向内送丝挤出一部分丝料后,按压下送 丝压板,快速拔出丝料,退丝完成。...
- Page 23 调平 调平前请清理干净喷嘴尖部的残余丝料,以免影响调平。 丝料 调平 回零 手动 请稍等,喷头与平台正在完成初始化运动 设置 状态 关于 下一步 点击【工具】-【调平】开始调平,设备会先回零。 请逆时针拧紧底板下三个螺母,再点击确认按钮 下一步 在喷头和打印平台停止运动后,逆时针拧紧平台下方的三个螺母(此步骤是因为传感器在上部, 防止喷头一开始划伤平台)。 运动停止后,请调节底板下前方的螺母 下一步 3. 选择任意喷头,喷头开始移动到第一个调整点。利用调平纸检测喷头与平台距离,并同时调节旋 钮。 滑动调平纸稍微感受到摩擦力,说明喷嘴与平台间距合适。验证完成后,喷头会运动到第 二个以及第三个调平点进行同样操作的调整。 注意:平台与喷嘴间距过小,模型不易移除,间距过大,不易粘附,容易起翘。...
- Page 24 XYZ轴校准 Z轴校准 丝料 调平 回零 手动 打印 预热 工具 设置 状态 关于 点击【工具】-【设置】-【Z轴校准】。Creator Pro 2 采用补偿层机制,不手动调整左右喷头的 安装位置,而使用程序计算两个喷头的高度差。 校准 校准 校准 Z轴校准 恢复出厂 初始化运动... 专家模式 语言 设置 Z轴校准,喷头与平台将先回到零位,选择任意喷头进行校准。当喷头与平台温度过高时,将会 等待喷头降温至50℃,以防止喷头烫伤贴纸。 在喷嘴与平台间插入调平卡,请点击 Z-,Z+ 调整合适的间距 Z:0.08 确认 3. 按照屏幕提示:在喷嘴与平台间插入调平卡,请点击 Z-, Z+调整合适的间距。调整幅度为滑动调 平纸,感受到稍有摩擦阻力,说明喷头与平台间距合适;当一个喷头调整完成后将会切换到另一 个喷头进行校准,操作步骤与原先的相同。 注意:Z轴校准过程中请勿旋转平台下方旋钮。...
- Page 25 X轴校准 X轴校准:用于调整两个喷头X轴方向的一致性,以防止打印时左右喷头错位。 校准 校准 校准 X轴校准 恢复出厂 L: 152/200 专家模式 语言 设置 R: 164/200 B: 45/50 点击【设置】-【X轴校准】 ,或者Z轴校准结束继续进行X轴校准。 设备初始化运动完成后,将会对喷头与平台进行加温,此时请确保已将丝料插入喷头; 加热完成后,左右喷头将会各自打印一条线。 请点击X-,X+ 调整距离,使得两条线保持一致 0.00 验证 确认 3. 根据实际打印的线条,点击X-,X+ 调整喷头的偏向性;清除打印线条,点击验证按钮,左右喷 头将会再次打印线条,查看线条是否重合,若重合则说明X轴校准完成,若不一致,则继续调 整,直至重合为止。...
- Page 26 Y轴校准 Y轴校准:用于调整两个喷头Y轴方向的一致性,以防止打印时左右喷头打印时Y轴方向错位。 校准 校准 校准 Y轴校准 恢复出厂 L: 152/200 专家模式 语言 设置 R: 164/200 B: 45/50 点击【设置】-【Y轴校准】 ,或者X轴校准结束继续进行Y轴校准。 设备初始化运动完成后,将会对喷头与平台进行加温,此时请确保已将丝料插入喷头; 加热完成后,左右喷头将会各自打印一条线。 请点击Y-,Y+ 调整距离,使得两条线保持一致 验证 0.00 确认 3. 根据实际打印的线条,点击Y-,Y+ 调整喷头的偏向性;清除打印线条,点击验证按钮,左右喷 头将会再次打印线条,查看线条是否重合,若重合则说明Y轴校准完成,若不一致,则继续调 整,直至重合为止。...
- Page 27 初次打印 操作完以上安装,进丝以及校准设备后,可开始打印。 请将SD卡插入设备侧面; 25MB 打印 预热 工具 1519MB Test flashforge 点击【打印】-【SD卡】;选择对应测试文件进行打印;...
- Page 28 Zhejiang Flashforge 3D Technology Co,. Ltd. 售后专线:support@flashforge.com After-Sales Service: support@flashforge.com 电话:400 886 6023 官方网站:www.sz3dp.com 地址:浙江省金华市仙源路518号 Tel: +86 579 82273989 Web: www.flashforge.com Add: 2/F, No.518, Xianyuan Road, Jinhua, Zhejiang, China...
Need help?
Do you have a question about the Creator Pro 2 and is the answer not in the manual?
Questions and answers