Table of Contents
Advertisement
®
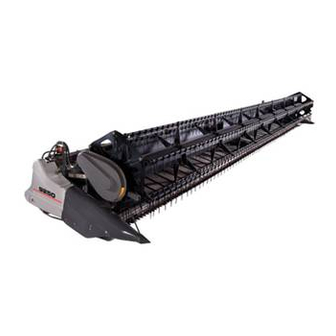
Gleaner
9250
DynaFlex Draper Header
SERVICE MANUAL
79034308 B Rev.
CONTENTS
SAFETY ..................................................................................................................................................................01
GENERAL INFORMATION ....................................................................................................................................02
DRIVES...................................................................................................................................................................03
CUTTING COMPONENTS .....................................................................................................................................04
ELECTRICAL .........................................................................................................................................................05
HYDRAULICS ........................................................................................................................................................06
HOUSING AND SHIELDS ......................................................................................................................................07
REEL ......................................................................................................................................................................08
© AGCO Corporation, 2010 All rights reserved.
Part Number 79034308 B Rev. (English)
Printed in U.S.A.
April 2010
Advertisement
Chapters
Table of Contents

Related Manuals for AGCO Gleaner DynaFlex 9250


Summary of Contents for AGCO Gleaner DynaFlex 9250
- Page 1 79034308 B Rev. CONTENTS SAFETY ..................................01 GENERAL INFORMATION ............................02 DRIVES...................................03 CUTTING COMPONENTS .............................04 ELECTRICAL .................................05 HYDRAULICS ................................06 HOUSING AND SHIELDS ............................07 REEL ..................................08 © AGCO Corporation, 2010 All rights reserved. Part Number 79034308 B Rev. (English) Printed in U.S.A. April 2010...
-
Page 2: Table Of Contents
Contents ® Gleaner 9250 DynaFlex Draper Header SERVICE MANUAL 79034308 B Rev. 01 - Safety Contents SAFETY Safety Alert Symbol ............................01-1 Safety Messages ............................01-1 Informational Messages ..........................01-1 Safety Signs ..............................01-2 A Word to the Operator ..........................01-2 Fire Prevention and First Aid ......................... - Page 3 Contents NOTES 01-ii 79034308 B Rev. Find manuals at https://best-manuals.com...
-
Page 4: Safety
Safety SAFETY SAFETY ALERT SYMBOL FIG. 1: The safety alert symbol means ATTENTION! BECOME ALERT! YOUR SAFETY IS INVOLVED! Look for the safety alert symbol both in this manual and on safety signs on the machine. The safety alert symbol will direct your attention to information that involves your safety and the safety of others. -
Page 5: Safety Signs
See Safety Sign Location of this section for illustrations. Replace any safety signs that cannot be read or are missing. Replacement safety signs are available from AGCO parts. A WORD TO THE OPERATOR FIG. 3: Read and understand the Operator Manual and the manual for all attachments before operating the machine. - Page 6 Safety IT IS TOO LATE TO REMEMBER WHAT SHOULD • BEFORE attaching, adjusting or working on the HAVE BEEN DONE AFTER THE ACCIDENT HAS driveline, disengage the header drive, lower the HAPPENED. header to the ground, stop the engine, remove the starter key and set the parking brake.
-
Page 7: Fire Prevention And First Aid
Safety FIRE PREVENTION AND FIRST AID FIG. 4: Be prepared for emergencies. Always carry one or more suitable fire extinguishers (ABC rating), dry chemical, 2.2 Kg (5 lb). Check fire extinguishers regularly to be sure the fire extinguishers are properly charged and in operating condition. -
Page 8: Prepare For Operation
Safety PREPARE FOR OPERATION Make sure the machine is in the proper operating condition as stated in the Operator Manual. Make sure the machine has the correct equipment needed by local regulations. Read and understand all operating instructions and precautions in the manual and the Operator Manual before operating or servicing the machine. -
Page 9: Road And Highway Operation
Safety ROAD AND HIGHWAY OPERATION FIG. 6: COMPLY with your state and local LAWS and REGULATIONS governing highway safety when moving machinery on a highway. • ALWAYS travel at a reasonable speed for road or field conditions. Whenever possible, avoid traveling near ditches, embankments and holes. -
Page 10: Header Transport Tie-Down
Safety HEADER TRANSPORT TIE-DOWN FIG. 8: Hooking locations along the frame are provided on the header to allow for proper tie-down for transport. P922746 FIG. 8 FIG. 9: Example of tie-down location (1) on the trailer. P922742 FIG. 9 FIG. 10: Example of tie-down location (1) on trailer. P922746 FIG. -
Page 11: Operation
Safety OPERATION WARNING: In order to provide a better view, certain photographs and illustration in this manual will show an assembly with the shield removed. Do not operate the machine and attachments unless all shields are in place. Replace shields immediately upon completion of inspection, repairs, cleaning adjustment... - Page 12 Safety FIG. 14: All shields and guards must be in the correct operating position and in good condition. 71389544C FIG. 14 FIG. 15: Never stand near the machine during operation. Debris can be thrown from the machine during operation possibly resulting in injury. D-8278 FIG.
- Page 13 Safety FIG. 17: Never allow anyone on any part of the machine or attachments except in the operator's seat and the instructor's seat when the engine is running. Do not attempt to get on or off of the machine while the machine is moving.
- Page 14 Safety FIG. 20: Use extra care and reduce speed when operating on hillsides or near ditches or embankments especially with a full grain tank to avoid rollover. Travel speed must be such that complete control and machine stability is maintained at all time. Shift to a lower gear before descending a steep hill.
-
Page 15: Maintenance
Safety MAINTENANCE FIG. 24: Escaping fluid under high pressure can be almost invisible but penetrate the skin causing serious injury. Consult a doctor immediately if you sustain an injury by escaping fluids. Fluid injected into the skin must be surgically removed within a few hours or gangrene may result. - Page 16 Safety FIG. 28: Remove spilled oil, antifreeze or fuel immediately from operator's ladder and platform and other access areas. Keep all access areas clean and free of obstructions. Wc1939 FIG. 28 FIG. 29: Before doing any unplugging, lubricating, servicing, cleaning, or adjusting, park the machine on a solid level surface.
-
Page 17: Engine Safety
Safety ENGINE SAFETY FIG. 32: Make sure that all shields, guards and access doors are in place and properly closed before starting the engine. Start the engine from the operator's seat only. Be sure that the transmission is in neutral and the header, separator and unloader clutches are disengaged. -
Page 18: Battery Safety
Safety BATTERY SAFETY FIG. 35: Electrical storage batteries give off highly flammable hydrogen gas. Keep lighted smoking material and open flame or electrical sparks away from the battery. Do not lay tools or other conductive material on the battery. Be careful when connecting booster cables to batteries. Electrical component damage or battery explosion can result if booster cables are not installed correctly. -
Page 19: Cylinder Stops
Safety CYLINDER STOPS Reel Lift Cylinder Stops A reel lift cylinder stop is supplied for the reel lift cylinder on both sides of the header. Install both reel lift cylinder stops to prevent lowering of the reel. FIG. 38: Engaging Lift Cylinder Stops - Put the header on the ground and raise the reel to maximum height. -
Page 20: Header Lift Cylinder Stop
Safety Header Lift Cylinder Stop FIG. 40: Disengaging Lift Cylinder Stop - A lift cylinder stop (1) is located on the left-hand header lift cylinder of the machine. The lift cylinder stop is shown in the disengaged position. Raise the header to maximum height. Stop the engine, set the parking brake, and remove the start key. -
Page 21: Shields
Safety SHIELDS NOTE: Pictures in this manual may show shields removed for visibility or access to parts of the machine. Numerous shields must be opened and or removed to perform normal service and adjustment procedures. WARNING: Never operate the machine or allow others to operate the machine unless all shields supplied with the machine and the machine's attachments are properly in... - Page 22 Safety FIG. 42: The left-hand end shield (1) shown in the closed position. The divider shield (2) shown in the operating position. Q217810 FIG. 42 FIG. 43: To remove the end shield (1), first remove the two cotter pins (2). P922748 FIG.
- Page 23 Safety FIG. 46: To install the divider shield, engage the mounting plate (1) onto the post (2). P909521 FIG. 46 FIG. 47: At the same time engage the rod support (3) into the receiver (4) on the header frame. P909520 FIG.
- Page 24 Safety FIG. 50: To release the four drive shields (1) along the back of the header, twist the latch handle (2) clockwise using a wrench or a suitable tool. Pull the top of the drive shield rearward and remove the drive shield by rotating the drive shield up and off of the posts on the header frame.
- Page 25 Safety NOTES 01-22 79034308 B Rev.
-
Page 26: Index
Index INDEX Safety - Maintenance ......... 01-12 Safety - Tire ............01-14 Accumulator Safety ..........01-15 Safety Alert Symbol ..........01-1 Safety Messages ..........01-1 Safety Operation ..........01-8 Safety Signs ............01-2 Shields ..............01-18 Battery Safety ............ 01-15 Tire Safety ............ - Page 27 Index NOTES 01-24 79034308 B Rev.
- Page 28 Contents ® Gleaner 9250 DynaFlex Draper Header SERVICE MANUAL 79034308 B Rev. 02 - General Information Contents GENERAL INFORMATION Introduction ..............................02-1 Units of Measurement ..........................02-1 Replacement Parts ..........................02-1 Machine Identification ..........................02-1 Header/Machine Usage ........................... 02-2 Operation ............................... 02-3 Checklists ..............................
- Page 29 Contents Sickle Timing - Dual Knife Drive ......................02-40 Lubrication and Maintenance ........................02-42 General Information ..........................02-42 Lube Decal ............................02-49 Lubrication Chart ........................... 02-50 Lubrication Details ..........................02-50 Reel Drive Chain ........................... 02-56 Troubleshooting ............................02-57 Cutterbar ............................... 02-57 Reel ...............................
-
Page 30: General Information
General Information GENERAL INFORMATION INTRODUCTION The information contained in this manual covers service information for the DynaFlex™ Header. The header operator's manual as well as the machine operator’s manual must be kept at hand for reference at all times. Units of Measurement Measurements are given in metric units followed by the equivalent in U.S. -
Page 31: Header/Machine Usage
General Information Header/Machine Usage General All models are equipped with hydrostatic reel drive. The header is equipped with a flexible cutterbar and Automatic Header Height Control (AHHC). As a Flex Draper, the four or six sensors (potentiometers) installed on each end and throughout the center of the header are specifically designed to operate with the AHHC control module installed in the machine. -
Page 32: Operation
General Information OPERATION • With the machine operating in a stationary position, have another person watch the operation of moving parts. Watch for any signs of faulty operation, Checklists overheated bearings, and listen for any sounds that are not normal. Daily End of Season •... -
Page 33: Variable Speed Drive Lockout
General Information Variable Speed Drive Lockout FIG. 2: Corn Header - The variable speed feature of this drive is used only with the corn header. The variable speed header drive can be very beneficial when harvesting corn by enabling the operator to match the corn header speed to the various field and operational conditions. -
Page 34: Parking Stands
General Information Parking Stands FIG. 5: The parking stands (1) are used to support the header when disconnecting the header from the machine. The stands hold the header in the correct position when removing and attaching the header to the machine. Lower the header until the skid pads are contacting a level area on which to set the header. - Page 35 General Information FIG. 9: Transverse Machine - If a corn head is going to be attached to the machine, disconnect the reel lift quick coupler from the reel lift fitting (1). Connect the female quick coupler to the male coupler (2) for the header variable speed sheave.
-
Page 36: Attaching Header
General Information Attaching Header FIG. 12: Rotate the feeder housing latches (1) back into the feeder housing. Lower the feeder housing. L831880 FIG. 12 FIG. 13: Align the left-hand front corner of the feeder housing with the left-hand guide flange (1) in the header opening. - Page 37 General Information FIG. 15: Slide the collar (1) to release the yoke and then slide the yoke from the driveline mount for storage. Repeat the procedure for the opposite driveline on dual knife drive. P918640 FIG. 15 FIG. 16: Sickle Drive Timing (Dual Knife Drive) - The two sickles must be timed to run exactly opposite each other before connecting the drivelines to the countershaft of the feeder housing.
- Page 38 General Information FIG. 19: Release the locking ring and pull back and forth on the driveline to make sure that the coupling is locked in the annular groove (1) on the countershaft. Repeat the procedure for the opposite driveline on dual knife drive.
-
Page 39: Extremity Lights (Header)
General Information Extremity Lights (Header) FIG. 23: Header extremity lights (1) are factory installed on the right-hand and left-hand end of the header. The extremity lights are used to mark the ends of the header. When harvesting, rotate the mounting tube (2) for the extremity lights inward. -
Page 40: Header Break-In
General Information Header Break-In Check the reel drive chain for alignment and correct tension. Lubricate the sickle with oil to aid initial break-in. If operating in extremely sandy or abrasive soil do not lubricate the sickle. Watch for any signs, such as heating or noise, indicating faulty adjustment. - Page 41 This as a preview PDF file from best-manuals.com Download full PDF manual at best-manuals.com...
Need help?
Do you have a question about the Gleaner DynaFlex 9250 and is the answer not in the manual?
Questions and answers