Table of Contents
Advertisement
Quick Links
Operator's Manual
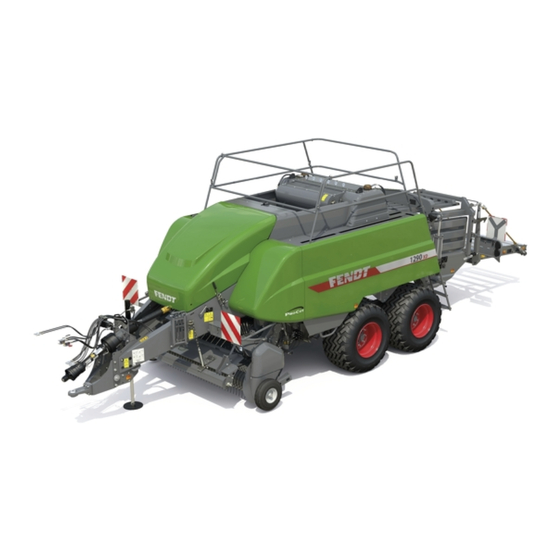
Large Square Baler
CE
870N
870R
870S
990N
990R
990S
1270N
1270S
1290N
1290NXD
AGCFxxxxxEHB0x101 -
North America
4205 River Green Parkway, Duluth GA 30096 USA
FENDT is a worldwide brand of AGCO
© AGCO 2019
Original Operator's Manual
1290S
1290SXD
12130N
12130S
June 2019
700741554F
EME
English
Advertisement
Table of Contents

Related Manuals for AGCO FENDT 870N


Summary of Contents for AGCO FENDT 870N
- Page 1 1290SXD 870S 12130N 990N 12130S 990R 990S 1270N 1270S 1290N 1290NXD AGCFxxxxxEHB0x101 - North America 4205 River Green Parkway, Duluth GA 30096 USA June 2019 FENDT is a worldwide brand of AGCO 700741554F © AGCO 2019 Original Operator's Manual English...
- Page 2 AGCO ®, or its dealers, accept no responsibility for variations which may be evident in the actual specifications of its products and the statements and descriptions contained in this publication.
- Page 3 TABLE OF CONTENT Safety Introduction Operation Maintenance Troubleshooting Specification Accessories Assembly Index Find manuals at https://best-manuals.com...
-
Page 4: Table Of Contents
Table of contents 1 Safety ............15 Introduction 1.1.1 Safety symbol . - Page 5 Table of contents Large Square Baler 700741554F Find manuals at https://best-manuals.com...
-
Page 6: Introduction
1. Safety 1.1 Introduction GUID-5D9F270E-D748-4741-82B1-BE49B78685F2 [V5] 1.1.1 Safety symbol The safety symbol tells you about a potentially hazardous area! Look for the safety symbol in this manual and on the machine. The safety symbols tell you that there is important safety instructions in the manual. -
Page 7: A Word To The Operator
1. Safety Always make sure that safety signs are in the correct locations and that you can read the safety signs. Illustrations of safety sign locations are in this section. Keep the safety signs clean. If necessary, use a weak soap and water solution. GUID-F38BCC9A-5A98-41F3-BA3C-2C5AB224EDFB [V6] 1.1.5 A word to the operator It is your responsibility to read and understand the... -
Page 8: This Manual
1. Safety GUID-F180C720-C8A9-4411-AA97-B6147E05E2A0 [V2] 1.1.6 This manual This manual covers general safety instructions for this machine. Keep this manual with the machine. Right and left, as used in this manual, are given as if you are in the operator seat. The photos, illustrations, and data used in this manual were up to date when published, but in-line production changes can make your machine have small differences. -
Page 9: Operation
1. Safety 1.2 Operation GUID-A3ACB803-2E1D-4690-84C2-84FEDB4354EB [V6] 1.2.1 General information When parking, park the machine and the tractor on a solid level surface. put all controls in neutral and apply the tractor park brake. Stop the tractor engine and take the key with you. Make sure the tractor and implement are in the proper operating condition according to the operator manuals. -
Page 10: Prepare For Operation
1. Safety Avoid contact with electrical power lines. Contact with electrical power lines can cause electrical shock, resulting in very serious injury or death. GUID-DB0A93E4-AEB5-49D5-AC5F-DD1454F1CFC6-high.jpg [High] Fig. 6 GUID-A25B667B-D7CF-4C75-8AED-C10113104322 [V6] 1.2.2 Prepare for operation Read and understand all operation instructions and precautions in this manual before you operate the machine or do the servicing. -
Page 11: Seat Instructions
1. Safety GUID-F38524AD-E24F-4FCC-9154-E5357EFDE9D2 [V3] 1.2.4 Seat instructions Put on the seat belt before you operate the machine. Always sit in the seat and have the seat belt on while you operate the machine. Replace the seat belts when they become worn or broken. Do not use a seat belt loosely. -
Page 12: Exhaust Warning
1. Safety DANGER: Entanglement hazard. Rotating components. Severe personal injury or death can occur. Do not make adjustments or repairs to components while they are moving. Stop the machine before doing service to the machine. Do not operate the machine with the drive shaft shields open or removed. -
Page 13: Handrails
1. Safety GUID-DAAB4281-F045-467E-97A1-20DFD2BB692C [V4] 1.2.8 Handrails WARNING: Falling hazard. Personal injury or death can occur. Use appropriate safety precautions when working off the ground. Point your body in the direction of the ladder and use the handrails when you are on the machine ladders. -
Page 14: Travel On Public Roads
1. Safety GUID-5D89E5D7-581C-41BB-8EB5-81C1804930D9 [V2] 1.3 Travel on public roads Always raise the bale chute before: • Taking the machine across a road. • Roading the machine. • Moving the machine on a trailer. See raising a bale chute for more information. Make sure you understand the speed, brakes, steering, stability, and load characteristics of this machine and the tractor before you travel on public... - Page 15 1. Safety Always install the safety transport chain between the implement and the tractor drawbar. • Use a safety transport chain with a strength rating equal to or more than the gross weight of the towed machines. • Connect the safety transport chain to the tractor drawbar and use a retainer on the hitch pin. •...
-
Page 16: Maintenance
1. Safety 1.4 Maintenance GUID-93C8628D-B392-4191-80DB-7D54BDAAF61B [V20] 1.4.1 General maintenance information Before you do maintenance, lubricate, do servicing, clean, or make adjustments: • Park the machine on a solid, level surface. • Disengage the tractor power take-off. • Make sure that all the controls are in the neutral position and apply the parking brake. - Page 17 1. Safety Do not operate the machine with the drive shaft shields open or removed. Entanglement in drive shafts that rotate can cause injury or death. Stay clear of components that rotate. Make sure that guards that rotate can rotate freely. A loose yoke can come off a shaft and result in injury to persons or damage to the machine.
-
Page 18: Fire Prevention And First Aid
1. Safety GUID-9D716526-CF1A-4CD9-89A6-FD350D1B1E7A [V7] 1.4.2 Fire prevention and first aid Be prepared for emergencies. Keep a first aid kit available for use on small cuts and scratches. Keep one or more fire extinguishers of the correct type. Examine fire extinguishers regularly as stated by the manufacturer. -
Page 19: High Pressure Leaks
1. Safety GUID-68111A90-0641-4B8F-9AB9-A5B05A044C46 [V4] 1.4.3 High pressure leaks WARNING: Hydraulic fluid under pressure can penetrate the skin or eyes. Serious personal injury, blindness, or death can occur. Relieve the pressure from the system or component before disconnecting components. Wear personal protective gear while working on the machine or equipment. -
Page 20: Tire Safety
1. Safety the nitrogen will make the accumulator move at a high rate of speed. GUID-E28CEEE8-E160-49B0-8080-8D193B1B4E86 [V7] 1.4.5 Tire safety Examine tires for cuts, bulges, and correct pressure. Replace worn or damaged tires. When tire service is needed, have a qualified tire mechanic service the tire. -
Page 21: Safety And Information Signs
1. Safety GUID-41F5E928-7C47-446F-BDC4-772EFAF8CCDC [V5] 1.5 Safety and information signs Safety signs - hazard and avoidance Most of the safety signs on this machine have two panels. The hazard panel (A) shows the consequence of encountering the hazard. The avoidance panel (B) shows the action required to avoid the hazard. - Page 22 1. Safety Safety sign (1) Hazard (A) - Entanglement hazard. Rotating shaft/PTO driveline. Avoidance (B) - Do not reach into areas of moving parts. Hazard (A) - General safety alert Avoidance (B) - Read the Operator Manual for safety information and operating instructions before operating the machine.
- Page 23 1. Safety Safety sign (4) Hazard (A) - Explosion hazard - accumulator contains gas and oil under pressure that can penetrate skin and cause serious injury. Avoidance (B) - Shut off engine, remove key, and relieve pressure before performing maintenance or repair work.
- Page 24 1. Safety Safety sign (8) Hazard (A) - Entanglement hazard in rotating auger. Avoidance (B) - Do not reach into area of moving parts. GUID-F131340A-AE2C-4F06-A727-289BDB9F3C84-high.jpg [High] Fig. 37 Safety sign (9) Hazard (A) - Crushing hazard - risk of personal injury.
- Page 25 1. Safety Safety sign (12) Hazard (A) - Hand entanglement hazard. Knotter assembly can move without putting hay in the baler. Avoidance (B) - Close the knotter shield before operating the baler. GUID-29A8845F-072D-420A-8D3B-44A5C4A7091D-high.jpg [High] Fig. 41 Safety sign (13) Hazard (A) - Never reach into the knotter area with the tractor running and the PTO connected.
- Page 26 1. Safety Flywheel brake (16) Pull handle down to engage flywheel brake (A). Push handle up to disengage flywheel brake (B). The flywheel rotates in a counter clockwise direction (C) as seen from the front of the baler. GUID-27146031-66F7-4BFA-B96A-9109913B53D7-high.jpg [High] Fig.
- Page 27 1. Safety Stuffer/knotter/needle chain routing (19) GUID-AF393B5B-63EF-4325-B205-6F543E2EB9CD-high.jpg [High] Fig. 49 Twine box routing for four and six twine balers (20) The top view is for four twine balers. The bottom view is for six twine balers. GUID-106D3A31-2B44-4B59-AA16-72D1C3EA2BE9-high.jpg [High] Fig. 50 Lift location (21) GUID-6EC3AEC1-038C-466E-A50A-4F4B6C587919-high.jpg [High] Fig.
- Page 28 1. Safety Twine routing into knotter area (22) GUID-DCF253E2-E4A3-4243-8184-2DB97ECDDC6D-high.jpg [High] Fig. 52 Twine routing through upper tensioners, upper slacker arms and tucker arms (23) GUID-243D1CEF-89DF-4AD5-B464-F43C5C0033B1-high.jpg [High] Fig. 53 Type 2 and Type 3 1000 RPM CE CV driveline (24) GUID-092B904C-AF0A-4B88-AF41-D8E36B985D35-high.jpg [High] Fig.
- Page 29 1. Safety Safety sign (25) Pinch hazard - risk of personal injury. Keep hands clear. HAKHE0110073601 GUID-2037228C-5A7B-4580-A29D-238AD737DF29-low.svg [Low] Fig. 55 Original art: ~/Desktop/700744942_2.ai STUFFER ARMS BEARINGS AXLE POINTS 2 2 5 5 0 0 1 1 0 0 0 0 1 1 0 0 0 0 PACKER BEARINGS 2 2 5 5 0 0...
- Page 30 1. Safety Location letter Description Time interval Stuffer cam bearings Connecting rods 250 hours Bale density Stuffer/Knotter drive sprocket Knotter clutch and needle Each day actuating rod Stuffer clutch and sprocket (3) Flywheel bearings Yearly Location of the driveline grease fittings (27) Weight of lubrication in grams and ounces and time intervals in hours.
- Page 31 This as a preview PDF file from best-manuals.com Download full PDF manual at best-manuals.com...
Need help?
Do you have a question about the FENDT 870N and is the answer not in the manual?
Questions and answers