
Subscribe to Our Youtube Channel
Related Manuals for Horizon Hobby E-flite Divo 3D Profile


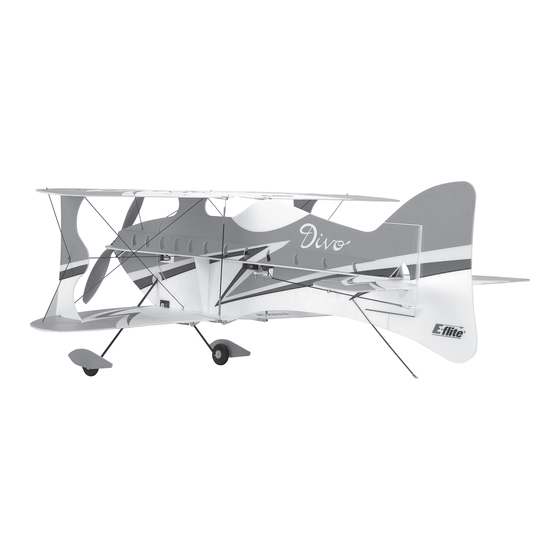
Summary of Contents for Horizon Hobby E-flite Divo 3D Profile
-
Page 1: Specifications
Divo 3D Profile Assembly Manual Specifications Wingspan: 28 in (715mm) Length: 31 in (807mm) Wing Area: 347 sq in (22.4 sq dm) Weight w/ Battery: 7.5–8.5 oz (215–241 g) Weight w/o Battery: 6.1–7.5 oz (173–215 g) -
Page 2: Table Of Contents
Center of Gravity .............. 31 Range Test Your Radio ............31 Preflight ................32 Flying Your Divo ..............32 2007 Official AMA National Model Aircraft Safety Code ... 33 Building and Flying Notes: ..........34 E-flite Divo 3D Profile Assembly Manual... -
Page 3: Using The Manual
JRPXFR** FM Receiver Crystal (JR only, not AR6000) EFLRS60 6.0-Gram Super Sub-Micro Servo (3) If you are using a Spectrum DX6 SPM6000 AR6000 DSM 6-Channel Park Flyer Receiver EFLRS60 6.0-Gram Super Sub-Micro Servo (3) E-flite Divo 3D Profile Assembly Manual... -
Page 4: Important Information About Motor Selection
Cyclon motor will offer a lighter weight set up. Use caution as wide open throttle will discharge the battery at a very high rate. Proper throttle management is required to achieve optimum performance and prevent shortened battery life. E-flite Divo 3D Profile Assembly Manual... -
Page 5: Notes Regarding Servos And Esc
Horizon. Return of any goods by Purchaser must be approved Warranty Period in writing by Horizon before shipment. Horizon Hobby, Inc., (Horizon) warranties that the Products purchased (the “Product”) will be free from defects in materials and workmanship at the date of purchase by the Purchaser. -
Page 6: Damage Limits
Provided warranty conditions have been met, your Product will be repaired or replaced free of charge. Repair or replacement decisions are at the sole discretion of Horizon Hobby. E-flite Divo 3D Profile Assembly Manual... -
Page 7: Non-Warranty Repairs
• Moisture causes damage to electronics. Avoid water exposure Champaign, Illinois 61822 to all equipment not specifically designed and protected for this purpose. Please call 877-504-0233 with any questions or concerns regarding this product or warranty. E-flite Divo 3D Profile Assembly Manual... -
Page 8: Fuselage Assembly
3. Position the plywood firewall at the front of the fuselage. DO NOT glue the firewall, it is only to aid in the alignment of the horizontal and vertical fuselage pieces at this time. E-flite Divo 3D Profile Assembly Manual... - Page 9 7. Remove the firewall and glue the two triangular fuselage braces in position. Make sure they are positioned so they will not interfere with the installation of the firewall later in the assembly. E-flite Divo 3D Profile Assembly Manual...
- Page 10 Hint: Use low-tack masking tape to hold the fin/rudder and stabilizer/elevator in neutral. This will make the assembly of your airframe slightly easier than if they are moving about while handling the airframe. E-flite Divo 3D Profile Assembly Manual...
- Page 11 Again, use foam-safe CA and work slowly make sure the two remain properly aligned to each other while gluing to keep the horizontal and vertical fuselage while gluing. pieces square to each other. E-flite Divo 3D Profile Assembly Manual...
-
Page 12: Wing Assembly
With the top of the top wing resting on the waxed paper, use foam-safe CA to glue the top wing control horns to the ailerons. The horns will be flush with the top of the top ailerons. E-flite Divo 3D Profile Assembly Manual... - Page 13 6. Glue the top wing to the cabane struts and vertical fuselage. A narrow board will keep the bottom wing flat when gluing the top wing and avoid any possibilities of twisting the wings. E-flite Divo 3D Profile Assembly Manual...
-
Page 14: Carbon Rod Installation
Make sure to keep everything aligned and the wings straight with the fuselage. Also make sure not to induce any twist in the wings, which could adversely affect the flight characteristics of your aircraft. E-flite Divo 3D Profile Assembly Manual... - Page 15 Use foam-safe CA to glue the carbon rods in position. Glue the three rods together where they cross each other as well. 4. Install the final 5.4-inch (137mm) carbon rods between the vertical fuselage and top wing using foam- safe CA. E-flite Divo 3D Profile Assembly Manual...
-
Page 16: Motor Installation (E-Flite)
Use a felt-tipped pen to mark the locations for the mounting screws through the motor mount. 3. Attach the motor mount to the motor using the hardware provided with the motor. E-flite Divo 3D Profile Assembly Manual... - Page 17 Apply a couple of drops of thin fuselage. CA to the screws where they protrude beyond the back of the firewall. Note: The firewall must fit tight against the vertical and horizontal fuselage pieces. E-flite Divo 3D Profile Assembly Manual...
-
Page 18: Motor Installation (Cyclon)
This will prevent the tube from splitting when you mount the motor. E-flite Divo 3D Profile Assembly Manual... - Page 19 2 to 3 degrees. When using the Carbon tube mount with the Cyclon Micro, use a round file to relieve the inside of the right doubler and glue the tube in with the reduced thrust angle. E-flite Divo 3D Profile Assembly Manual...
- Page 20 E-flite Divo 3D Profile Assembly Manual...
-
Page 21: Servo Installation
Install a micro control connector to each end of the servo arm as shown. 3. Attach the bend of each of the 4.8-inch (123mm) carbon pushrods to the control horns on the bottom wing. E-flite Divo 3D Profile Assembly Manual... - Page 22 7. Attach a long servo arm to the elevator and rudder servos after centering the servo using the radio. Install a micro control connector to the end of the servo arms. E-flite Divo 3D Profile Assembly Manual...
- Page 23 CA to the junction between the fuselage for the tabs on the rudder servo or cut the horn and locking plate to secure its position. mounting tabs off of the rudder servo. E-flite Divo 3D Profile Assembly Manual...
- Page 24 The rudder brace will go in the hole closest to the rear. 11. With rudder centered, secure the pushrod to the connector at the rudder servo using a 2mm x 4mm machine screw. E-flite Divo 3D Profile Assembly Manual...
- Page 25 15. Use foam-safe CA to glue the pushrod brace to the fuselage in the hole farthest from the elevator. Make sure to position the brace so the pushrod will not bind on the brace during flight. E-flite Divo 3D Profile Assembly Manual...
-
Page 26: Electronics Installation
Plug the servos into the receiver at this time. 3. Apply hook and loop tape to the motor battery and fuselage. Slide the motor battery into position. E-flite Divo 3D Profile Assembly Manual... - Page 27 Note: Never check the motor rotation on the bench with the propeller installed. The plane could move and cause serious injury. Always check the motor without the propeller to avoid injury. E-flite Divo 3D Profile Assembly Manual...
-
Page 28: Landing Gear Installation
The tube helps in quieting the skid on hard surfaces. 3. Check the alignment of the axles using a ruler. They should be parallel or the tips should be slightly forward to provide the best ground tracking. E-flite Divo 3D Profile Assembly Manual... - Page 29 6. Glue one of the wheel retainers in each of the wheel fuselage and the nylon doublers. Also glue the landing pants using foam-safe CA. gear to the bottom wing. 5. Slide a wheel retainer onto each landing gear axle. E-flite Divo 3D Profile Assembly Manual...
-
Page 30: Control Throws
High Rate: 2 -inch (60mm) with 50% Expo (Up/Down) Rudder -inch (75mm) (Left/Right) These are general guidelines measured from our own flight tests. You can experiment with higher rates to match your preferred style of flying. E-flite Divo 3D Profile Assembly Manual... -
Page 31: Center Of Gravity
3. Be sure that your transmitter batteries are fully charged, per the instructions included with your radio. After the first flights, the CG position can be adjusted for your personal preference. E-flite Divo 3D Profile Assembly Manual... -
Page 32: Preflight
Check all the control horns, servo horns, and clevises to make sure they are secure and in good condition. Replace any items that would be considered questionable. Failure of any of these components in flight would mean the loss of your aircraft. E-flite Divo 3D Profile Assembly Manual... -
Page 33: 2007 Official Ama National Model Aircraft Safety Code
Only personnel involved with flying the aircraft are allowed at or in front of the flight line. Intentional flying behind the flight line is prohibited. E-flite Divo 3D Profile Assembly Manual... -
Page 34: Building And Flying Notes
Building and Flying Notes: E-flite Divo 3D Profile Assembly Manual... - Page 35 Building and Flying Notes: E-flite Divo 3D Profile Assembly Manual...
- Page 36 © 2007 Horizon Hobby, Inc. 4105 Fieldstone Road Champaign, Illinois 61822 (877) 504-0233 horizonhobby.com E-fliteRC.com 10869...
Need help?
Do you have a question about the E-flite Divo 3D Profile and is the answer not in the manual?
Questions and answers