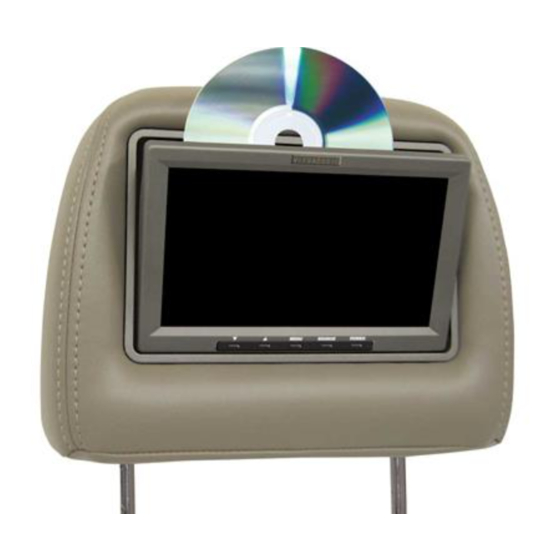
Summary of Contents for Vizualogic A-1000
- Page 1 HEADREST VIDEO MONITOR SYSTEM with BUILT-IN DVD Owner’s Manual 1493 Bentley Drive • Corona, CA 92879 • 951-272-1996 • 800-624-7960 • Fax 951-272-1584 www.vizualogic.com 99-9110-000...
-
Page 2: Welcome
Welcome Congratulations on your purchase of a Vizualogic A-1000 System that will provide your family with many years of enjoyment. This sophisticated product provides video entertainment to rear seat passengers without altering the appearance of your vehicle’s original interior. Reviewing this owner’s manual thoroughly prior to operation will provide you with the best performance and help explain the simple requirements for proper care. -
Page 3: Table Of Contents
Limited Warranty Terms of Warranty TMI Products, Inc (Company) warrants to the original retail purchaser that the automotive video product(s) purchased from a Company authorized installer, within the first ninety (90) days after new vehicle delivery, are free from defects in materials or workmanship under normal use and conditions for a period of three (3) years from date of purchase or the first 36,000 miles as registered on the vehicle’s odometer at time of installation, whichever occurs first, with exception of remote control(s) which is warranted for a... -
Page 4: Troubleshooting
Monitor Control Buttons 1. IR Sensor – Allows the remote to headrest/auxillary input navigate the OSD (On Screen 6. MENU – Enters and navigates the Display) on this unit and to control OSD menus (Main Menu and other functions and accessories. Hidden Menu). -
Page 5: Care And Maintenance
Care and Maintenance Your Vizualogic System is a product of superior design and craftsmanship and should be treated with care. The suggestions below will help to fulfill any warran- ty obligations and provide many years of enjoyment. • Cleaning the Monitor Screen and Housing: The components may be cleaned by occasionally wiping with a soft, lint-free, cotton cloth that has been slightly dampened with water. -
Page 6: Optional Accessories
Frequency Modulator. 8. FREQUENCY SELECT – Press this button to select the desired Frequency Modulator channel. To increase the enjoyment and utility of your Vizualogic System, several accessories are available from your local authorized distributor/retailer: WIRELESS STEREO HEADPHONES •... -
Page 7: Dvd Functions
IR Headphones The Vizualogic A-1000 System features integrated Infrared (IR) transmitters on the front of each monitor. The driver’s side monitor transmits on channel ‘A’ and the passenger side transmits on channel ‘B’. To listen to the source displayed on monitor, turn on the headphones and select the corresponding audio channel for the monitor being viewed. -
Page 8: Fm Modulator Playback
REPEAT One – repeats the song that is playing. REPEAT Folder – repeats the folder that is playing. The Vizualogic A-1000 System features multiple ways to enjoy the audio portion of a desired source. The audio can be experienced through the use of Infrared Headphones or with the integrated wireless FM Modulator To listen to the audio portion of the viewed source though the vehicle’s stereo... -
Page 9: Playing Mp3 Cds
Playing Audio CDs Using the REPEAT Feature The default mode for the REPEAT feature is OFF. Pressing REPEAT button multi- ple times changes the REPEAT options as follows: Track - repeats the current track that is playing. All - repeats the entire disc that is currently playing. Playing MP3 CDs MP3 is a format for storing digital audio. -
Page 10: Dvd Basics
OSD Function Control OSD MAIN MENU – Press MENU key to enter OSD main menu, then select Item in the menu by continuously hitting MENU key. Use the up and down buttons to change the value. CONTRAST – Adjust CONTRAST value from 0 -32 (default:16) BRIGHTNESS –...


Need help?
Do you have a question about the A-1000 and is the answer not in the manual?
Questions and answers