Table of Contents
Advertisement
THANK YOU!
Thank you for your purchase of the HYT TC-700 radio - the choice for professionals. This
easy-to-use radio will deliver you secure, instant and reliable communications at peak
efficiency. Please read this manual carefully before use. The information presented herein
will help you to derive maximum performance from your radio.
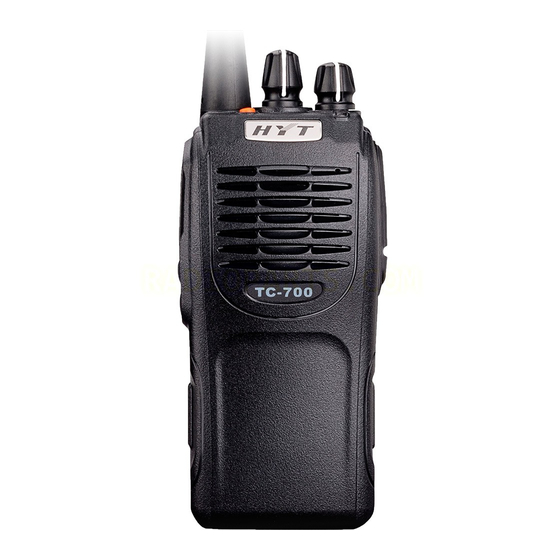
MODELS COVERED IN THIS MANUAL
TC-700 VHF Two-way Radio
TC-700 UHF Two-way Radio
Advertisement
Table of Contents

Related Manuals for HYT TC-700


Summary of Contents for HYT TC-700
- Page 1 THANK YOU! Thank you for your purchase of the HYT TC-700 radio - the choice for professionals. This easy-to-use radio will deliver you secure, instant and reliable communications at peak efficiency. Please read this manual carefully before use. The information presented herein will help you to derive maximum performance from your radio.
-
Page 2: Table Of Contents
Contents Safety and General Information Product Inspection Battery Antenna Accessory Information Attaching the Battery Removing the Battery Attaching the Antenna Removing the Antenna Attaching the Belt Clip Removing the Belt Clip Attaching the Earpiece/Microphone Getting Started Programmable Auxiliary Functions Basic Operations Advanced Operations Call1/Call2 Emergency... - Page 3 Output Power Check/Adjust Power Level Whisper Whisper Backup Battery Power Indicator Rental Timer Indicator Channel Annunciation Temporary Enable Channel Annunciation Auto Contact Auto Contact Temporary Delete TX Low Power Mode Enable TX Low Power Temporary Enable Channel Lock Patrol Event Select Transmit Confirm Background Operations Time-out Timer (TOT)
-
Page 4: Safety And General Information
◇ This equipment should be serviced by qualified technicians only. ◇ Do not modify the radio for any reason. ◇ Only accessories approved by HYT may be used. ◇ Use only the supplied or an approved antenna. ◇ Don not use any portable radio that has a damaged antenna. If a damaged antenna comes into contact with your skin, a minor burn can result. -
Page 5: Product Inspection
Before unpacking the TC-700 portable radio, please inspect the packaging for signs of damage and report any damage to your dealer. Upon unpacking of the TC-700 portable radio, please ensure that all items shipped were received, report any missing or damaged items to your dealer. -
Page 6: Battery
Initial Use The HYT approved battery is shipped not fully charged at the factory. Prior to using a new battery, please charge it for 12 hours, which applies for Ni-Cd, Ni-MH and Li-Ion battery charged with slow or rapid rate charger. - Page 7 Exercise care in handling any charged battery, particularly when placing it inside a pocket, purse, or other container with metal objects. To Prolong Battery Life ℃ Battery performance will be greatly decreased at a temperature -20 below . Please use back-up battery in cold weather. The cold battery unable to work in this situation may work under room temperature, so keep it for later use.
- Page 8 Please follow these steps: 1. Plug the power cable into the adapter. 2. Plug the DC connector of the adapter into the DC socket on the back of the charger. 3. Place the radio with the battery attached, or the battery alone, in the charger. 4.
-
Page 9: Antenna
Remove the battery from the charger, and: make sure that it is a HYT authorized battery. Other batteries may not charge. Remove power from the battery charger and, using a clean dry cloth, clean the gold metal, charging contacts of the battery and charger. -
Page 10: Accessory Information
Accessory Information Attaching the Battery Align the battery with the guide rails on the radio unit, slide the battery upwards until you hear a “click” and the battery latch on the bottom of radio locks the battery. (Shown as Figure 1) Figure 1 Removing the Battery With the radio off, slide the battery latch away from the battery, slide down the battery for 1... -
Page 11: Attaching The Belt Clip
Attach Remove Figure 3 5. Attaching the Belt Clip Remove the screws that locking the belt clip to the radio unit, match the screw hole on the metal holder with that on the aluminum chassis, then secure it using the screws. (Shown as Figure 4) Figure 4 6. -
Page 12: Attaching The Earpiece/Microphone
7. Attaching the Earpiece/Microphone Open (not remove) the accessory cover, plug the audio accessory firmly into the accessory jack, then secure the screw using your hand or a coin. Please loosen the screw prior to removing the audio accessory. (Shown as Figure 6) Note: Using the radio with audio accessory may affect the waterproof performance of the radio. -
Page 13: Getting Started
Getting Started PTT (Push-to-Talk) Key Press and hold down the PTT key to transmit, release it to receive. SK1 (Side Key 1) (programmable) SK2 (Side Key 2) (programmable) Antenna Microphone Speaker TK (Top Key) (programmable) Channel Selector Knob Rotate the knob to select from channel 1 to 16. Radio On-Off/Volume Control Knob Rotate the knob clockwise to turn the radio on, rotate the knob fully counter-clockwise until a “click”... - Page 14 Table below explains the functions of the LEDs and beeps. Wired Source radio: Turn the source radio on while orange flashes Clone holding down the PTT and SK2. twice. Slave radio: Rotate the On-Off/Volume Control knob clockwise to turn the slave radio on.
- Page 15 Power On The green LED flashes once. Low Battery Alert LED flashes red, and radio sounds three beeps every 30 seconds. Transmitting LED glows red Receiving LED glows green when carrier presents. Scanning Green flashes once every 1 second. Programming Reading: LED glows red;...
-
Page 16: Programmable Auxiliary Functions
Programmable Auxiliary Functions Your dealer may program the TK, SK1, SK2 (long or short press) keys with one of the following auxiliary functions respectively. None Call1/Call2 Emergency Emergency Cancel Lone Worker Lone Worker Backup Man Down (optional) Man Down Backup (optional) Monitor Monitor Momentary Nuisance Channel Temporary Delete... -
Page 17: Basic Operations
External Scrambler (optional) External Scrambler Backup (optional) Auto Contact Auto Contact Temporary Delete TX Low Power Mode Enable TX Low Power Temporary Enable Channel Lock Patrol Event Select Transmit Confirm Basic Operations Rotate the On-Off/Volume Control knob clockwise to turn the radio on, green LED flashes once. -
Page 18: Advanced Operations
Advanced Operations The following functions are programmable by your dealer. Call1/Call2 Press the programmed Call1/Call2 key to transmit the stored DTMF code, 2-Tone, HDC1200 or HDC2400 signalling. Emergency Press the programmed Emergency key to emit emergency alarm, or send ENI (Emergency Number Identity) / background tone to a pre-defined person or the dispatcher (selectable via programming software). -
Page 19: Man Down Backup (Optional)
The Man Down status will not be memorized once radio power off. Man Down Backup (optional) Press the programmed function key to activate the Man Down mode, horizontally or inversely position the radio will activate an alert tone, a defined emergency procedure is activated if the radio is horizontally or inversely positioned for a certain length of time. -
Page 20: Scan Backup
programmed Nuisance Channel Temporary Delete key to temporarily delete the channel from the scan list. The priority channel can be deleted temporarily only. If there’s only one or two channels in the scan list, one of them cannot be deleted. Once radio exits from the scan mode, or power off and on, the temporarily deleted channel will turn back to the scan list. -
Page 21: Talk Around
conversation. The Scrambler status will not be memorized once radio power off and on. Scrambler Backup Press the programmed function key to activate the Scrambler Backup feature. When activated, any other party listening on your channel is prevented from eavesdropping your conversation. - Page 22 Battery Power Indicator Upon press the programmed Battery Power Indicator key, the radio sounds “1”, “2”, “3”, or “4” to indicate the current battery level. Audible Indicator Battery Level “1” Very Low “2” “3” Satisfactory “4” High Rental Timer Indicator Upon press the programmed Rental Time Indicator key, the radio sounds “1”, “2”, “3”, “4”, or “5”...
- Page 23 be heard. If one beep is heard, the Channel Annunciation will be enabled. Upon re-turn on radio, the current channel number will be heard. Please select the volume level as "1", when using an earpiece. Auto Contact When a group of radios are set with Auto Contact, the radio will automatically emit alert tone if the user is out of communication range.
- Page 24 Background Operations Time-out Timer (TOT) The feature allows for more efficient use of channels by limiting the maximum time of each transmission. Once a continuous transmission exceeds the preset time (programmable by your dealer), the transmission is automatically terminated and alert tone is heard. Release the PTT to cancel the alert tone.
- Page 25 make some operation (pressing any key). Should the user not respond to a safety check signal then a defined emergency procedure is activated. CTCSS/CDCSS If CTCSS/CDCSS is set on the current channel, causes a CTCSS/CDCSS match to be required on an incoming signal for radio to unmute. Radios that set with the same CTCSS/CDCSS, or no CTCSS/CDCSS, can receive from you.
- Page 26 condition is matched. BOT ID and EOT ID (PTT ID) Your dealer may configure whether to transmit Connect ID (BOT ID) or Disconnect ID (EOT ID), when connecting or disconnecting a repeater or telephone system. If the BOT ID is selected, press the PTT to transmit BOT ID. If the EOT ID is selected, release the PTT to transmit EOT ID.
- Page 27 Troubleshooting Symptom Solution The battery is run out. Please recharge the battery or replace it with a fresh one. Cannot power on the radio. The battery is not properly installed. Please remove and reinstall the battery. The operation time will not increase The battery life cycle is over, please replace with even though the battery is properly a new one.
- Page 28 Optional Accessories Antenna Multi-unit Rapid-rate Charger Remote Speaker Microphone Receive-only Earpiece (for (for Li-Ion Batteries) MCL07 SM08M3 use with Remote Speaker Microphone) ESS01 Receive-only Earpiece with Earbud ESM03 Earset with Boom Earset with in-line Transparent Acoustic Tube Microphone EHM05 Microphone EHM06 (for with Remote...
- Page 29 (MHz) /CDCSS /CDCSS HYT endeavors to achieve the accuracy and completeness of this manual, but no warranty of accuracy or reliability is given. All the above specifications and design are subject to change without notice due to continuous development. No part of this manual may be copied, reproduced, translated, stored in a retrieval system, distributed, or transmitted in any form or by any means, electronic or mechanical, for any purpose without the express written permission of HYT.
- Page 30 This device complies with Part 15 of the FCC rules. Operation is subject to the following two conditions: (1) This device may not cause harmful interference, and (2) this device must except any interference received, including interference that may cause undesired operation.
- Page 31 This radio has been tested and complies with the FCC RF expo- sure limits for “Occupational Use Only.” In addition, your HYT radio complies with the following Standards and Guidelines with regard to RF energy and electromagnetic energy levels and evaluation of such levels for exposure to humans: •...
- Page 32 FCC RF exposure limits of this radio. Electromagnetic Interference/Compatibility During transmissions, your HYT radio generates RF energy that can possibly cause interference with other devices or systems. To avoid such interference, turn off the radio in areas where signs are posted to do so.
- Page 33 FOREWORD Thank you for purchasing the TC-700 transceiver. READ ALL INSTRUCTIONS carefully and completely before using the transceiver. This instruction manual SAVE THIS INSTRUCTION MANUAL– contains important operating instructions for the transceiver. INSTALLATION NOTES Body-worn operations are restricted to belt-clips, holsters or similar •...
- Page 34 DO NOT modify the transceiver for any reason. KEEP the transceiver from the heavy rain, and Never immerse it in the water. The transceiver construction is water resistant, not wa- terproof. The use of non-HYT battery packs/chargers may impair transceiver performance and invalidate the warranty.
Need help?
Do you have a question about the TC-700 and is the answer not in the manual?
Questions and answers