Table of Contents
Advertisement
Quick Links
Advertisement
Table of Contents

Related Manuals for HYT TC-700P


Summary of Contents for HYT TC-700P
- Page 1 8 1 1 0 0 7 0 0 0 1 7 0 0...
- Page 2 Thank you for purchasing Hytera TC-700P portable radio. This easy-to-use radio will deliver you secure, instant and reliable communication service at peak efficiency. To derive optimum performance from your radio, please read this manual and the supplied Safety Information Booklet...
-
Page 3: Copyright Information
Note: indicates tips that can help you make Copyright Information better use of your radio. Hytera and HYT are trademarks or registered trademarks Term Explanation of Hytera in the PRC and other countries and/or areas. Hy tera retains the ownership of its trademarks and The following terms will appear through this manual: product names. - Page 4 Disclaimer RF Energy Exposure Compliance H y t e r a e n d e a v o r s t o a c h i e v e t h e a c c u r a c y a n d Your radio is designed and tested to comply with a c o m p l ete n e s s of t hi s m a nu a l, b u t n o wa r r a nt y of number of national and international standards and...
- Page 5 ● O perational Instructions and Training Guidelines Reorient or relocate the receiving antenna. ● To ensure optimal performance and compliance with the Increase the separation between the equipment and occupational/controlled environment RF energy exposure receiver. ● limits in the above standards and guidelines, users should C o n n e c t t h e e q u i p m e n t i n t o a n o u t l e t o n a transmit no more than 50% of the time and always adhere circuit different from that to which the receiver is...
-
Page 6: Table Of Contents
Contents Checking Items in the Package ------------------------------- 3 Adjust Squelch Level -------------------------------------- 16 Radio Overview --------------------------------------------------- 4 Scrambler ----------------------------------------------------- 16 Radio Controls ---------------------------------------------- 4 Compandor --------------------------------------------------- 16 Programmable Keys --------------------------------------- 5 Call Forward-------------------------------------------------- 16 Before Use---------------------------------------------------------- 7 Whisper-------------------------------------------------------- 16 Charging the Battery --------------------------------------- 7 Lone Worker ------------------------------------------------- 17 Assembly and Disassembly ------------------------------ 8 Man Down (optional) --------------------------------------- 17... - Page 7 Contents 5-Tone Signaling -------------------------------------------- 22 Troubleshooting --------------------------------------------------- 23 Care and Cleaning ----------------------------------------------- 25 Optional Accessories -------------------------------------------- 26...
-
Page 8: Checking Items In The Package
Checking Items in the Package Please unpack carefully and check that all items listed below are received. If any item is missing or damaged, please contact your dealer. Radio Unit Battery MCU Charger Switching Power Belt Clip Strap Antenna Owner’s Manual & Safety Information Booklet Note: 1.The above pictures are for reference only. -
Page 9: Radio Overview
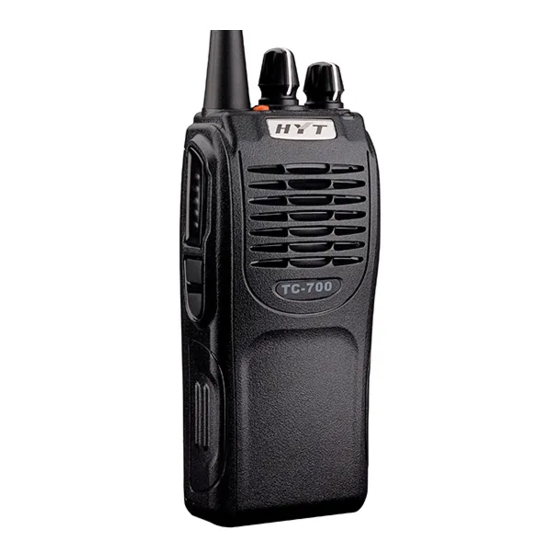
Radio Overview Radio Controls (1) PTT Key (2) SK1 (Side Key 1) (3) SK2 (Side Key 2) (4) Antenna (5) Speaker (6) Microphone (7) TK (Top Key) (8) Channel Selector Knob (9) Radio On-Off/Volume Control Knob (10) LED Indicator (11) Battery Latch (12) Belt Clip (13) Accessory Jack (14) Battery... -
Page 10: Programmable Keys
Radio Overview Programmable Keys For enhanced convenience, you may request your dealer to program the keys SK1, SK2, and TK as shortcuts to the functions listed below: Shortcut Keys Description Adjust Power Level To adjust power level through one key press. Monitor To adjust the condition for incoming signal match. - Page 11 Radio Overview Shortcut Keys Description Whisper To make your voice heard clearly even if you speak with a very low voice. Lone Worker To activate Emergency in case of unexpected circumstances. Man Down To activate Emergency in case of unexpected circumstances. Auto Contact To detect whether a member in the contact list is out of the communication range.
-
Page 12: Before Use
Before Use Charging the Battery Procedures Connect the power adapter to AC source. See① . Use only the charger and battery specified by Hytera. Charger Plug the power adapter into the rear socket of the LED can indicate the charging process. charger. -
Page 13: Assembly And Disassembly
Before Use Assembly and Disassembly Attaching the Battery Make sure the battery is in parallel and good contact Attaching the Antenna with the aluminum chassis. The battery bottom is Turn the antenna clockwise to fasten it. about 1 to 2 centimeters below the bottom of the radio’s body. - Page 14 Before Use Attaching the Belt Clip Attaching Audio Accessory/Programming Cable Remove the screws. Remove the screw on the accessory jack cover by Align the screw holes on the belt clip with those on rotating it counter-clockwise, and then remove the the radio’s body, and then tighten the screws.
-
Page 15: Status Indications
Status Indications The top LED indicator will help you easily identify the current status of your radio. Radio Status LED Indicator Transmitting The LED glows red. Receiving The LED glows green. Call Transmission Alert The LED glows orange. Call Alert (5-Tone) The LED flashes orange slowly. -
Page 16: Basic Operations
Basic Operations Turning the Radio On/Off Note: 1. To ensure optimal volume of the receiving radio, R ot a te t h e R a d i o O n - O f f / Vo l u m e C o n t r o l k n o b hold the radio approximately 2.5 to 5 centimeters clockwise/counter-clockwise until a click is heard to turn away from your mouth. -
Page 17: Functions And Operations
Functions and Operations Adjust Power Level once). To disable the feature, release this key (the alert tone sounds twice). Generally, we recommend you to adopt low power for Squelch Off power saving. However, if you cannot communicate with other radios located at a distant place with low power, If the feature “Squelch Off ”... -
Page 18: Scan
Functions and Operations After a call is established between you and another party, at the same frequency. In this system, the radios are press the programmed Cancel Call key within the auto configured to transmit at the same frequency, but to reset time (the LED glows orange), and your radio will exit receive at different frequencies. -
Page 19: Emergency
Functions and Operations ● Emergency When activities are detected on a channel, the radio will stay on the channel to receive current activities In case of an emergency, you can use this feature to ask and the LED glows green. for help from your companion or the control center. -
Page 20: Vox
Functions and Operations Emergency Mode Once the radio enters Emergency mode, it will switch This feature allows you to transmit your voice with no need to the preset Emergency Revert Channel. A complete to press the PTT. However, you must employ a dedicated process includes the following stages: transmit ID, earpiece to realize this function. -
Page 21: Adjust Squelch Level
Functions and Operations Operation: Operation: Press the programmed Talk Around key to enable the Press the programmed Scrambler key to enable the feature (the aler t tone sounds once). To disable the feature (the aler t tone sounds once). To disable the feature, press this key again (the alert tone sounds twice). -
Page 22: Lone Worker
Functions and Operations Operation: Operation: Press the programmed Whisper key to enable the feature Press the programmed Man Down key to enable the (the alert tone sounds once). To disable the feature, press feature (the alert tone sounds once). this key again (the alert tone sounds twice). Your radio will sound a pre-alert tone if it is positioned Lone Worker aslant for a preset time period, and will enter the... -
Page 23: Call 1-Call 5
Functions and Operations If a radio is out of the communication range, you can broadcasts number 1, it means that the battery level runs press the programmed Auto Contact Temporary low. In this case, please replace or charge the battery. Rental Time Indicator D e l e t e key t o r e m ove i t f r o m t h e c o n t a c t l i s t temporarily. -
Page 24: Channel Announce Temporary Enable
Press this key again to disable the feature (the alert optional board is attached. tone sounds twice). TC-700P supports Real-time Patrol function only, not Off- line Patrol function. Therefore, the patrol radio will not save Note: If you use an ear pie ce on your radio, we the patrol information received from the patrol transmitter r e c o m m e n d y o u t o s e t t h e “Vo i c e A n n o u n c e... -
Page 25: Vibrate (Optional)
Safety Check Note: This function is optional. Please contact Hytera TC-700P will sound the alert tone after it receives the or your dealer if you need this function. safety check signal from the control center or another Vibrate (optional) radio. -
Page 26: Signaling Introduction
Signaling Introduction The following types of signaling are available for TC-700P. Encoding: For detailed information, please contact your dealer. P r e s s t h e P T T k e y d u r i n g n o r m a l v o i c e Phone communication to send PTT ID. -
Page 27: 5-Tone Signaling
Signaling Introduction ● Killed: The speaker mutes, and any operation such Revive/Secret Enquiry/Cancel Call/Authorize: Your as key press is not allowed. dealer c an program whether the radio sounds ● Stunned: The radio can receive signal only. side tone during encoding or sounds beeps after ●... -
Page 28: Troubleshooting
Troubleshooting Phenomena Analysis Solution T h e r a d i o c a n n o t b e T h e b a t t e r y m a y b e i m p r o p e r l y Remove the battery and attach it again. - Page 29 Troubleshooting Phenomena Analysis Solution Irrelevant communication The radio may be set with no signaling. S e t s i g n a l i n g f o r a l l m e m b e r r a d i o s t o a v o i d activities or noises are interference at the same frequency.
-
Page 30: Care And Cleaning
Care and Cleaning To guarantee optimal performance as well as a long service life of your radio, please follow the tips below. Radio Care ● Keep the radio far away from substances that can corrode the circuit. ● Do not hold the radio by its antenna or earpiece cable directly. -
Page 31: Optional Accessories
Optional Accessories The following items are the main optional accessories for the radio, and please consult your local dealer for more other accessories. Earbud with on-MIC Earbud with In-Line D-earset with Boom D-earset with In-Line PTT ESN06 PTT ESN05 Microphone EHN08 Microphone EHN07 Earpiece with on-MIC PTT &... - Page 32 Optional Accessories Bone-conduction Remote Speaker Microphone Remote Speaker Earbud (for use with Earpiece EBN01 (IP56) SM13N5 Microphone SM08N1 remote speaker microphone) ESS07 Earpiece with Transparent Li-Ion Battery (2100mAh) MCU Multi-unit Rapid Six-Unit Switching Acoustic Tube (for use with BL2102 Rate Charger (for Li-Ion/ Power PS7002 remote speaker microphone) Ni-MH battery (1800mAh)
Need help?
Do you have a question about the TC-700P and is the answer not in the manual?
Questions and answers