Table of Contents
Advertisement
Advertisement
Table of Contents

Subscribe to Our Youtube Channel
Related Manuals for Xylem YSI ProQuatro Professional Series


Summary of Contents for Xylem YSI ProQuatro Professional Series
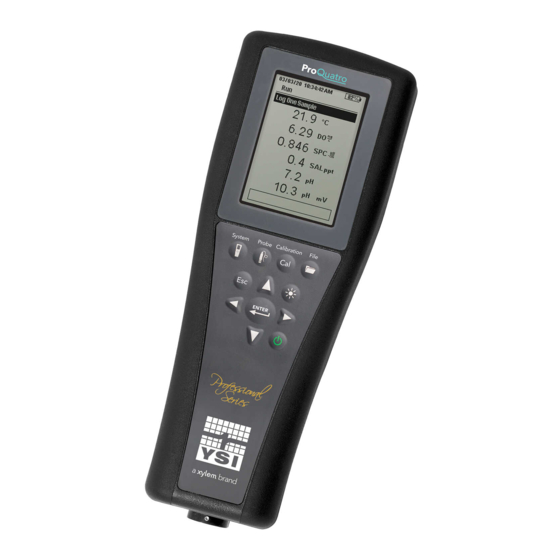
- Page 1 ProQuatro User Manual PROFESSIONAL SERIES HANDHELD METER USER MANUAL 606962-01...
- Page 2 The information contained in this manual is subject to change without notice. Effort has been made to make the information in this manual complete, accurate, and current. The manufacturer shall not be held responsible for errors or omissions in this manual. Consult YSI.com for the most up-to-date version of this manual.
-
Page 3: Table Of Contents
TABLE OF CONTENTS 3. Care, Maintenance, and Storage 1. Getting Started General Maintenance Battery Use and Battery Life Sensor Maintenance Sensor Installation and Cable Connection Dissolved Oxygen Sensor Maintenance Connecting the Cable to the ProQuatro Conductivity Sensor Maintenance Temperature Sensor Maintenance 2. -
Page 4: Getting Started
1. Getting Started Battery Installation The ProQuatro requires (2) alkaline C-cell batteries which are included with the purchase of a new instrument. Battery life depends on parameters and usage. Under normal conditions, battery life is approximately 80 hours for continuous use at room temperature. - Page 5 Field Cables and Sensors Most field cables have at least one sensor port in which a sensor must be installed. Ports on these cables are sensor-specific, so it is important to ensure the correct sensor is installed in each port. Available field cables are listed in the table below: YSI Item # Description 605790-1, 4, 10, 20, or 30...
- Page 6 Dual sensor bulkhead ports are numbered 1 and 2, see figure 2 below. Please refer to the following tables to determine correct sensor installation. Figure 2 Port numbers on a 2-port cable Cable Port 1 Options* Port 2 Options Ammonium Ammonium 1010 dual port cable Chloride...
- Page 7 Cable Port 1 Options* Port 2 Options DO Port Options C/T Port Options Polarographic DO 5556 Conductivity/ Temperature sensor only Galvanic DO (included with new Quatro Ammonium Ammonium None (use a port plug) Quatro cable cables) (605790) Chloride Chloride Nitrate Nitrate None (use a port plug) *If using a Quatro cable, a sensor must be installed in port 1 for correct operation of port 2.
- Page 8 Sensor Installation - Conductivity/Temp Sensor in a Quatro Cable As mentioned, the installation of the Conductivity/Temperature (C/T) sensor (model 5560) in a Quatro cable is different from all other Pro Series sensor installations. Follow these instructions when installing a conductivity/temperature sensor in a Quatro cable: Locate the C/T port and, if replacing, remove the old sensor using the installation tool to loosen the stainless steel retaining nut.
-
Page 9: Connecting The Cable To The Proquatro
Laboratory Cables and Sensors There are several cable assemblies with built-in sensors that are ideal for use in a laboratory environment. These assemblies include: YSI Item # Description 605780 DO/Temp 115V stirring BOD probe with 1-meter cable assembly 605107 pH/Temp single junction combination electrode with 1-meter cable 605177 pH/Temp single junction combination electrode with 4-meter cable 605108... -
Page 10: Operation
2. Operation Keypad Layout 10 11 Figure 7 ProQuatro Keypad System: Opens System Menu from any screen. Use to adjust system settings. Probe: Opens Sensor Menu from any screen. Use to enable sensors and display units. Calibrate: Opens Calibrate Menu from any screen. Use to calibrate all parameters except temperature. File: Opens File Menu from any screen. -
Page 11: Powering On And Main Display
Powering On and Main Display Press the Power key to turn the instrument on. The instrument will beep once, briefly display the splash screen with the YSI logo, then go directly to the main run screen. 03/03/20 10:34:42 AM 100% Log One Sample 21.9 °C... -
Page 12: Menu Layout
Menu Layout Press the Esc key to escape back to the Run screen. The left arrow can be used to go back to the previous menu in all screens except alpha/numeric entry screens. Functions that are enabled appear as a circle with a dot or a box with a check mark. Disabled functions appear as an empty circle or empty box. - Page 13 03/03/20 10:34:42 AM 100% System Menu g Language Language English Highlight Language from the System menu. Press enter to select the desired Español language. Optional languages: Deutsch Italiano • Chinese (Simplified) • German • Norwegian • Chinese (Traditional) • Italian •...
- Page 14 System Menu g Auto-Shutoff Auto Shutoff powers the instrument off after a user specified time period. Highlight Auto Shutoff and press enter. Using the alpha/ numeric entry screen, enter a value between 0 and 360 minutes. To disable auto shutoff, set the value to 0 (zero). System Menu g Firmware Version Firmware Version shows the instrument’s firmware version.
-
Page 15: Sensor Menu
Sensor Menu Press the Probe key to access the following options. • Setup 03/03/20 10:34:42 AM 100% • Display Sensors • Auto Stable Setup • Salinity Display Auto Stable [On] Salinity: As Measured Figure 18 Probe Sensor Menu 03/03/20 10:34:42 AM 100% Sensor Menu g Sensor Setup Sensor Setup... - Page 16 Dissolved Oxygen (DO) Sensor Setup (continued) There are two compatible sensors for use with a field cable: • Polarographic – This sensor has a black sensor body and is engraved with the model number 2003. • Galvanic – This sensor has a grey sensor body and is engraved with the model number 2002. In terms of physical configuration, membrane material, and general performance, YSI Professional Series Galvanic dissolved oxygen sensors are exactly like the Professional Series Polarographic sensors.
- Page 17 Conductivity Sensor Setup (continued) %/°C (Percent per Degree Celsius) is the temperature coefficient used to calculate temperature compensated Specific Conductance. The default is 1.91% which is based on KCl standards. To change the temperature coefficient, highlight %/°C and press enter. Use the numeric entry screen to enter a new value between 0 and 4%.
- Page 18 Sensor Setup g Display The Sensor Display menu determines the parameters and units that are shown on the main display. If more measurements are selected than can be displayed on one screen, a scroll bar will be shown. Use the up and down keys to scroll through the measurements.
- Page 19 Conductivity Display (continued) Salinity can be displayed in ppt (parts per thousand) or PSU (practical salinity units). The units are equivalent, as both use the Practical Salinity Scale for calculation. TDS can be displayed in mg/L (milligrams per liter), g/L (grams per liter), or kg/L (kilograms per liter). Resistivity can be displayed in ohm-cm (ohms per centimeter), kohm-cm (kilo ohms per centimeter), or Mohm-cm (mega ohms per centimeter).
- Page 20 Auto Stable (continued) 03/03/20 10:34:42 AM 100% Within the Auto Stable menu, you can also choose to Hold All Readings. After all Auto Stable DO sensors have reached their stability criteria, all measurements on the display will Enabled be held or ‘locked’ on the display. If Hold All Readings is not enabled, the sensor Audio Enabled measurements will continue to change on the display in real time.
-
Page 21: Calibration Menu And Procedures
Calibration Menu and Procedures Press the Cal key to access the following options. Under the Calibrate Menu, each 03/03/20 10:34:42 AM 100% sensor can be calibrated, default calibration restored, and a recalibration prompt Calibrate can be configured. Conductivity ISE1 [pH] ISE2 [ORP] Barometer Restore Default Cal... -
Page 22: Conductivity Calibration
Conductivity Calibration A 16 oz nalgene bottle is included with all 6051030 ISE/conductivity cables. This bottle can be used to calibrate the conductivity sensor with an ISE sensor installed. A ring-stand should be used to support this container during calibration. YSI recommends calibrating conductivity first, as the salinity reading from the conductivity sensor is a variable used to determine the dissolved oxygen mg/L measurement. -
Page 23: Dissolved Oxygen Calibration
Dissolved Oxygen Calibration 03/03/20 10:34:42 AM 100% The instrument offers three options for calibrating dissolved oxygen: DO% in Calibrate DO water-saturated air, DO mg/L (ppm) in a solution of known dissolved oxygen DO % determined by a Winkler Titration, and a Zero point. If performing a zero point DO mg/L (ppm) calibration, you must also perform a DO% or DO mg/L (ppm) calibration following Zero... - Page 24 03/03/20 10:34:42 AM 100% DO mg/L (ppm) Calibration Calibrate DO mg/L Calibration Value [7.80] Place the DO sensor into a water sample that has been titrated by the Winkler Accept Calibration method to determine the dissolved oxygen concentration in mg/L. Salinity [0.00] Press ESC to Abort From the Calibrate Menu, highlight DO and press enter.
-
Page 25: Ph Calibration
pH Calibration Observe the pH mV readings during calibration to understand the condition and response of the pH sensor. In buffer 7, pH mV values should be between -50 and +50. In pH 4 buffer, the mV reading should be 165 to 185 mV higher than the reading in pH 7 buffer. -
Page 26: Orp Calibration
03/03/20 10:34:42 AM 100% Second Calibration Point Calibrate ISE1 (pH) Calibration Value [7.00] Immerse the probe into the second buffer solution. The Calibration value will Accept Calibration automatically be adjusted based on the selected buffer and temperature if the Finish Calibration selected buffer set is USA or NIST. -
Page 27: Ammonium, Nitrate, And Chloride Calibration
Ammonium, Nitrate, and Chloride Calibration Exposure to the high ionic content of pH buffers and some conductivity standards can cause a significant, but temporary, drift in the ammonium, nitrate, and chloride ISE sensors. Therefore, when calibrating the pH sensor, YSI recommends that you use one of the following methods to minimize errors in the subsequent readings: •... -
Page 28: Barometer Calibration
Chilled Third Calibration Point The chilled 3-point calibration is recommended if there is a large temperature variation during sampling or when the temperature of the media cannot be anticipated. The highest concentration solution and one of the lower concentration solutions should be at ambient temperature. -
Page 29: Restore Default Calibration Values
Restore Default Calibration Values Occasionally, the instrument may need to have the factory calibration default values restored. From the Calibrate Menu, highlight Restore Default Cal and press enter. Highlight the channel you wish to restore to default and press enter. Next you will be asked to confirm the operation. Highlight Yes and press enter to confirm. The handheld will beep after the default calibration is restored. -
Page 30: Files Menu
Files Menu Press the File key to access the Files Menu. Use the Files menu to view and delete data. Data can be filtered by a specific date and time range and by user-created Data IDs Data Memory 03/03/20 10:34:42 AM 100% Files The Data Memory shows a percentage indicating the amount of memory... -
Page 31: View Calibration Records
View Calibration Records From the Files Menu, highlight View Calibration Records and press enter. Select the channel from which you’d like to view the 10 most recent calibration records. Options include: DO, Conductivity, ISE1, ISE2, and Barometer. Use the arrow keys to scroll through the records. -
Page 32: View Data Id List
ORP Sensor Calibration Record Content • Date and Time 03/03/20 10:34:42 AM 100% View Cal. Records • Cal Solution Value Conductivity [10 of 10] • Sensor Value Date: 03/03/20 • Temperature Time: 07:18:35AM] Method: Salinity • Calibrate Status Cal Value: 45.38 SAL ppt Sensor V.: 45.38 SAL ppt... -
Page 33: Delete Data
03/03/20 10:34:42 AM 100% Delete Data Delete Data Filter Data ID [Caesar’s Creek] From the Files Menu, highlight Delete Data and press enter. Begin Date [3/02/20] Begin Time [00:00:00AM] Enter the desired filter criteria, then select Delete Selected Data to permanently End Date [3/03/20] delete the data. -
Page 34: Taking Measurements
Taking Measurements For the highest accuracy, calibrate the sensor(s) before taking measurements. Some recommendations when preparing to record data are Under Probe g Setup, configure the DO, Conductivity, and ISE channels for the sensors that will actually be connected to the instrument. -
Page 35: Care, Maintenance, And Storage
3. Care, Maintenance, and Storage This section describes the proper procedures for care, maintenance and storage of the sensors. The goal is to maximize their lifetime and minimize down-time associated with improper sensor usage. General Maintenance O-Rings The instrument utilizes o-rings as seals to prevent water from entering the battery compartment and sensor ports. Following the recommended procedures will help keep your instrument functioning properly. - Page 36 To re-install the o-rings: Place a small amount of o-ring grease between your thumb and index finger. More grease is NOT BETTER! Draw the o-ring through the grease while pressing the fingers together to place a very light covering of grease to the o-ring. Place the o-ring into its groove making sure that it does not twist or roll.
-
Page 37: Sensor Maintenance
Sensor Maintenance Dissolved Oxygen Sensor Maintenance Membrane Cap Installation The DO sensor (Polarographic and Galvanic) is shipped with a dry, protective red cap that will need to be removed before using. Remove the protective cap or used membrane cap and replace it with a new membrane cap following these instructions: Remove the sensor guard to access the sensor tip. - Page 38 Polarographic Sensors (continued) Next, with your free hand, hold the sensor in a vertical position, tip down. Place the sensor tip directly down on the sanding disk and twist it in a circular motion to sand the gold cathode. The goal is to sand off any build-up and to lightly scratch the cathode to provide a larger surface area for the O2 solution under the membrane.
- Page 39 Galvanic Sensors We recommend that the Sodium Chloride (NaCl) solution and the membrane cap be changed at least once every 60 days during regular use. In addition, the NaCl solution and membrane should be changed if (a) bubbles are visible under the membrane; (b) significant deposits of dried electrolyte are visible around the membrane;...
-
Page 40: Conductivity Sensor Maintenance
Conductivity Sensor Maintenance The openings that allow sample access to the conductivity electrodes should be cleaned regularly. The small cleaning brush included in the Maintenance Kit is ideal for this purpose. Dip the brush in clean water and insert it into each hole 10 to 12 times. In the event that deposits have formed on the electrodes, it may be necessary to use a mild detergent (laboratory grade soap or bathroom foaming tile cleaner) with the brush. -
Page 41: Chloride Sensor Maintenance
pH, ORP, and pH/ORP Sensor Maintenance (continued) If biological contamination of the reference junction is suspected or if good response is not restored by the above procedures, perform the following additional cleaning step: Soak the sensor for approximately 1 hour in a 1:1 dilution of commercially-available chlorine bleach. Rinse the sensor in clean water and then soak for at least 1 hour in clean water with occasional stirring to remove residual bleach from the junction. -
Page 42: Sensor Storage
Sensor Storage Short-Term Storage – All Sensors The cable assembly is supplied with a sensor storage container, or sleeve, that attaches to the cable. The container is used for short- term storage (less than 30 days). Be sure to keep a small amount of moisture (tap water) in the container during storage. This is done to maintain a 100% saturated air environment which is ideal for short-term sensor storage. - Page 43 pH Sensor Long-term Storage The key to pH sensor storage, short or long-term, is to make certain that the sensor does not dry out. Sensors which have been allowed to dry out due to improper storage procedures may be irreparably damaged by the dehydration and will require replacement.
-
Page 44: Accessories
4. Accessories Ordering Telephone: 800 897 4151 (USA) +1 937 767 7241 (Globally) Monday through Friday 8:00 AM to 5:00 ET Fax: +1 937 767 9353 (orders) Email: orders@ysi.com Mail: YSI Incorporated 1725 Brannum Lane Yellow Springs, OH 45387 USA Web: Visit YSI.com to order replacement parts, accessories, and calibration stolutions. - Page 45 ProQuatro Handhelds and Kits YSI Item # Description 606950 ProQuatro handheld only 606966 ProQuatro handheld, 605790-4 ISE/ISE/DO/Cond/Temp cable, 605101 pH sensor, 605203 polarographic DO sensor, and 603075 soft-sided carrying case. 606967 ProQuatro handheld, 605790-4 ISE/ISE/DO/Cond/Temp cable, 605101 pH sensor, 605102 ORP sensor, 605203 polarographic DO sensor, and 603075 soft-sided carrying case.
-
Page 46: Sensors For Field Cables
Sensors for Field Cables YSI Item # Description 605202 Galvanic DO Sensor 605203 Polarographic DO Sensor 605101 pH Sensor 605102 ORP Sensor 605103 pH/ORP Sensor (6051030 and 6051020 cables only) 605104 Ammonium ISE, NH4+ 605105 Chloride ISE 605106 Nitrate ISE 605323 1001A Amplified pH Sensor 605216... -
Page 47: Calibration Solutions
Calibration Solutions YSI Item # Description 060907 Conductivity Calibrator, 1,000 umhos/cm (8 ea, pint) 060911 Conductivity Calibrator, 10,000 umhos/cm (8 ea, pint) 060660 Conductivity Calibrator, 50,000 umhos/cm (8 ea, pint) 061320 Zobell Solution, ORP Calibrator 125 mL 061321 Zobell Solution, ORP Calibrator 250 mL 061322 Zobell Solution, ORP Calibrator 500 mL 003821... -
Page 48: Safety And Support
5. Safety and Support Service Information YSI has authorized service centers throughout the United States and Internationally. For the nearest service center information, please visit ysi.com and click ‘Support’ or contact YSI Technical Support directly at 800-897-4151 (+1 937-767-7241). When returning a product for service, include the Product Return form with cleaning certification. The form must be completely filled out for a YSI Service Center to accept the instrument for service. -
Page 49: Declaration Of Conformity
WEEE 2012/19/EU RoHS 2011/65/EU Harmonized EN61326-1:2013 Standards: EN61326-2-3:2013 EN61000-3-2:2014 EN61000-3-3:2013 EN55011:2009 Authorized EU Xylem Analytics UK Ltd Representative Unit 2 Focal Point, Lacerta Court, Works Road Letchworth, Hertfordshire, SG6 1FJ UK Signed: Gregory Popp Date: March 3, 2020 Title: Quality Manager... - Page 50 The undersigned hereby declares on behalf of the named manufacturer under our sole responsibility that the listed product conforms to the requirements for electrical equipment under US FCC Part 15 and ICES-003 for unintentional radiators. Manufacturer: YSI Incorporated 1725 Brannum Lane Yellow Springs, OH 45387 Product Name: ProQuatro Water Quality Instrument...
-
Page 51: Warranty
Warranty The YSI ProQuatro is warranted for three (3) years from date of purchase by the end user against defects in materials and workmanship, exclusive of batteries and any damage caused by defective batteries. ProQuatro field cables are warranted for two (2) years from date of purchase by the end user against defects in material and workmanship (6 months for non-field rugged cables*). -
Page 52: Appendices
6. Appendices Appendix A DO% Calibration Values Calibration Value Pressure D.O. % in Hg mmHg mbar 101% 30.22 767.6 102.34 1023.38 100% 29.92 760.0 101.33 1013.25 29.62 752.4 100.31 1003.12 29.32 744.8 99.30 992.99 29.02 737.2 98.29 982.85 28.72 729.6 97.27 972.72 28.43... - Page 53 Appendix B Oxygen Solubility Table Solubility of oxygen in mg/L in water exposed to water-xaturated air at 760 mm Hg pressure. Salinity = Measure of quantity of dissolved salts in water. Chlorinity = Measure of chloride content, by mass, of water. S(0/00) = 1.80655 x Chlorinity (0/00) Temp °C Chlorinity : 0...
- Page 54 Temp °C Chlorinity : 0 5.0 ppt 10.0 ppt 15.0 ppt 20.0 ppt 25.0 ppt Salinity: 0 9.0 ppt 18.1 ppt 27.1 ppt 36.1 ppt 45.2 ppt 33.0 7.18 6.84 6.52 6.21 5.91 5.63 34.0 7.07 6.73 6.42 6.11 5.82 5.55 35.0 6.95...
- Page 55 Our products and services move, treat, analyze, monitor and return water to the environment, in public utility, industrial, residential and commercial building services settings. Xylem also provides a leading portfolio of smart metering, network technologies and advanced analytics solutions for water, electric and gas utilities. In...
Need help?
Do you have a question about the YSI ProQuatro Professional Series and is the answer not in the manual?
Questions and answers