Advertisement
Quick Links
Installation and Assembly -
This product is intended for use with UL
Listed products and must be installed by a
R
qualified professional installer.
Read instruction sheet before you start installation and assembly.
WARNING
• Installer must verify that the ceiling will safely support
four times the combined weight of all attached equip-
ment and hardware.
Visit the Peerless Web Site at www.peerlessindustries.com
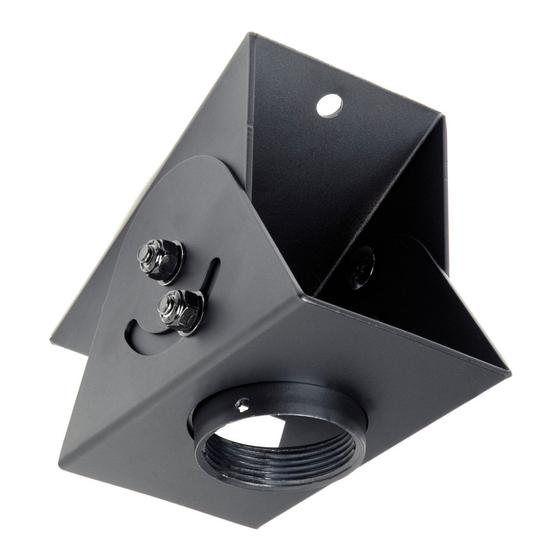
Lightweight Cathedral Ceiling
Plate for Projectors
1 of 5
Maximum Load Capacity:
ISSUED: 03-26-03 SHEET #: 055-9213-2 11-10-04
For customer service call 1-800-729-0307 or 708-865-8870.
Model: ACC 912
75 lb (34 kg)
Advertisement

Subscribe to Our Youtube Channel
Related Manuals for peerless-AV ACC 912


Summary of Contents for peerless-AV ACC 912
- Page 1 Lightweight Cathedral Ceiling Installation and Assembly - Model: ACC 912 Plate for Projectors Maximum Load Capacity: This product is intended for use with UL Listed products and must be installed by a 75 lb (34 kg) qualified professional installer. Read instruction sheet before you start installation and assembly.
-
Page 2: Parts List
Parts List Description Qty. Part # A upper ceiling bracket 055-1484 B lower ceiling bracket 055-1486 C 1/4-20 x 5/8" carriage bolt 520-1175 D 1/4-20 nylock nut 530-9413 E 1/4" ID x 3/4" OD washer 540-9401 F #14 x 2.5" hex head wood screw 5S1-015-C04 G M5 x .8 x 10 mm phillips self-tapping screw 520-9250... - Page 3 Flush Mount Tube Application (EXT 002 required) Note: Skip this step if you are installing an extension column. FLUSH MOUNT TUBE Insert flush mount tube from the (EXT 002) top, and thread flush mount tube into threaded fitting of lower ceiling bracket (B).
-
Page 4: Cutaway View
Installation to Concrete Ceiling Drill two 5/16" (8 mm) dia. holes to a minimum depth of 1-3/4" (45 mm). Attach upper ceiling bracket (A) using concrete expansion anchors (ACC 200) as shown. Tighten to 80 in. • lb (9 N.M.) maximum torque. - Page 5 Attach upper ceiling bracket (A) to lower ceiling bracket (B) by inserting four carriage bolts (C) through holes of ceiling brackets (A & B). Fasten bolts (C) with four washers (E) and nylock nuts (D) as shown. Note: Adjust lower ceiling bracket (B) until it is level before tightening nuts (D). 1-1/2"...
Need help?
Do you have a question about the ACC 912 and is the answer not in the manual?
Questions and answers