Table of Contents
Advertisement
Advertisement
Table of Contents

Related Manuals for Yamaha Nuage


Summary of Contents for Yamaha Nuage
- Page 1 Nuage Setup Guide Version 1.8...
- Page 2 5. Installing software and drivers ....................57 5-1. Installing the eLicenser Control Center ................57 5-2. Installing NUENDO ....................... 59 5-3. Installing Tools for Nuage ..................... 62 5-4. Installing Dante Controller ....................67 5-5. Installing QuickTime 7.7.9 from Apple Software Update (For Windows only) ....71 5-6.
- Page 3 September, 2016 v1.8 released All Yamaha products described in this document are the registered trademarks of Yamaha Corporation. Also, other products described in this document are either the trademarks or the registered trademarks of each manufacturer or party.
- Page 4 Introduction This guide explains how to build a system using the Nuage, the Yamaha Advanced Audio Production System. The Yamaha Nuage is a complex system that brings together the Nuage Fader/Nuage Master, Nuage I/O, Dante Accelerator, and other Nuage hardware; a computer, video monitor, network switch, and other PC-related equipment;...
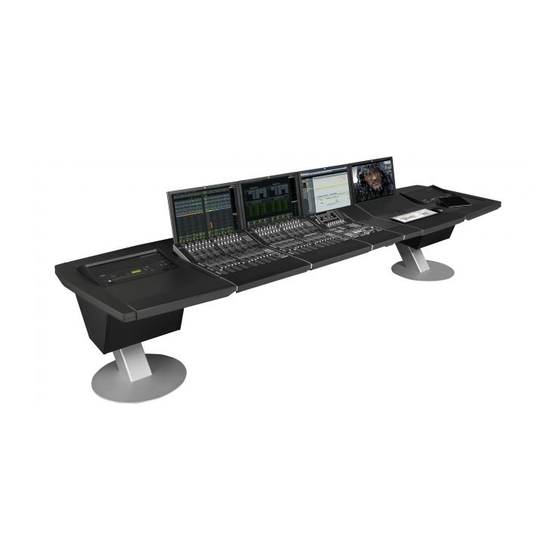
- Page 5 3. Installing primary equipment 3-1. Installing the controller and console desk Be sure to set aside enough space to allow for your particular Nuage setup. The figure below shows the approximate sizes for the controllers. 58.1cm(22.9”) 58.1cm(22.9”) 35.4cm(13.9”) 22.7cm(9.0”) 58.1cm(22.9”) 58.1cm(22.9”)
- Page 6 2. AKA Design ProWave system http://www.akadesign.co.uk/site_product/prowave/prowave.html 3. Sound Construction & Supply Custom Console (for Nuage) http://www.custom-consoles.com/recording-studio-furniture.php Once you have finished getting the console desk set up, fix each unit in place with joining brackets. To attach a joining bracket, first line up the units and remove the two neighboring screws on their...
- Page 7 【Remove the screws】 Next, attach the joining bracket using the screws you just removed 【Place the Jointing bracket screwed into place】...
- Page 8 Repeat the process at the opposite end of the units Caution: Do not transport multiple units that are held together with joining brackets. This dangerous and likely to result in drops or damage ‘ 【Brackets installed in two locations】 Caution! When multiple Fader units with Master unit are in use, always make sure to use the jointing brackets...
- Page 9 The positions for each rubber foot are as follows: 【Nuage Fader (rear)】 【Nuage Fader (front)】 【Nuage Fader (side)】...
- Page 10 【Nuage Master (rear)】 【Nuage Master (front)】 【Nuage Master (side)】 【Nuage Workspace Small (rear)】...
- Page 11 【Nuage Workspace Small (side)】 ※The dimensions and the positions of the rubber feet are the same as those of Nuage Fader 3-2. Installing video monitors To ensure accurate color reproduction and a wide viewing angle, we recommend that the monitor you use with the Nuage Fader be a professional 24-inch monitor with 1920 x 1200 resolution and in-plane-switching (IPS) technology.
- Page 12 Following are four recommended video monitors (current as of June 2016). 1. HP z24n http://www8.hp.com/us/en/products/monitors/product-detail.html?oid=7483063#!tab=features 2. Dell U2413 http://www.dell.com/ed/business/p/dell-u2413/pd Mounting the video monitor There are two approaches to mounting video monitors for Nuage. 1. Use the included monitor stand. 2. Use a monitor arm...
- Page 13 【Included monitor stand】 【Monitor Arm】 The advantages of using monitor arms are that they let you position the monitor with more freedom, in terms of vertical and horizontal position and in terms of angle, and they don’t require as much depth on your desk surface as a monitor stand.
- Page 14 Ergotron LX Desk Mount LCD Arm http://www.ergotron.com/ProductsDetails/tabid/65/PRDID/351/language/en-US/Default.aspx Ergotron LX Dual Side-by-Side Arm http://www.ergotron.com/ProductsDetails/tabid/65/PRDID/354/language/en-US/Default.aspx Humanscale M8 http://www.humanscale.com/products/product_detail.cfm?group=m8...
- Page 15 In order to see the information as much as possible, position the lower edge of the LCD panel to sit just above the upper edge of the controller. Note that if the video monitor’s height creates acoustic problems, you can position the lower part of the LCD panel to hid it behind the rear of the controller. Adjustments to the display will be explained later...
- Page 16 【Set to normal height】 【Lowered】 Also note that, depending on the monitor, the power button and screen-adjustment buttons may be along the lower front of the video monitor, and if the monitor is too close to the controller, one of these buttons may get pushed accidentally.
- Page 17 3-3. Installing Nuage I/O Nuage I/O is a 19-inch rack-mount equipment in 2U. Please prepare enough rack space as necessary. Nuage I/O has fan equipped on the rare panel, please install it to the machine room if there is noise from the fan.
- Page 18 Accommodates a keyboard measuring up to 460 × 138 × 38 mm TIPS: To fit the keyboard into the Nuage Fader or Workspace (Large), the recommend size of the keyboard up to 460 × 138 × 38 mm (18.11 × 5.43 × 1.49 inch). Please make sure your keyboard fits into the space in advance.
- Page 19 【Thread keyboard cable through hole on underside】 【Tray with keyboard in place】 2. The Nuage Workspace (large) If the keyboard is not stored in a tray, but you want to keep it readily accessible, place it on the Workspace (large). The keyboard’s cable can be passed through a hole in the Workspace cover to run...
- Page 20 We recommend the Nuage Workspace (small) as a place to set your trackball. The cable can be passed through a hole in the cover in the same way. If you use a mouse, we recommend using a mouse pad rather than using your mouse directly on the cover.
- Page 21 3. Easy monitoring from computer 4. VLAN、Link Aggregation、IGMP Snooping、Multicast Filtering 5. Has more ports than you will need We recommend the following switch based on the above criteria: ・ Yamaha SWP1 Series The Cisco SG300 Series ・ 【Yamaha SWP1-16MMF】 【Cisco SG300-10】...
- Page 22 Priority Usage DSCP Decimal Binary Label High Time critical PTP events 0x38 111000 Medium Audio, PTP 0x2E 101110 (reserved) 0x08 001000 None Other traffic BestEffort 0x00 000000 You can set up a Cisco switching hub as shown below using a web browser. For more details on settings, refer to the switch’s user manual.
- Page 23 VLANs. Using Wi-Fi Do not use Wi-Fi for Dante, controls, or any Nuage connections. If your hardware has built-in Wi-Fi equipment, ensure that it has been disabled. We also recommend that you disable any other forms of wireless networking, such as Bluetooth.
- Page 24 With Nuage, the DAW switch buttons on the Nuage Fader and Nuage Master let you switch among three Windows or Mac computers. TIPS: If there is only one set of keyboard and mouse (or trackball) to be used, the second KVM switcher and on can be replaced with less expensive video switchers (details will follow).
- Page 25 About the MAIN DISP button on the Nuage Fader The Nuage Fader has a “MAIN DISP” button; this is used to temporarily show the main screen (Project window) being displayed on the Nuage Master monitor on the Fader monitor as well.
- Page 26 KMV switcher. TIPS: A set of mouse and keyboard can only connect to either KVM switcher. Even though each Nuage Fader can switch its monitor display independently, the only computer to be controlled with that mouse and keyboard is the one that is currently selected and displayed on the KVM switch to which the mouse and keyboard are connected.
- Page 27 【Workgroup Manager Setup (FADER1-3)】 【Workgroup Manager Setup (MASTER)】 Recommended KVM switch We recommend the following KVM switches and video switchers 【Gefen 8x1DVIKVMDL/SL】 【Gefen 4x1DVIKVMDL】...
- Page 28 If that is the case, make sure to use a dual-link DVI display cable for each DVI connection and see if the problem is fixed. 3-7. Installing video-related equipment The following are the main types of video-related equipment for use with Nuage...
- Page 29 a. Synchronizer b. Video-sync generator c. SMPTE timecode generator d. Nonlinear/linear video recorder e. Video monitor GPIO equipment g. Word-clock generator 3-7-a. Synchronizer 【Steinberg SyncStation】 What is a SyncStation? Three critical elements in any audio/video production environment are reliable audio/video synchronization, accurate phase matching, and machine control.
- Page 30 Video Out W.Clock Out Video In LTC In LTC Out MTC Out MTC In W.Clock In (the NanoSync HD can directly acquire MTC from the main unit over a USB connection). However, the precision of MTC is lower than that of SMPTE time codes (LTC), which can cause sync accuracy problems.
- Page 31 【Rosendahl Nanosync HD】 【Blackmagic Design Sync Generator】 In order to sync Nuage to video equipment, the SyncStation will need an input sync signal for video (NTSC/PAL/HD). A vide-sync generator is the device that generates this video sync signal 3-7-c. SMPTE timecode generator...
- Page 32 3-7-d. Nonlinear/linear video recorder 【SONY DSR1500-A】 【Blackmagic Design Hyperdeck Studio Pro】 The NUENDO is capable of importing video files (QuickTime, etc) as reference when editing audio, but the conventional post-production workflow for editing audio for video has involved copying the master to a tape (or hard drive) for editing, and copying the audio to NUENDO (Track lay-down).
- Page 33 3-7-e. Video monitor 【Blackmagic Design SmartView DUO】 Synchronous editing requires video monitors for reviewing video. While SDI and HDMI are the most common formats, there is also composite video, and we recommend using a monitor that is compatible with video recorder 3-7-f.
- Page 34 3-8. Installing powered speakers Nuage systems allow for a variety of speaker configurations needed for monitoring environments; what follows is a walk-through of setting up 5.1-channel speakers for a typical surround-sound environment.
- Page 35 Recommended speakers are the Yamaha MSP Studio series (shown below, from the left, are the SW10 subwoofer, MSP7 Studio, and MSP5 Studio) and HS series (shown below, from the left, are...
- Page 36 3-9. Installing input devices About mic input The Nuage’s I/O system does not have a built-in mic preamp, so you cannot plug a mic into it directly. Use a separate mic preamp. We recommend the Yamaha AD8HR 【Yamaha AD8HR mic preamp/AD converter】...
- Page 37 4. Connecting equipment 4-1. Power connections Connect all equipment mentioned in the previous sections to power. Because there are so many pieces of equipment that need to be connected to power—the controller, computer monitors, I/O, computers, network switches, KVM switches, video-related equipment, powered speakers, mic preamps, outboard gear, etc—make sure in advance that you have enough power outlets and that the circuit they are on can supply enough power.
- Page 38 First, connect the Nuage Fader/Nuage Master to the switch 【Connection between switch and controller】 Next, connect the Nuage I/O to the network switch. (When redundant mode is chosen) 【Connection between switch and I/O(Redundant Mode)】...
- Page 39 If the NIO units are connected in the Daisy chain mode: 【Connection between switch and I/O(Daisy-chain Mode)】 Next, connect the computers to the network switch. 【Connection between switch and computers】...
- Page 40 TIPS: HP Z840 has two LAN ports, and it is always recommended to use the port labeled “AMT” and disable the AMT function.(Regarding AMT, it will be explained in another chapter) Next, connect the Dante Accelerator to the network switch (using Cat 7 cable) 【Connection between switch and Dante Accelerator】...
- Page 41 The Ethernet cable connections are now complete 4-3. KVM-switch connections To control KVM switches from the Nuage Fader/Nuage Master, you will need one 9-pin RS-232-C cable for each controller. 【RS-232-C cable】...
- Page 42 First, connect each KVM switch to one computer monitor. 【Connections between KVM switches and computer monitors】 Next, connect RS-232-C cables to the RS-232-C jacks on the Nuage Fader/Nuage Master rear panels, and to the RS-232-C jacks on the back of the KVM switches.
- Page 43 Next, connect the keyboard and mouse to the USB OUT jacks on a KVM switch. 【Connection between KVM switch and keyboard/mouse】 Next, connect the computers’ USB jacks to the KVM switch’s USB IN jack. 【Connection between KVM switch and computers】...
- Page 44 (as a rule, the one positioned at the Nuage Master). Ensure that there are USB connections between that switch and the computers. In this type of arrangement, you only need to use a KVM switch for that station; you can use less expensive video switches for the other two stations.
- Page 45 Make connections needed for headphone monitoring Make connections needed for talkback mic Make all connections to input devices This guide presupposes an I/O channel setup using the Nio500-A16 (16 analog channels) and the Nio500-D16 (16 digital channels). 【Input-channel setup example】...
- Page 46 Audio-input devices (several for mics, musical instruments, etc) Audio-output devices (several for speakers, etc) Headphone monitoring (2) Talkback mic (1) 25-pin D-sub cable (for AES/EBU digital connection). 【XLR cable】 Use a female 25-pin D-sub cable for Nuage I/O input. 【D-sub25pin cable (female)】...
- Page 47 Use a male 25-pin D-sub cable for Nuage I/O output 【D-sub25pin cable (male)】 When using the AD8HR for the mic preamp, connect to the Nuage I/O’s digital input with a 25-pin D-sub cable. 【Connection between Nuage I/O and MLA8】 Ensure that you have the appropriate number, length, and type of cables, and then connect the output...
- Page 48 The outputs for headphone amp, which are assigned to channels 11 and 12, connect the two Nuage I/O outputs to the “TO PHONES” jack on the Nuage Master rear panel, which in turn connect to the “PHONES” jacks on the lower front of the Nuage Master. There are two jacks, one quarter-inch and one 3.5-mm, to accommodate headphones and in-ear earphones (both output L/R sound in stereo,...
- Page 49 Next, connect the talkback mic to the Nuage I/O. The Nuage Master has a built-in talkback mic. Its output is at the “TALKBACK OUT” jack on the Nuage Master’s rear panel; connect that to any input on the Nuage I/O.
- Page 50 Now, connect all the microphone inputs to AD8HR to Nuage I/O's inputs. Microphones Nuage I/O AD8HR Microphones The audio connections are now complete. 4-5. AD8HR Connections In this setup guide, we will introduce how to connect two AD8HR units (#1, #2) to Nio500-D16 and remotely control them from Nuendo.
- Page 51 TIPS: Among our recommended computers for Nuage, hp's Z840 has a serial connector while Z440, Z240 and Apple's Mac Pro don't. If you need to use this feature with those computers, use a USB-serial adapter cable or a PCIe card.
- Page 52 (Make sure the switches on the second unit and on are all set to "RS422"). Then, connect each AES/EBU output connector on AD8HR to the AES/EBU input on Nuage I/O. Finally, connect the wordclock distributed from the clock master to each AD8HR unit and also...
- Page 53 4-6. Video-related equipment connections and other connections House-sync and video reference signal connections First, connect the house sync, which provides video syncing (video sync signal), to each video device and to the SyncStation. Use a 75 Ω BNC cable. 【BNC Cable】 【House sync connected to SyncStation】...
- Page 54 The SyncStation has two types of 2-channel AES (XLR, BNC), and two types of S/PDIF (optical, coaxial) interfaces; the Nuage I/O’s VST System Link output uses BNC, so if you are using AES2, connect one BNC cable.
- Page 55 "BNC IN" as Wordclock Source on the Nuage Workgroup Manager, and also make sure you turn both "Preferred Master" and "Slave To External Word Clock" on the Dante Controller's Clock on for only one of the Nuage I/O units, and turn them off for the other units.
- Page 56 【Nuage Workgroup Manager NIO Properties】 【Dante Controller Clock Status window】...
- Page 57 5. Installing software and drivers For current software/driver compatibility list, please refer to the following page: http://www.yamahaproaudio.com/global/en/products/daw_systems/nuage/downloads.jsp 5-1. Installing the eLicenser Control Center The eLicenser Control Center (eLCC) is software from Steinberg for managing licenses and enforcing copy protection, using either the USB eLicenser (included in the NUENDO/Cubase package) or the soft eLicenser.
- Page 58 Once you have correctly entered the code, the license will be downloaded; select the eLicenser to which you want the license to be downloaded, and click the “Download License” button. Simply downloading the license does not actually make the software available for use, so start the usage period.
- Page 59 When you see the screen shown below, the eLicenser is working. 5-2. Installing NUENDO Next, launch the installer to install NUENDO. Follow the steps in the installation window. 【NUENDO Installer】...
- Page 60 【Software License Agreement】 【Choose Install Location】...
- Page 61 【Enter Password to Proceed】 【Installation Completed】 Installation of NUENDO is now complete.
- Page 62 Installing Tools for Nuage 5-3. Tools for Nuage bundles into one package all the various applications and drivers that Nuage needs, including Nuage Workgroup Manager, for managing Nuage systems; Nuage Extension for communications between NUENDO and Nuage; and Nuage PT Bridge, driver software that connects to third-party DAWs and switches Nuage controllers.
- Page 63 【Software License Agreement】 【Choose Programs To Be Installed】...
- Page 64 【Check Disk Space and Start Installation (Password Required)】 【Installations Completed】...
- Page 65 Next, move on to Dante Infrastructure installation. 【Dante Infrastructure Installer】 【Installation Type】...
- Page 66 【Installation Completed】 For Windows, after installing TOOLS for NUAGE, the firewall setting for Nuage Workgroup Manager will pop up, allow the following access settings. 【Windows Security Alert】...
- Page 67 TIPS: Only one Workgroup Manager is needed to be installed and started up for Nuage system. For example, If Workgroup Manager is already installed for DAW A, it is not necessary to install it again. If it is necessary to install Extension and Nuage PT Bridge for Mac, uncheck the Workgroup Manager from the installation options mentioned above and continue.
- Page 68 【Yamaha Pro Audio Website (Downloads->Other Utilities->Dante Utilities)】 If the following window appears when you attempt to install Dante Controller on a Macintosh by double-clicking on the installer icon, you will not be able to install it. This is because of a feature in Mac OS X called Gatekeeper.
- Page 69 【Open with Ctrl Key】 If this happens when installing NUENDO, you can circumvent it in the same way. 【Dante Controller Installer】 【Software License Agreement】...
- Page 70 【Choose Install Location】 【Enter Password to proceed】 【Installation Completed】...
- Page 71 5-5. Installing QuickTime 7.7.9 from Apple Software Update (For Windows only) NUENDO has video tracks, allow to import video file as video reference for audio playback, recording and editing. And for this, QuickTime technology from Apple is used as video engine. QuickTime is being installed on Mac OSX as default, but it may not be installed as default in case of Windows, so please make sure to install the latest version of QuickTime Essentials.
- Page 72 Follow the steps in the installation window. 【License Agreement】 【Downloading QuickTime 7.7.9】...
- Page 73 【Installation Completed】 5-6. Installing Bonjour (For Windows only) Dante Controller assumes that Bonjour is available. This is included by default with Mac OS X—only Windows users will need to install Bonjour. Bonjour can be downloaded from Apple’s website. http://support.apple.com/kb/DL999...
- Page 74 Follow the steps in the installation window. 【Bonjour Installer】 【License Agreement】...
- Page 75 【System Requirements etc.】 【Installation Options】 【Installation Completed】...
- Page 76 5-7. Installing the driver for Dante Accelerator Next, download the driver for Dante Accelerator from the Yamaha Pro Audio website (http://www.yamahaproaudio.com/) and run the installer. 【Dante Accelerator Installer】 【Software License Agreement】...
- Page 77 【Choose Install Location】 【Rebooting Required After Installation】 【Installation Completed (and Reboot)】...
- Page 78 5-8. Installing the driver for SyncStation Download the latest driver for SyncStation from the Steinberg website and run the installer. http://www.steinberg.net/en/support/downloads_hardware/downloads_NUENDO_syncstation.html From this point on, download what is shown below, and follow the instructions in the installer to perform the installation. 1.
- Page 79 As described earlier, to bypass Gatekeeper, hold down the Control key, click on the installer icon, and select "Open." 【SyncStation Driver Installer】 【Choose Install Location】...
- Page 80 【Type Password to Proceed】 【Installation Completed】 2. Download latest firmware While you do not need to install the firmware updater, you should keep the firmware on hand, so download the latest firmware (Firmware will be located at the same place as the driver). The file name and dot-extension for the downloaded file should be something like this: syncstation-sw130123-hw120302.chf 3.
- Page 81 【SyncStation Firmware Updater】 Select “SyncStation” as the MIDI Input/MIDI Output ports. 【Choose MIDI Ports】 Click “Verify SyncStation”; the SyncStation's current version information will be displayed.
- Page 82 【Verify SyncStation Firmware Versions】 Next, navigate to the location of the latest firmware data (the .chf file), select it, confirm that it is the version to be used for the update, and begin the update. 【Specify New Firmware】 If the update finishes without incident, you will see the following message.
- Page 83 【Firmware Successfully Uploaded】 After uploading firmware, you should always perform a factory reset. Hold down the down-arrow button on the SyncStation to display the menu, and then press the down-arrow button repeatedly from the “Unit” line to open “Unit07-InstallTemplate”, select “Factory,” and hold down the down-arrow button.
- Page 84 Switch on the Nuage Fader/Nuage Master, in any order. Tip: The Nuage Controller has an “all-lit” mode for operational checks; when started up in “all-lit” mode, all buttons, LEDs, and other visual-feedback elements will be lit at maximum power. Holding down the DAW “A” and “B” buttons when turning it on and continuing to press them will...
- Page 85 Before turning on the computers, turn on the computer monitors and peripherals. Check again to ensure that the monitor power switches do not come in contact with the Nuage Controller, which might accidentally turn them off. Make sure if the Power Button Lockout mode is on.
- Page 86 BIOS Setup Turn on the PC Power supply, hold down “F10” on the keyboard when the HP logo appears to access BIOS Setup mode. In BIOS Setup mode, Select AMT Configuration from Advanced menu and press Enter. 【HP Z series BIOS Setup】 Select “Disabled”...
- Page 87 Next, select “OS Power Management” from Power menu. 【OS Power Management】 Set ”Idle Power Savings” to Normal and press F10 to accept it. 【Set Idle Power Savings to Normal】...
- Page 88 When the above setting is done, select Save Changes and Exit from File menu. 【Save Changes and Exit】...
- Page 89 When the confirm message pop up, select “Yes” and press Enter to finish the setting. The computer will be restarted. Tip: The HP Z series has a known issue where it can take several minutes to finish starting up. If this happens, just wait until start-up is complete.
- Page 90 Next, to make it so that the monitor positioned at the Nuage Master is treated as the main display, click the checkbox labelled "Make this my main display" (if that is already the main display, do nothing). Mac OS X From the System Preferences window, click the Displays button, and then the "Arrangement"...
- Page 91 Computer optimizations Windows The following procedure optimizes your Windows machine for use with Nuage. Most of the points here are recommendations for improving audio recordings and processing performance on Windows computers (note that performance improvements cannot be guaranteed due to differences between systems).
- Page 92 8. Confirm that all hard drives that will be used in audio processing have NTFS formatting. 9. Confirm that the OS, device drivers, BIOS, and chipset drivers are all up to date. For details, refer to the websites of the chipset manufacturer. 10.
- Page 93 【Disable Display/HDD Sleep】 2. Disable software update to prevent automatic updates. Only use operating-system updates that have been tested by and are officially supported by Yamaha/Steinberg. 【Disable Software Update】 3. Set up a dedicated hard drive for audio recording, separate from your system hard drive. This...
- Page 94 5. Disable the keyboard shortcut for Spotlight, and prevent Spotlight from searching the audio drive. 【Disable Spotlight shortcut keys】 【Prevent Spotlight from searching the audio drive】 6. Disable the keyboard shortcut for Mission Control.
- Page 95 7. Disable Wi-Fi and Bluetooth. 6-6. Settings for Nuage Workgroup Manager If Tools for Nuage has been installed, Nuage Workgroup Manager will launch automatically when the computer is started, so it should not be necessary to launch the program (you may need to launch Nuage Workspace Manager if you quit the program manually).
- Page 96 If the Nuage Fader/Master and the Nuage I/O network switch are already hooked up, you should see the following in the Nuage Workgroup Manager window. 【Nuage devices recognized on the Workgroup Manager】 Select each device one at a time and click the up-arrow button to add it to the upper pane (Add this following the setup procedure for Nuage I/O in Section 3-3).
- Page 97 Tip: If you are using more than one Nuage Fader, add them in order, starting with the one you want to treat as the first Fader (eg, if you have two Faders next to each either, treat the left one as Fader 1 and the right one as Fader 2).
- Page 98 【Dante Controller】 When the Dante Accelerator card and Nuage I/O are connected, you should see the following. Select the port that Dante Controller connects to (If you don't select the correct port, Nuage I/O and Dante Accelerator will not be displayed).
- Page 99 The device names can be changed so it is easy to remember (not mandatory). Open the Device Config window. 【Device Config window】...
- Page 100 Do not change “Y001-Yamaha-” written at the beginning of Dante Accelerator’s name, or ”Y00X-Yamaha-“ witten at the beginning of Nuage I/O. If you change the name, they may not be able to be seen by the other Yamaha Dante equipment, such as CL digital mixing console.
- Page 101 【Dante Transmitters】 Click the "+" button again to close up the Dante Accelerator grid. Next, disclose the 16 channels of output for each Nuage I/O.
- Page 102 Check Dante Accelerator's 128 channels of input and each Nuage I/O's 16 channels of output. 【Dante Receivers】 Once you understand how the Dante Controller grid works, you can set up the patches between the Dante Accelerator outputs and the Nuage I/O inputs, and between the Nuage I/O outputs and the...
- Page 103 Nuage I/O output and Dante Accelerator input. TIPS: When patching Nuage I/O and Dante Accelerator, it is necessary to follow the ID order from the first unit, starting from 1-16, then 17-32 and 33-48. (If the patch is not in order, Direct Monitoring,...
- Page 104 NUENDO is launched, it will not recognize which monitor to use for Nuage Fader, so you need to force NUENDO to recognize it (The NUENDO Workspace window will be displayed on the monitor that the operating system recognizes as being the main monitor, so Nuage Master should be displayed correctly).
- Page 105 To check whether the mixer window is displayed on the right monitor, open a project or create a new one, and then press any SEL button on the Nuage Fader. Check to see whether the channel strip corresponding to that channel has a white outline. If it is shown correctly above the SEL button that you pressed, then your settings are correct.
- Page 106 Once you have adjusted the left/right positioning and the bottom edge, if necessary, each channel (track) on screen should be positioned in a vertical line with the Nuage Fader's 16 channels. 【Display monitor/Nuage Fader adjusted】 Other window settings Once you have finished setting up the mixer window, position the transport, time-display, video, and other windows.
- Page 107 【VST Audio System】 Next, open Yamaha AIC128-D, and, and if you want to use the Direct Monitoring feature, check on Direct Monitoring. Click the Control Panel button, and set up the settings as shown below. 【Yamaha AIC128-D】...
- Page 108 【Yamaha AIC128-D Control Panel】 Finally, open VST System Link and make sure that nothing has been set. 【VST System Link】 Tip: Make sure nothing is set on the VST System Link screen. There is no screen for setting an Extended System Link for synchronizing SyncStation and samples. System Link settings should be handled using the Project Synchronization Setup described below.
- Page 109 TIPS: Always startup NUENDO system with NUENDO as DAW A. If the DAW A is not started up, the system does not operate properly. 6-10. Project Synchronization Setup Use the Project Synchronization Setup screen to set up synchronization for video devices that use SyncStation and NUENDO projects.
- Page 110 Settings for Precision Time Alignment (System Link) Check on Send Data via System Link If the Nuage I/O's System Link Out jack connects to the SyncStation's AES jack (BNC) using a BNC cable, select "AIC128-D Output 16" in NUENDO, and select "AES2-Right"...
- Page 111 【SyncStation Settings】 The project synchronization settings shown above are complete. Check to make sure that the three Frame, Clock, and SysLink indicators light up, and that NUENDO's transport is synchronized. Tip: The best settings for synchronizing with video devices will vary depending on the make and model of video equipment you are using.
- Page 112 【VST Connections】 Inputs Tab The main settings for you to set up here are Inputs, Outputs, and Studio. Set the Inputs in order, based on the input channels you set up in Section 4-4. First, add five channels of mic/line input. Click the Add Bus button, type "Mic/Line"...
- Page 113 The mic/line inputs have been patched to each of the Dante Accelerator's input channels (AIC128-D Input 1-5). Follow the same method to add 5.1 channels for a DVD player, and for a stereo video recorder. 【VST Connections Inputs】 External FX Tab Here, the Outboard inputs are assigned to channels 15/16, but because this is being used as a send/return external effect, do not patch them from the Inputs tab, patch them from the External FX tab..
- Page 114 Outputs Tab Next set the output channels. Start by creating a bus under the Outputs tab. Tip: The speaker configuration (5.1, stereo, etc) used for monitoring in the control room must be defined under the Outputs tab as the main mix. Separately from the speakers (5.1, stereo, etc) added under the Studio tab, create a bus under the Outputs tab, and set that as the main mix.
- Page 115 【Define Main Mix】 Studio Tab Setting the main mix, makes it so that the designated bus (5.1 speakers) will appear under the Studio tab (it cannot be changed here). The speakers that you actually use to listen to sounds in the control room are defined as "Monitor" under the Studio tab.
- Page 116 【VST Connections - Completed】 TIPS: When using the Control Room function, it is necessary to turn on the Control Room. To turn on Control Room, click the power switch botton to turn on the green light on Control Room in VST Connections or Control Room Mixer screen Tip: In some cases, even if you play back a 5.1-channel project, you will only be able to hear it as...
- Page 117 MixConvertV6, then click the downward-pointing triangle next to Stereo at the top to select 5.1 channels. 【Control Room Mixer】 【5.1 -> Stereo】 【5.1 -> 5.1 (pass through)】 The above changes can be made in the Nuage Master's control room. Switch the downmix to set 5.1ch > 5.1ch. 【Control Room on Nuage Master】...
- Page 118 Room Mixer window to open MixConvertV6, and choose 5.1ch by clicking the triangle button on the right-hand side below the Stereo on top. Talkback、CUE Setup Setup the input for Talkback and output for CUE respectively. 【Talkback/CUE patching on VST Connections】 The Talkback button on Nuage Master and Mute button on CUE will be activated.
- Page 119 【CUES/COMM section on Nuage Master】 TIPS: When add Talkback and Cue on VST Connection, the Talkback button, the Mute button on CUE and Signal indicator will be active as shown in above fig. (The above fig shows CUE 1-3 after...
- Page 120 Here we will learn how to configure HA Remote settings and remotely control AD8HR units. Nuage Remote Setup First, open "Nuage HA Remote Setup" window from Devices menu of Nuendo (If cables are correctly connected, it will automatically start finding the COM port.
- Page 121 Select a Nuage I/O input channel to which either AD8HR is connected, press "PRE" and "2" on the Section Control and "HA GAIN" and "HA TRIM" parameters are displayed on the Nuage Fader screen.
- Page 122 Gain moves to the opposite side, however, this is due to the spec of AD8HR. 6-13. Connecting R Series units R series, analog – Dante converter, can be connected to Nuage and it can control various head amp-related parameters (Version 1.5 or later). Although R series are not recognized and displayed in the Workgroup Manager, HA remote control can be done by adding the input channels on Nuendo that have been patched on Dante Controller.
- Page 123 The R series models that can be controlled are: Rio3224-D Rio1608-D Ri8-D The parameters that can be controlled are: HA Gain (gain level) HA GC (gain compensation) HA On/Off (head-amp on/off) HA HPF (high pass filter) HA +48V (phantom power on/off) 【R series(Ri8-D/Ro8-D(n/a)/Rio1608-D/Rio3224-D from top down)】...
- Page 124 Dante Controller to Nuendo input channels on VST Connections, they will appear on the Fader unit screen and become controllable. Open Nuage Remote HA Setup window from Devices menu on Nuendo, move to R Series tab and select the Dante Accelerator card in use (or a DVS.)
- Page 125 【Nuage HA Remote Setup window】 TIPS: The area below the Dante Interface box are empty, simply because the height needs to be consistent with the adjacent AD8HR page. Nothing will appear in this area in any condition. Next, on the Dante Controller, patch each Dante output from R series unit to the Dante input channels of Dante Accelerator.
- Page 126 Dante Accelerator card to each bus. Now the inputs from R series are connected to Nuendo and the HA remote can be controllable. In the SECTION CONTROL area of the Nuage Fader unit, press PRE button. 【Nuage Fader unit Section Control】...
- Page 127 By default, the PRE section of Nuendo will appear, but by pressing 4 or 5 button in the Section Control are described the above, the HA remote of R series becomes controllable. 【PRE section – screen #4】 Here are the parameters that can be controlled. HA GAIN –...
- Page 128 【PRE section – screen #5】 HA HPF – Turn on/off the high pass filer and set the cut-off frequency for each channel of R series units. HA +48V – Turn on/off the phantom power for each channel of R series units. For security reasons, you have to press and hold this button for turning on the phantom power.
- Page 129 6-14. Connecting RMio64-D RMio64-D, Dante-MADI converter, can be connected to Nuage and change various parameters on Nuage Workgroup Manager. RMio units will be recognized as “I/O” and up to total eight Nio and RMio units can be controlled (Version 1.6 or later.)
- Page 130 When an RMio unit is connected to the network switch, it is recognized and displayed on the Device/DAW List of Workgroup Manager. 【Nuage Workgroup Manager】 Without adding the unit to the Workgroup, only “Identify” works and configuration window cannot be open until the RMio unit is added to the Workgroup, by pressing the uparrow button between the...
- Page 131 GPI, or General Purpose Interface, (GPIO, or General Purpose Input / Output) is a general interface for controlling external devices by using the voltage change. In case of Nuage, this may be used for external devices such as a “RECORDING” sign and external talkback button and so on.
- Page 132 Next, open Nuage MASTER Setup window from Device menu of Nuendo, move to GPIO tab and set and IP address for Nuage Master. If possible, use the following unique IP address. IP address can be directly typed in the textboxes.
- Page 133 192.168.254.103 eBOX 192.168.254.102 eBOX GPI8 192.168.254.104 【Nuage MASTER Setup – GPIO - Device】 The IP address can also be set by using the DIP switches on the rear panel as well as the bundled app. 【DIP switches – rear panel】...
- Page 134 IP address 192.168.254.102 192.168.254.103 192.168.254.104 192.168.254.105 192.168.254.106 192.168.254.107 【eBOX Configuration Utility】 When the IP address is correctly set, the link status and packet send/receive status are indicated on the front panel of eBOX. 【Status indicators】...
- Page 135 Like R series, eBOX is not displayed on Nuage Workgroup Manager even when connected and recognized, which is no problem. Below is an example in which you press Talkback button on Nuage Master and see if eBOX receives GPI signal from the Master. In the Output area, select “Nuendo” as target, “Control Room” as Function 1, “Talkback”...
- Page 136 If GPI RECEIVE lights as soon as you press the TALKBACK button, it shows it works correctly. 6-16. Connecting and setting up Pro Tools system The Pro Tools control function of Nuage is compatible to the following two types of Pro Tools platforms:...
- Page 137 In order to synchronize Nuendo and Pro Tools, the following synchronizers are needed: Steinberg SyncStation Avid Sync HD However, if your budget is limited and the synchronization using SMPTE timecode is not required, MTC (MIDI Timecode) can substitute. If that’s the case, prepare MIDI interfaces and cables. TIPS:...
- Page 138 【Pro Tools System (rear) w/ SyncStation】 Insert HDX card to the PCIe slot of Mac Pro. Before connecting the card to the motherboard, make sure to connect the black and yellow cable to the motherboard.
- Page 139 Using the DigiLink cable, connect PRIMARY PORT on HD I/O and PORT 1 connector on HDX card. Next, connect Loop Sync (LS) on HD I/O and that on Sync HD, by connecting LS OUT on Sync HD and LS IN on HD I/O and connecting LS OUT on HD I/O and LS IN on Sync HD, using BNC cables.
- Page 140 Next, for wordclock synchronization, connect WORDCLOCK A on SyncStation and WC IN on Sync HD, also connect WORDCLOCK B to WC IN on HD I/O.
- Page 141 Connect USB port on SyncStation and an available USB port on the computer. Connect the serial port on HDX card and HOST SERIAL connector on Sync HD using a 9-pin serial cable.
- Page 142 Lastly, connect audio outputs on HD I/O and audio inputs on Nuage I/O. Synchronization Settings TIPS: In this scenario, Nuendo and Pro Tools are synchronized by using SMPTE Timecode (LTC) where Nuendo (SyncStation) is the clock Master while Pro Tools (Sync HD) is the Slave.
- Page 143 Next, enable Sync HD. Open Peripherals window, move to Syncronization page and check “Enable SYNC HD” Make Pro Tools “online” (make chase-able as Slave). Click on the Sync button on the transport. Now Pro Tools is waiting for the LTC signal coming in. Next, configure the Nuend system.
- Page 144 Now, play back a Nuendo project and see if another project on Pro Tools will work in sync by the same time code. Reference: Synchronization between Nuendo and Cubase TIPS: For Nuendo/Cubase synchronization, VST System Link will need to be used. When locked via VST System Link, the synchronization is bi-directional so the transport can be controlled from both platforms.
- Page 145 Open Project Synchnorization Setup on Nuendo, choose “VST System Link” in the Timecode Source area, and press “SYNC” button below that area. Do the same thing on the Cubase side as well. Next, open Device Setup windows and move to VST System Link page. Choose the Dante input and output channels that you have patched on Dante Contrller earlier.
- Page 146 Pro Tools side, it always will be brought back to the Nuendo time position. Switching DAW on the Nuage control surface does not change that. In order to control Pro Tools independently, press SYNC ONLINE button to make the Pro Tools offline.
- Page 148 MultiPanner Nuendo is capable of handling busses compatible with Dolby Atmos 9.1ch format (Nuendo 7,1 and later), and those Atmos channels can be controlled from NUAGE Fader/Master (NUAGE V1.8). Speaker placement Dolby Atmos 9.1ch bus is available with Nuendo7.1, and below is an example of speaker placement for monitoring Dolby Atmos 9.1.
- Page 149 【Front Speakers [Left, Center, Right]】 【Side/Rear Speakers [Left Surround/Side Left]】...
- Page 150 【Ceiling Speakers [Top Side Left/Top Side Right]】 【Subwoofer [Lfe]】...
- Page 151 The diagram below shows an example of the angle of each speaker and its distance from the listening position. Tsl/Tsr 【An example of speaker placement against the listening position】...
- Page 152 In the Studio tab, add a Dolby Atmos 9.1 monitor bus and assign the output channels to each speaker. Here, assign the output channels of Dante Accelerator card which are patched to each output channel of NUAGE I/O.
- Page 153 When the bus is correctly configured, it appears on the NUAGE Fader screen as below. 【9.1 Dolby Atmos bus on NUAGE Fader】 If you create a mono/stereo/5.1/9.1 Atmos track, you will see the pan position of each track on the NUAGE Fader screen as below.
- Page 154 【NUAGE Fader Section Control】 【Section Control = 1】...
- Page 155 【Section Control = 2】 【Section Control = 3】 【Section Control = 4】 【Section Control = 5】...
- Page 156 【Section Control = 6】 【Section Control = 7】 【Section Control = 8】 On the NUAGE Master Touchscreen, Dolby Atmos panning can be performed more intuitively by simply dragging the color balls or turning the knobs. 【Dolby Atmos on NUAGE Master (Mono)】...
- Page 157 【Dolby Atmos on NUAGE Master (Stereo)】 【Dolby Atmos on NUAGE Master (5.1)】 【Dolby Atmos on NUAGE Master (9.1 Dolby Atmos)】...
- Page 158 TIPS: Thus far, we have outlined how to configure the panning of Bed channels. In order to pan the Object channels, you must obtain an RMU unit from Dolby, and install the RMU Connection Kit for Nuendo. For details, please refer to Mixing with VST MultiPanner document.
Need help?
Do you have a question about the Nuage and is the answer not in the manual?
Questions and answers