PaloAlto Networks PA-5200 Series Quick Start Manual
Hide thumbs
Also See for PA-5200 Series:
- Quick start manual ,
- Hardware reference manual (60 pages) ,
- Hardware reference manual (50 pages)
Advertisement
Quick Links
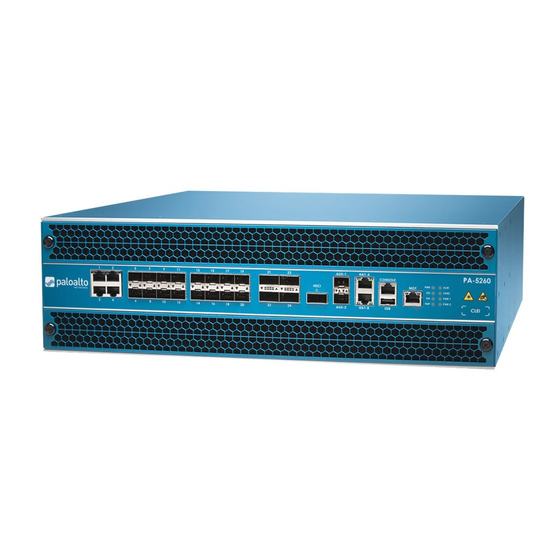
PA-5200
1
Before You Begin
1
Use this document to install and begin setting up your Palo Alto Networks PA-5200 Series firewall. Refer to the PA-5200
Series Next-Gen Firewall Hardware Reference at
specifications, and more detailed procedures for installing the firewall.
◼
Verify that the installation site has an AC (or DC) power source.
◼
Have a #1 and #2 Phillips-head torque driver available. Use the #1 Phillips-head bit to attach the rack-mount brackets to the firewall
and use the #2 bit to secure the rack-mount brackets to the equipment rack posts.
◼
Unpack the equipment and verify that you received the following items:
Qty
Description
1
PA-5200 Series next-generation firewall.
2
AC power cords. If you ordered the firewall with DC power supplies, the DC power cables are not included.
1
DB-9 female to RJ-45 male console cable.
2
Velcro straps to secure the AC power cords to the power supplies.
1
Standard RJ-45 CAT6 Ethernet cable for management (MGT) port access.
2
Front rack-mount brackets used to secure the firewall to a two-post or four-post equipment rack.
20
#8-32 x 5/16" front rack-mount bracket screws to attach the front rack-mount brackets to the firewall. (Two of the
twenty screws are spares.)
10
#10-32 x 3/4" rack-mount screws to secure the front rack-mount brackets to a rack with #10-32 threaded holes. (Two of
the ten screws are spares.)
10
#12-24 x 1/2" rack-mount screws to secure the front rack-mount brackets to a rack with #12-24 threaded holes. (Two of
the ten screws are spares.)
1
End User License Agreement (EULA).
1
China Restriction of Hazardous Substances (RoHS) declaration.
2
Rack Mount the Firewall
The PA-5200 Series firewall ships with two rack-mount brackets for an installation in a two-post or four-post 19" equipment
rack. If you install the firewall in a four-post rack, you can purchase an optional four-post kit to secure the firewall to the back
rack posts to provide additional support. Both procedures are covered in this section.
Install the Firewall in a Two-Post Equipment Rack
1
Attach one rack-mount bracket to each side of the firewall using nine #8-32 x 5/16" screws for each bracket (Figure 1) and torque to 15 in-lbs.
For a two-post rack, we recommend that you install the brackets in the mid-mount position as shown in Figure 1. For a four-post rack or
cabinet, install the rack-mount brackets in the front-mount position as shown in Figure 3.
Ensure that the equipment rack is properly anchored so it can support the weight of the installed equipment without tipping.
2
With help from two other people, hold the firewall in place in the rack and secure the rack-mount brackets to the rack using four screws for
each bracket (Figure 2). Use the appropriate screws (#10-32 x 3/4" or #12-24 x 1/2") for your rack and torque to 25 in-lbs. Use cage nuts (not
provided) to secure the screws if the rack has square holes.
Figure 1
docs.paloaltonetworks.com
https://docs.paloaltonetworks.com/hardware
for safety information,
Figure 2
(Optional) Install the Four-Post Rack Kit
1
Attach one rack-mount bracket to each side of the firewall using nine #8-32 x 5/16" screws for each bracket (Figure 3) and torque to 15 in-
lbs. Ensure that the rack-mount brackets are positioned at the front of the firewall.
2
Attach one side rack-mount rail to each side of the firewall using four #8-32 x 5/16" screws for each bracket (Figure 4) and torque to 15 in-
lbs. Ensure that the beveled edge on each bracket is facing the firewall.
3
With help from two other people, hold the firewall in the rack and secure the rack-mount brackets to the rack using four screws for each
bracket (Figure 5). Use the appropriate screws (#10-32 x 3/4" or #12-24 x 1/2") for your rack and torque to 25 in-lbs. Use cage nuts (not
provided) to secure the screws if the rack has square holes.
4
Slide one back rack-mount bracket into each of the two previously installed side rack-mount rails (Figure 5) and secure the back brackets to
the back rack posts (Figure 6) using four screws for each bracket (#10-32 x 3/4" or #12-24 x 1/2" screws) and torque to 25 in-lbs.
Figure 3
Figure 5
Page 1 of 2
Quick Start Guide
Beveled Edge Faces Firewall
Figure 4
Figure 6
Advertisement

Related Manuals for PaloAlto Networks PA-5200 Series


Summary of Contents for PaloAlto Networks PA-5200 Series
- Page 1 Attach one rack-mount bracket to each side of the firewall using nine #8-32 x 5/16” screws for each bracket (Figure 3) and torque to 15 in- Use this document to install and begin setting up your Palo Alto Networks PA-5200 Series firewall. Refer to the PA-5200 lbs.
- Page 2 Connect to the Management Interface The PA-5200 Series firewall ships with either two AC or two DC power supplies to provide power redundancy. This section Connect the standard RJ-45 Ethernet cable from the RJ-45 port on your computer to the MGT port on the firewall (Figure 10).
Need help?
Do you have a question about the PA-5200 Series and is the answer not in the manual?
Questions and answers