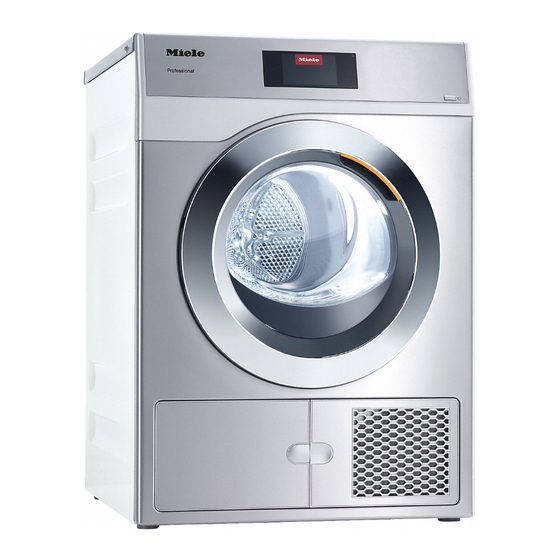
Miele PDR 908 HP Operating And Installation Instructions
Heat-pump
Hide thumbs
Also See for PDR 908 HP:
- Operating and installation instructions (116 pages) ,
- Installations plan (10 pages) ,
- Operating and installation instructions (108 pages)
Table of Contents

Related Manuals for Miele PDR 908 HP


Summary of Contents for Miele PDR 908 HP
- Page 1 Operating and Installation Instructions Heat-Pump Dryer Always read the operating instructions before setting up, installing, and commissioning the appliance. This prevents both personal injury and damage to the appliance. en-US M.-Nr. 11 226 870...
-
Page 2: Table Of Contents
Contents Caring for the environment ................. 7 IMPORTANT SAFETY INSTRUCTIONS .............. 8 Operating the tumble dryer ................ 16 Control panel ......................16 Sensor controls and touch display with sensor controls ........17 Main menu......................17 Examples of how to operate the appliance............18 Operating a laundromat machine ................ - Page 3 Contents Program chart...................... 34 Label........................34 Program packages ....................35 Standard........................ 35 Sport........................39 Soft furnishings ..................... 40 Hygiene ......................... 41 WetCare......................... 42 Flatwork......................... 42 Special programs ....................43 Changing the program sequence .............. 44 Changing a program once it has started............... 44 Canceling a program .....................
- Page 4 Contents Cleaning the bottom-right grille/heat exchanger........... 63 Removing the grille................... 63 Cleaning the cooling fins .................. 64 Replacing the grille................... 64 Cleaning the tumble dryer ..................65 Frequently Asked Questions ................ 66 The display indicates the following messages or faults ........66 Unsatisfactory drying results.................
- Page 5 Contents Controls / Display ....................87 Language......................87 Language entry ....................88 Set languages....................88 Display brightness.................... 88 Clock display....................89 Date ........................89 Volume......................89 Res. moisture display ..................89 Visibility parameters ..................89 "Display" off status................... 90 "Machine" off status..................90 Delay start ......................
- Page 6 Contents Machine parameters.................... 102 Legal Information.................... 102 Payment system ....................102 Setting for payment systems ................. 102 Time / impulse ....................103 Feedback sig. to pay system................103 Payment system lock ..................103 Clear paid signal..................... 103 Debounce time ....................104 Pay system override time ................
-
Page 7: Caring For The Environment
Consult with local authorities, dealers or Miele in order to dispose of and recycle electrical and electronic appliances. Miele assumes no responsibility for deleting any personal data left on the appliance being disposed. -
Page 8: Important Safety Instructions
IMPORTANT SAFETY INSTRUCTIONS WARNING To reduce the risk of fire, electric shock, or injury to persons when using your appliance, follow basic precautions, including the following: It is essential to read all instructions before using the appliance. Do not allow children to play on or in the appliance. - Page 9 IMPORTANT SAFETY INSTRUCTIONS Important information regarding use of fabric softener sheets: We do not recommend use of fabric softener sheets. Use of fabric softener sheets can clog the surfaces of the lint filters, extending the drying time and increasing energy consumption. During subsequent cleaning, the plastic and surfaces of the lint filters can be damaged! The best results are obtained by using liquid fabric softener in the washing machine.
- Page 10 IMPORTANT SAFETY INSTRUCTIONS To prevent the risk of fire, the following textiles must not be dried in this dryer: – items which have not been washed. – items, such as work-wear, exposed to grease, oils, or other deposits (such as lotions or cosmetics) in your dryer. If these items have not been thoroughly cleaned there is a danger that they may contribute to a chemical reaction that could cause the laundry to ignite when heated even after being removed from the...
- Page 11 IMPORTANT SAFETY INSTRUCTIONS Do not place items exposed to cooking oils in your dryer. Items contaminated with cooking oils may contribute to a chemical reaction that could cause a load to catch fire. To reduce the risk of fire due to contaminated loads, the final part of a tumble dryer cycle occurs without heat (cool down period).
- Page 12 Miele Tumble Dryer and the Miele Washing Machine. If you order a plinth for this tumble dryer (available from Miele as an optional accessory), make sure it is the correct one. ...
- Page 13 It is not suitable for room lighting. Replacement lamps should only be fitted by a Miele authorized person or by Miele Technical Service. Information on the heat pump and refrigerant –...
- Page 14 IMPORTANT SAFETY INSTRUCTIONS Using a fragrance capsule (optional accessory) Only use genuine Miele original fragrance capsules. Store the fragrance capsule in its original packaging. Make sure that you always keep the fragrance flacon or the lint filter with the flacon inserted in it in a horizontal position when carrying, and do not tip or place it down on any surface.
- Page 15 IMPORTANT SAFETY INSTRUCTIONS FCC Declaration of Conformity This appliance complies with Part 15 of the FCC regulations. This appliance has been tested and found to comply with the limits for a Class B digital device, pursuant to Part 15 of the FCC Rules and is subject to the following conditions: This appliance does not cause harmful interference.
-
Page 16: Operating The Tumble Dryer
Operating the tumble dryer Control panel a Language sensor control e Optical interface For selecting the current user For Technical Service. language. f Button The operating language is displayed For switching the tumble dryer on again at the end of the program. and off. -
Page 17: Sensor Controls And Touch Display With Sensor Controls
Operating the tumble dryer Sensor controls and touch Main menu display with sensor controls After switching on the tumble dryer, the main menu will appear in the display. The , , and Start/Stop sensor controls and the sensor controls in the You can access all the important sub- display react to finger-tip contact. -
Page 18: Examples Of How To Operate The Appliance
Operating the tumble dryer Options menu (multiple selection) Examples of how to operate the appliance Extras 11:02 Option lists Gentle tumble Program menu (single-option list) Programs 11:02 Anti-crease Cottons Express Shirts Touch one or several Options to select Minimum iron Delicates Denim... - Page 19 Operating the tumble dryer 11:02 Status Tip: For some settings, depending on the value range and increments, the value can also be set using a numerical keypad. Briefly touching the numbers 2:27 Time left will bring up the numerical keypad. Drying Cottons Once a valid number has been entered,...
-
Page 20: Operating A Laundromat Machine
Operating the tumble dryer Symbols in the display Operating a laundromat machine Drying levels The entry menu will vary depending on Extra Dry the programming status (see Normal Plus “Controls” under “Supervisor level”). Normal Shortcuts are the easiest way to ... -
Page 21: Initial Commissioning
Some of the settings can only be configured during the initial commissioning process. After that, they must only be changed by Miele Technical Service. These settings are also described under “Supervisor level”. -
Page 22: Reference To External Appliances
Initial commissioning Reference to external Setting the date appliances Date A reference to external hardware 2021 appears. June 2020 Confirm with the sensor control. July 2019 Before initial commissioning, connect August 2018 the XCI box or slide a communication September module into the slot on the back of the tumble dryer. -
Page 23: Selecting Program Packages
Initial commissioning Confirming the time request Selecting program packages The following question appears in the You can select various programs from display: the program packages. Any programs already active are Remove the clock display? highlighted in orange. Touch the sensor control. - Page 24 If you wish to change the settings after the commissioning process, please contact Miele Technical Service. If you do not wish to set up a payment system, you can skip this stage. Payment system...
-
Page 25: Completing The Commissioning Process
Initial commissioning Place your finger on the number that Completing the commissioning you want to change and move your process finger in the direction you want. The commissioning process is Select a duration of 20 minutes. complete when a program lasting longer than 20 minutes has been ... -
Page 26: Notes On Correct Laundry Care
1. Notes on correct laundry care – Sew in or remove underwiring from Washing bras. – Heavily soiled laundry must be washed particularly thoroughly. Use Understanding the care-label sufficient detergent and select a high symbols temperature. If in doubt, wash the items several times. -
Page 27: Loading The Tumble Dryer
2. Loading the tumble dryer Loading the laundry Socket for the fragrance flacon Textiles may be damaged. The “Fragrance flacon” chapter describes how to use the fragrance Before loading, read “1. Notes on flacon. correct laundry care”. If you are not using a fragrance flacon: Push the tab down completely (see arrow) so that the socket is closed. -
Page 28: Selecting A Program
3. Selecting a program Switching on the tumble dryer Alternatively, you can select a program via: Favorites*. Press the button. * The pre-set programs under The drum lighting will come on. cannot be changed. Favorites The drum lighting will automatically go ... -
Page 29: Selecting Program Settings
4. Selecting program settings Selecting the duration (timed Main menu for a program programs) Selecting the drying level You can select the program duration The pre-set drying level for many yourself.* programs can be changed if required. * The time frame for the selected Different drying levels are available program duration can be limited by depending on the program. -
Page 30: Selecting Extra Options
4. Selecting program settings Anti-crease Selecting extra options After the program has finished, the The drying programs can be drum will continue to rotate in a certain augmented with various extra options. rhythm, depending on the selected program. This helps to prevent creasing ... -
Page 31: Starting A Program
5. Starting a program Payment system Program duration/Estimated time remaining Tip: If your machine is connected to a payment system, the amount of The program duration depends on the payment required will appear in the quantity of laundry, the type of fabric, display. -
Page 32: End Of Program - Removing The Laundry
6. End of program – removing the laundry End of program Removing the laundry The laundry will be cooled down shortly before the end of the program. The laundry can now be unloaded. – Finish lights up If Anti-crease * has been selected, the drum rotates in intervals. -
Page 33: Timer
Timer Starting the timer The Delay start must be activated in the Supervisor level so that the timer Touch the Start/Stop sensor control. can be selected. The door will lock and the time until the Before the program starts, the Timer program starts will appear in the can be used to select a program start display. -
Page 34: Program Chart
Program chart All weights marked with * are based on the weight of dry laundry. Label Cottons Eco Maximum 17.6 lb (8 kg)* Items Cotton items such as those described under Cottons, Normal with normal residual moisture. Note – Items are dried to a Normal level only in this program. –... -
Page 35: Program Packages
Program chart Program packages You can select various programs from the program packages. The programs will appear in the program list. Standard Cottons Maximum 17.6 lb (8 kg)* Extra Dry, Normal Plus, Normal Items – Single and multi-layered cotton items. –... - Page 36 Program chart Delicates Maximum 8.8 lb (4 kg)* Normal Plus, Normal, Hand iron plus Items – Delicate synthetic, cotton ,or mixed-fiber fabrics. – Lightweight pullovers, dresses, pants, overalls, table cloths, dress shirts, and blouses. – Lingerie and appliquéd fabrics. Note Less creasing occurs in this program. Reducing the load will reduce creasing even further.
- Page 37 Program chart Toweling Maximum 17.6 lb (8 kg)* Items Large quantities of single-layered and multi-layered toweling items. These include, for example, towels, bath towels, bath robes, face flannels, flannel bed linen. Note Items are dried to a Normal Plus level only in this program. Gentle Smoothing Maximum 2.2 lb (1 kg)* Normal, Hand iron plus...
- Page 38 Note – These programs may only be used with the Miele Dryer Basket (optional accessory). – Select Basket – Low temperature for temperature-sensitive items.
-
Page 39: Sport
Program chart Sport Sportswear Maximum 6.6 lb (3 kg)* Items Sportswear that is suitable for drying in a tumble dryer. Note Items are dried to a Normal level only in this program. Outdoor Maximum 5.5 lb (2.5 kg)* Normal, Hand iron plus Items Outdoor clothing which is suitable for drying in a tumble dryer. -
Page 40: Soft Furnishings
Program chart Soft furnishings Down bedding Maximum 4.4 lb (2 kg)* Items Bedding suitable for tumble drying (duvets or pillows filled with down or feathers). Note Items are dried to a Normal level only in this program. Feathers have a tendency of developing a strong odor when they are warm. -
Page 41: Hygiene
Program chart Hygiene Cottons hygiene Maximum 8.8 lb (4 kg)* Items Cotton or linen items that come into direct contact with the skin. These include, for example, underwear, baby clothes, hand towels, bath towels, bathrobes, spa towels, and flannels. Note Items are dried to a Normal level only in this program. Minimum iron hygiene Maximum 8.8 lb (4 kg)* Items... -
Page 42: Wetcare
Program chart WetCare WetCare Sensitive Maximum 5.5 lb (2.5 kg)* Items Non-washable outerwear Note The garment is briefly dried and fluffed up WetCare Silks Maximum 5.5 lb (2.5 kg)* Normal, Hand iron plus, Hand iron Items Non-washable silk garments which crease easily WetCare Intensive Maximum 5.5 lb (2.5 kg)* Normal Plus, Normal, Hand iron, Hand iron plus, Machine iron Items Washable outerwear... -
Page 43: Special Programs
Program chart Special programs – You can put together 5 special – programs and assign your own program names. Enter these into the tables. – Load: Maximum 17.6 lb (8 kg) kg – (weight of dry items) – Example – [Special program 1] Dry+ –... -
Page 44: Changing The Program Sequence
Changing the program sequence Payment system Adding laundry Open the door. Opening the door or canceling the program after it has started may cause Risk of burns by touching hot a loss of credit (depending on how the laundry in the drum. -
Page 45: Fragrance Flacon
Fragrance flacon Inserting a fragrance flacon The fragrance flacon is inserted in the upper lint filter. The socket is next to Fragrance flacons (optional the recessed grip. accessories) can be used to give your laundry a pleasant scent. If you are not using a fragrance flacon, the cover to the unused ... - Page 46 Fragrance flacon Insert the fragrance flacon as far it will Turn the outer ring clockwise a go into the socket. little. The fragrance flacon may slip out. Turn the outer ring in such a way that the markers and line up. The markers ...
-
Page 47: Opening The Fragrance Flacon
Fragrance flacon Opening the fragrance flacon Closing the fragrance flacon Before drying, you can select the After drying, the fragrance flacon should intensity of the fragrance. be closed to prevent the fragrance from escaping needlessly. Turn the outer ring clockwise: The ... -
Page 48: Removing/Replacing The Fragrance Flacon
– Always store in a cool, dry place packaging. away from direct sunlight. Fragrance flacons are available to – When purchasing new fragrance order from Miele dealers, Miele flacons, only remove the protective Technical Service, or online. seal just before use. -
Page 49: Cleaning And Care
Cleaning and care 1. When to clean the lint filter Observing the cleaning intervals The lint filters are located in the drum- loading area. This tumble dryer is equipped with a multi-stage filter system, which consists of lint filters (1.) and a filter in the toe-kick (2.). -
Page 50: When To Clean The Filter In The Toe-Kick
Cleaning and care 2. When to clean the filter in the toe- Damage caused by insufficient kick cleaning or by operation with a worn, The filter in the toe-kick is behind the damaged filter in the toe-kick. lint-filter flap on the bottom left. There is insufficient flow of air and heat in the heat exchanger due to clogging. -
Page 51: When To Clean The Grille In The Bottom Right/Heat Exchanger For Heat Dissipation
Cleaning and care 3. When to clean the grille in the bottom right/heat exchanger for heat dissipation Clean when Open bottom right grille, appears in clean the heat exchanger the display. The bottom-right grille can be removed. This covers the heat exchanger for heat dissipation. -
Page 52: Cleaning The Lint Filters
Cleaning and care Cleaning the lint filters This tumble dryer has 2 lint filters in the loading area. The upper and lower lint filters trap lint produced during the drying process. Removing the fragrance flacon The intensity of the fragrance will be diminished if the lint filters and the toe- kick filter are not cleaned. -
Page 53: Cleaning The Lint Filters And Air-Flow Openings Thoroughly
Cleaning and care Cleaning the lint filters and air-flow openings thoroughly If the drying duration has become longer or the surface of the filters is visibly compacted with lint, you should carry out the following cleaning procedure. Cleaning the lint filters while dry ... - Page 54 Cleaning and care Cleaning the lint filters with water Rinse the filter surfaces through under warm running water. Wipe the smooth plastic surfaces of both lint filters with a damp cloth to clean them. Wet lint filters could cause operational faults while drying.
-
Page 55: Cleaning Instructions When Using Fabric Softener Sheets
Cleaning instructions when using Option 3 fabric softener sheets Wet the surfaces of the lint filters with a liquid color detergent (e.g., Miele If you are using fabric softener sheets, Ultra Color Liquid Laundry Detergent). please follow these warnings and instructions. -
Page 56: Cleaning The Toe-Kick Filter
Cleaning and care Cleaning the toe-kick filter The lint filter in the toe-kick collects finer lint, hair, and detergent residues that have got through the surfaces of the lint filters. Removing the lint filter Pull the lint filter out at an angle. ... -
Page 57: Cleaning The Lint Filter With Water
Cleaning and care Cleaning the lint filter with water Replacing the toe-kick filter Clean the filter thoroughly under Filter wear caused by continuous running water. tumble-dryer use. Squeeze the filter very carefully If the tumble dryer is in continuous several times as you rinse it. - Page 58 Cleaning and care Deformation White residues or residues of other colors Deformations indicate that the filter has become blocked and worn by Residues arise from laundry fibers and continuous use. traces of detergent components which Cracks, tears, indentations can clog the filter. They can be found on the front and side edges of the filter.
-
Page 59: Cleaning The Filter Insert (In The Toe-Kick)
Cleaning and care Removing the filter insert Cleaning the filter insert (in the toe-kick) If the filter insert is clogged up and soiled, it must be removed and cleaned The surface of the filter in the filter under running water. insert is visible after removing the lint filter in the toe-kick. -
Page 60: Checking The Cooling Fins On The Heat Exchanger
Cleaning and care Checking the cooling fins on the heat exchanger Danger of injury caused by touching the cooling fins. You could cut yourself. Do not touch the cooling fins with your hands. After removing the filter insert, visually check the cooling fins on the heat exchanger. -
Page 61: Reinstalling The Filter Insert (In The Toe-Kick)
Cleaning and care Reinstalling the filter insert (in the toe-kick) Press the frame of the filter insert in at the positions marked PUSH until it audibly engages. Use the handle on the right to slide the filter insert at an angle behind the Reinstalling the lint filter (in the edge. -
Page 62: Cleaning And Closing The Lint-Filter Flap
Cleaning and care Cleaning and closing the lint- filter flap Use the handle on the right to slide the lint filter at an angle behind the edge. Use a damp cloth to remove any lint. Make sure that you do not damage the rubber seal when doing this. -
Page 63: Cleaning The Bottom-Right Grille/Heat Exchanger
Cleaning and care Open the grille from left to right and Cleaning the bottom-right pull it off at an angle to the front. grille/heat exchanger The heat exchanger's cooling fins behind the grille can become blocked with dust and dirt drawn in from the surrounding area. -
Page 64: Cleaning The Cooling Fins
Cleaning and care Cleaning the cooling fins Replacing the grille Check whether the cooling fins are clogged. Danger of injury caused by touching the cooling fins. You could cut yourself. Do not touch the cooling fins with your hands. If there is visible soiling: ... -
Page 65: Cleaning The Tumble Dryer
Cleaning and care The drum and other stainless steel Cleaning the tumble dryer parts can be cleaned with a suitable Disconnect the tumble dryer from the stainless steel cleaner. electrical supply. Damage caused by the use of unsuitable care products. Unsuitable care products could damage plastic surfaces and other parts. -
Page 66: Frequently Asked Questions
Frequently Asked Questions With the help of the following guide minor faults in the performance of the machine, some of which may result from incorrect operation, can be remedied without contacting the Service Department. This guide may help you to find the reason for the fault, and how to correct it. The display indicates the following messages or faults Message Possible cause and solution... - Page 67 Frequently Asked Questions Message Possible cause and solution The tumble dryer is not working correctly or Clean out the air- economically. Possible causes could be clogging ways lights up at caused by lint or detergent residue. the end of a pro- ...
- Page 68 Frequently Asked Questions Message Possible cause and solution You have attempted to dry only a few items of Clean the lint filter. varying size. A smaller item has been sucked into the Check the air- loading area in the door and is clogging the holes in ways.
- Page 69 Touch the sensor control. lights up after a If the program terminates again with the same error program has message, then there is a fault. Contact Miele been canceled. Technical Service. The laundry is unevenly distributed or has rolled up. ...
-
Page 70: Unsatisfactory Drying Results
Frequently Asked Questions Unsatisfactory drying results Problem Possible cause and solution The laundry is not suffi- The load consisted of different types of fabric. ciently dry. Finish drying using the Timed drying warm air program. Large items of laundry The laundry could not be untangled in the program have rolled up, causing you selected. -
Page 71: The Drying-Cycle Duration Is Very Long
Frequently Asked Questions The drying-cycle duration is very long Problem Possible cause and solution The drying process The room where the tumble dryer is located is too goes on too long or warm. even switches off*. Ventilate the room thoroughly. Detergent residues, hair, and fine lint can clog the filters. -
Page 72: General Problems With The Tumble Dryer
Frequently Asked Questions General problems with the tumble dryer Problem Possible cause and solution You can hear buzzing or This is not a fault. The compressor (heat pump) is humming operating operating. noises. These noises are quite normal and can be heard when the compressor is operating. -
Page 73: Reactivating The Plinth Filter
Frequently Asked Questions Reactivating the plinth filter You can reactivate one or more dirty plinth filters in the washing machine. You will then be able to use the plinth filter again for a reasonable period of time. Wash the plinth filter(s) separately, not with any laundry items. -
Page 74: Technical Service
In the event of a fault which you cannot Optional accessories for this tumble remedy yourself, please contact your dryer are available from your Miele Miele dealer or Miele Technical Service. dealer or Miele Technical Service. Contact information for Miele Technical Service can be found at the end of this document. - Page 75 Installation instructions Alteration rights reserved. Visit our website for all the current product specifications, technical appliance information, and warranty information. To avoid accidents or damage to the appliance, please read these instructions before installing and/or using it.
-
Page 76: Important Safety Instructions
Install the clothes dryer according to the manufacturer's instructions and local codes. Repair and maintenance work should be performed by a Miele authorized service technician. Work by unqualified persons could be dangerous and could void the warranty. ... - Page 77 Do not install the machine in rooms where temperatures below freezing may occur. This dryer is not intended for wall-insert. If there is any doubt concerning installation, contact Miele’s Technical Service Department. 1-800-999-1360 TechService@mieleusa.com SAVE THESE INSTRUCTIONS...
-
Page 78: Installation And Connection
*INSTALLATION* Installation and connection Front view a Drain hose for condensed water e Power cord b Control panel f Door c Lint-filter flap for the filter in the toe- g Bottom-right grille = Air-cooling kick opening – (open only when a prompt appears –... -
Page 79: Rear View
*INSTALLATION* Installation and connection Rear view a Interface for communicating with d Module slot (for external external appliances communication module) b Power cord e Drain hose for condensed water c Recesses under the protruding lid for transporting the appliance... -
Page 80: Installation Locations
All measurements in inch (mm) Side view Washer-dryer stack Steel toe-kick A stacking kit (APCL 001)* is needed. This must be installed by a Miele authorized Steel toe-kick* (open or closed bases, e.g. service technician. APCL 002, APCL 003, APCL 005, * Miele accessory available to order... -
Page 81: Transporting The Tumble Dryer To Its Installation Site
*INSTALLATION* Installation and connection Transporting the tumble dryer to its Transporting the tumble dryer installation site to its installation site Danger of injury due to unsecure Damage caused by incorrect lid. transportation of the tumble dryer. The fixings at the back of the lid may If the tumble dryer tips over, there is become brittle due to external a danger of injury to people and... -
Page 82: Installation
*INSTALLATION* Installation and connection Installation Ensure that no closeable door, sliding door, or an oppositely hinged door is installed that would hinder the door of the dryer being opened in any way. Downtime after installation Damage caused by switching the appliance on too soon. -
Page 83: Room Ventilation
This tumble dryer can be equipped with – Make sure that the room temperature a payment system (optional Miele is not too high. If there are other accessory). Therefore Miele Technical heat-producing appliances in the... -
Page 84: Drain Hose For Condensed Water
*INSTALLATION* Installation and connection Inserting the drain hose into a Drain hose for condensed standpipe water Insert the end of the drain hose into The condensed water is pumped away the standpipe. through the drain hose which is located at the back of the dryer. ... -
Page 85: Electrical Connection
*INSTALLATION* Installation and connection The plug connector or isolator switch Electrical connection should be easily accessible at all times. This description applies to tumble dryers both with and without an Risk of electric shock. electrical plug. If the tumble dryer is disconnected from the electrical supply, protective The following applies to tumble dryers measures must be taken to ensure... -
Page 86: Technical Data
Technical data Height 2' 9 7/16" (850 mm) Width 1' 11 7/16" (596 mm) Width (only for appliances with a 1' 11 13/16" (605 mm) stainless steel lid) Depth 2' 3 9/16" (777 mm) Depth with door open 3' 10 7/8" (1191 mm) Weight 165 lb (75 kg) Drum volume 34.3 gal (130 l) Load quantity... -
Page 87: Supervisor Level
Supervisor level Opening the supervisor level Closing the settings menu 11:02 Touch the sensor control. The display will then go back to the previous menu level. Touch the sensor control. Programs Favorites Supervisor The display will change to the main menu. -
Page 88: Language Entry
Supervisor level Language entry Set languages The display can be set to one of The languages for the setting several different user languages. This Language entry International can be setting allows you to determine how changed. languages can be selected. 6 languages can be selected. All You can change the language as languages are available. -
Page 89: Clock Display
Supervisor level Clock display Volume After selecting the clock format, you The volume for various sounds can be can set the time of day. changed. Clock format The volume can be changed. – Finish tone – Factory default: 24-hour display –... -
Page 90: Display" Off Status
Supervisor level "Display" off status "Machine" off status The display switches off to save In order to save energy, the tumble energy; only the Start/Stop sensor dryer will switch off automatically after control flashes slowly. You can change the end of the program or if no further this setting. -
Page 91: Memory
You can decide whether load quantities are displayed in “kg” or “lb”. – Factory default: kg – lb Logo You can choose whether the “Miele Professional” logo or your own logo appears in the display. For the setting, the Controls Laundromat ext. -
Page 92: Program Selection
Supervisor level Opening the supervisor level Program selection (laundromat version) Controls Switch the tumble dryer on and open the dryer door. You can select whether the tumble dryer is operated as a “laundromat” Touch the Start/Stop sensor control machine. Shortcuts are the easiest and hold it down while carrying out way to operate the machine. -
Page 93: Program Packages
Supervisor level – Standard – Laundromat basic int. time Factory default: All (selected) 4 time programs* with different programs are available. temperature levels are time- controlled via the tumble dryer's – Laundromat, basic (4 prog) electronic. The maximum laundry 4 programs are available. weight is 17.6 lb (8 kg). -
Page 94: Favorite Programs
Supervisor level Favorite programs After switching on, you can also select a program via: Favorites. 12 programs can be stored as favorites based on your own priorities and requirements. These favorites will also be made available in the control options –... -
Page 95: Special Programs
Supervisor level Res. moisture program Special programs – Final residual moisture: You can put together 5 special - 6% (dry) – 40% (damp) residual-moisture or time-controlled programs and assign your own – Extra drying time: program names. 0–60 minutes First, enter the program name. –... -
Page 96: Sort Programs
Supervisor level – Cooling down temp. (Process air): Program color allocation 104-131°F (40–55°C) You can assign a specific color to a – Anti-crease favorite program. In the list of favorites, each favorite program is – Drum rotation main direction: given a colored frame, which can be 0–500 seconds adjusted. -
Page 97: Process Technology
Supervisor level Additional cooling Process technology Before the end of the program, the Anti-crease temperature of the dried laundry is At the end of the program, the drum monitored and the cooling phase at will continue to rotate at intervals if the the end of the program is extended if laundry is not removed immediately. -
Page 98: Service
Supervisor level Your message is displayed at the end of Service the program and can be acknowledged Clean out the airways with . The same message appears at the end of the next program. The tumble dryer's electronic Settings calculates the degree at which lint or detergent residue in the lint filters and This setting allows you to determine the air ducts are impairing performance. -
Page 99: External Applications
The network remains set up; the WiFi this system is connected to the tumble function is switched off. dryer via the Miele XCI Box. – Activate (visible when the network is deactivated) – Factory default: No function The WiFi function is reactivated. -
Page 100: Network Time
If you do not install a RemoteUpdate, appliances. you can continue to use your tumble – As slave dryer in the usual way. However, Miele recommends installing RemoteUpdates. The machines are in a network and are connected to the Internet. All Activation machines are configured as slaves. -
Page 101: Smartgrid
Supervisor level Running a RemoteUpdate SmartGrid If a RemoteUpdate is available for your SmartGrid setting is only visible if a tumble dryer, it will be displayed WiFi network has been set up and automatically when the supervisor level activated. This function can be used is open. - Page 102 If you wish to change the settings after the commissioning process, please Copyrights and licenses contact Miele Technical Service. Miele uses their own and third party software which is not subject to any so- You would like to connect a payment called open source license for the system.
- Page 103 Supervisor level Time / impulse Payment system lock To be able to operate the tumble dryer To avoid tampering, a program lock with conventional payment systems can be set up in program operation. If where multiple coins can be inserted, the lock is applied, the program is you can adjust how much time is interrupted and payment credit is lost...
- Page 104 Supervisor level Debounce time Duration Cool air In coin-box mode, the debounce time The running time can be adjusted. for the minimum payment signal that A time of between 10 minutes and must be applied can be adjusted. 2 hours can be set in five-minute –...
- Page 107 Please have the model and serial number of your machine available when contacting Technical Service. U.S.A. Miele, Inc. National Headquarters 9 Independence Way Princeton, NJ 08540 Phone: 800-991-9380 Fax: 609-419-4241 www.mieleusa.com/professional proinfo@mieleusa.com Technical Service & Support Phone: 800-991-9380 Fax: 800-220-1348...
- Page 108 PDR 908 HP en-US M.-Nr. 11 226 870 / 01...
Need help?
Do you have a question about the PDR 908 HP and is the answer not in the manual?
Questions and answers