Table of Contents
Advertisement
Advertisement
Table of Contents

Related Manuals for Emtek EMpowered Smart Lock


Summary of Contents for Emtek EMpowered Smart Lock
- Page 1 EMPowered™ Motorized Smart Lock Upgrade - Connected by August www.emtek.com...
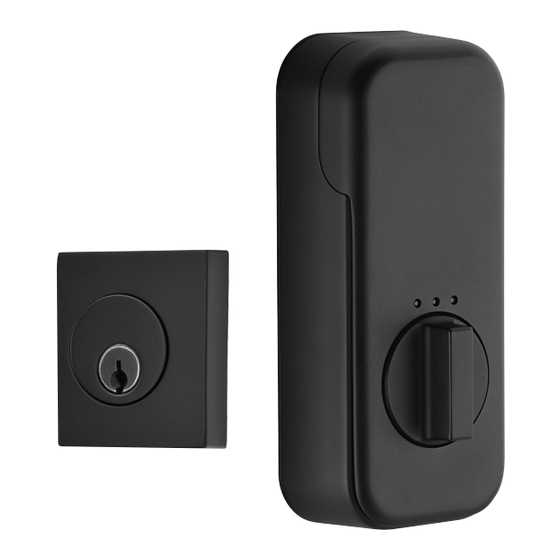
- Page 2 EMPowered™ Motorized Smart Lock Upgrade - Connected by August Deadbolt Sideplate Tubular Sectional Entry Set Tubular Monolithic/Full Length Entry Set Hardware Troubleshooting Definitions Programming Troubleshooting Resetting Lock to Factory Default Factory Settings Compliance...
- Page 3 EMPowered™ Motorized Smart Lock Upgrade - Connected by August Deadbolt...
-
Page 4: What's In The Box
What’s in the box ITEM NO. DESCRIPTION QTY. ITEM NO. DESCRIPTION QTY. EMPower Unit Deadbolt Screw Guide August Module Deadbolt Trim Deadbolt Extension Collar Battery Cover Deadbolt Cylinder AA Batteries #8 x 3/4” Wood Screws M4-0.7 x 8mm Machine Screws Deadbolt Strike Plate Interior Escutcheon #10-32 x 2-1/8”... - Page 5 Door Prep 2-3/8" 2-3/4" 1/8” Deep 1" Dia Edge Bore 2 1 4 " 2-1/8" Dia. Bore 1" Door Jamb Prep 1-1/8" 2 3 4 "...
-
Page 6: Install Latch
Install Latch Note: Use only the supplied latch for proper functionality. - Page 7 Install Lock Cylinder Must use screw guide Extension Collar required for thin doors...
-
Page 8: Remove Battery Cover
Remove Battery Cover Loosen screw on bottom to remove cover. - Page 9 Install Interior Mounting Plate...
- Page 10 Check Interior Mounting Plate Alignment Center tail piece in mounting plate hole before tightening.
- Page 11 Install Interior Escutcheon Bolt must be in retracted (unlocked) position...
-
Page 12: Testing Operation
Testing Operation... -
Page 13: Install Batteries
Install Batteries Bolt must be in retracted (unlocked) position before installing batteries. -
Page 14: Handing The Lock
Handing the Lock To hand the lock, press the button until you hear one beep... - Page 15 Go to the August App to Complete Installation Set up a lock Connected by August: 1. Install DoorSense™ 2. Connect your Smart Lock 3. Set up an August Connect Secure cover by tightening screw on bottom.
- Page 16 EMPowered™ Motorized Smart Lock Upgrade - Connected by August Keyed Sideplate...
-
Page 17: What's In The Box
What’s in the box ITEM NO. DESCRIPTION QTY. ITEM NO. DESCRIPTION QTY. 2 or 4 EMPowered™ Unit #6 x 1” Oval Head Wood Screw Deadbolt Extension Collar August Module Battery Cover Deadbolt Cylinder AA Batteries Alignment Tool M4-0.7 x 8 mm Machine Screws Passage Latch Rosette Mounting Plate Interior Escutcheon... - Page 18 23/8” Door Prep 2-3/8" 1" Dia. Edge Bores 2-3/4" 23/4” 2 1 4 " 21/4” 21/8” Dia. 51/2” 2-1/8" Dia. 5-1/2” Bores Bores 21/4” 2 1 4 " 1" Template Door Jamb Prep 11/8” 1-1/8" 23/4” 2 3 4 " 2 1 4 "...
- Page 19 Install Latches Note: Use only the supplied latch for proper functionality.
- Page 20 Install Interior Lever/Knob...
-
Page 21: Remove Battery Cover
Remove Battery Cover Loosen screw on bottom to remove cover. - Page 22 Install Lock Cylinder & Interior Mounting Plate Do not install the side plate mounting screws until a later step. Must use screw guide Extension Collar required for thin doors...
- Page 23 Check Interior Mounting Plate Alignment Center tail piece in mounting plate before tightening.
- Page 24 Install Interior Escutcheon Bolt must be in retracted (unlocked) position...
-
Page 25: Testing Operation
Testing Operation Test thumb turn and lever function before installing the screws. -
Page 26: Install Batteries
Install Batteries Bolt must be in retracted (unlocked) position before installing batteries. -
Page 27: Handing The Lock
Handing the Lock To hand the lock, press the button until you hear one beep... - Page 28 Go to the August App to Complete Installation Set up a lock Connected by August: 1. Install DoorSense™ 2. Connect your Smart Lock 3. Set up an August Connect Secure cover by tightening screw on bottom.
- Page 29 EMPowered™ Motorized Smart Lock Upgrade - Connected by August Sectional Entry Set...
-
Page 30: What's In The Box
What’s in the box ITEM NO. DESCRIPTION QTY. ITEM NO. DESCRIPTION QTY. EMPower Unit Deadbolt Extension Collar August Module Deadbolt Cylinder Battery Cover Passage Latch Latch Face Plate AA Batteries Decorative Cap M4-0.7 x 8mm Machine Screws Interior Escutcheon #8-32 Flat head Machine Screw Threaded Washer #10-32 x 2-1/8”... - Page 31 23/8” Door Prep 2-3/8" 1" Dia. Edge Bores 2-3/4" 23/4” 2 1 4 " 21/4” 21/8” Dia. 51/2” 2-1/8" Dia. 5-1/2” Bores Bores 21/4” 2 1 4 " 1" Template Door Jamb Prep 11/8” 1-1/8" 23/4” 2 3 4 " 2 1 4 "...
- Page 32 Install Latches Note: Use only the supplied latch for proper functionality.
- Page 33 Install Grip and Interior Lever/Knob...
-
Page 34: Remove Battery Cover
Remove Battery Cover Loosen screw on bottom to remove cover. - Page 35 Install Lock Cylinder & Interior Mounting Plate Extension Collar required for thin doors Must use screw guide...
- Page 36 Check Interior Mounting Plate Alignment Center tail piece in mounting plate hole before tightening.
- Page 37 Install Interior Escutcheon Bolt must be in retracted (unlocked) position...
-
Page 38: Testing Operation
Testing Operation... -
Page 39: Install Batteries
Install Batteries Bolt must be in retracted (unlocked) position before installing batteries. -
Page 40: Handing The Lock
Handing the Lock To hand the lock, press the button until you hear one beep... - Page 41 Go to the August App to Complete Installation Set up a lock Connected by August: 1. Install DoorSense™ 2. Connect your Smart Lock 3. Set up an August Connect Secure cover by tightening screw on bottom.
- Page 42 EMPowered™ Motorized Smart Lock Upgrade - Connected by August Monolithic/Full Length Entry Set...
- Page 43 What’s in the box ITEM NO. DESCRIPTION QTY. ITEM NO. DESCRIPTION QTY. EMPowered™ Unit Deadbolt Extension Collar Deadbolt Cylinder August Module Passage Latch Battery Cover Latch Face Plate AA Batteries Decorative Cap M4-0.7 x 8mm Machine Screws #8-32 Flat Head Machine Screw Interior Escutcheon Threaded Washer #10-32 x 2-1/8”...
- Page 44 23/8” Door Prep 2-3/8" 1" Dia. Edge Bores 2-3/4" 23/4” 2 1 4 " 21/4” 21/8” Dia. 51/2” 2-1/8" Dia. 5-1/2” Bores Bores 21/4” 2 1 4 " 1" Template Door Jamb Prep 11/8” 1-1/8" 23/4” 2 3 4 " 2 1 4 "...
- Page 45 Install Latches Note: Use only the supplied latch for proper functionality.
- Page 46 Install Grip and Interior Lever/Knob Must use screw guide...
- Page 47 Remove Battery Cover Loosen screw on bottom to remove cover.
- Page 48 Install Lock Cylinder & Interior Mounting Plate Extension Collar required for thin doors...
- Page 49 Check Interior Mounting Plate Alignment Center tail piece in mounting plate hole before tightening.
- Page 50 Install Interior Escutcheon Bolt must be in retracted (unlocked) position...
- Page 51 Testing Operation...
- Page 52 Install Batteries Bolt must be in retracted (unlocked) position before installing batteries.
- Page 53 Handing the Lock To hand the lock, press the button until you hear one beep...
- Page 54 Go to the August App to Complete Installation Set up a lock Connected by August: 1. Install DoorSense™ 2. Connect your Smart Lock 3. Set up an August Connect Secure cover by tightening screw on bottom.
- Page 55 Hardware Troubleshooting Cycle lock in both the locked and unlocked positions. If problems are found: Symptom Suggested Action Door is binding • Check that door and frame are properly aligned and door is free swinging. • Check hinges: They should not be loose or have excessive wear on knuckles.
- Page 56 Daylight Saving Time (DST). NOTE TO INSTALLER AND CONSUMER While EMTEK has included several features to prevent lockout (low battery warnings), it is still possible for a lockout situation to occur. Because this product has a mechanical override (a key), EMTEK recommends you carry your keys with you to prevent lockout.
- Page 57 Resetting Lock to Factory Default When lock is reset to factory defaults, all programming features are reset to original default settings (see below). 1. Remove battery cover and batteries. 2. Remove the interior escutcheon to access the reset button. 3. The reset button (see image) is located beside the PCB cable connector.
- Page 58 Compliance FCC INTERFERENCE STATEMENT This device complies with Part 15 of the FCC Rules. Operation is subject to the following two conditions. (1) This device may not cause harmful interference, and (2) this device must accept any interference received, including interference that may cause undesired operation.
- Page 59 REV 19A 11-08-19 Copyright © 2019, EMTEK Products, Inc. an ASSA ABLOY Group company. All rights reserved. Reproduction in whole or in part without the express written permission of EMTEK Products, Inc. is prohibited. WARNING: This product can expose you to chemicals including lead, which is known to the state of California to...
Need help?
Do you have a question about the EMpowered Smart Lock and is the answer not in the manual?
Questions and answers